
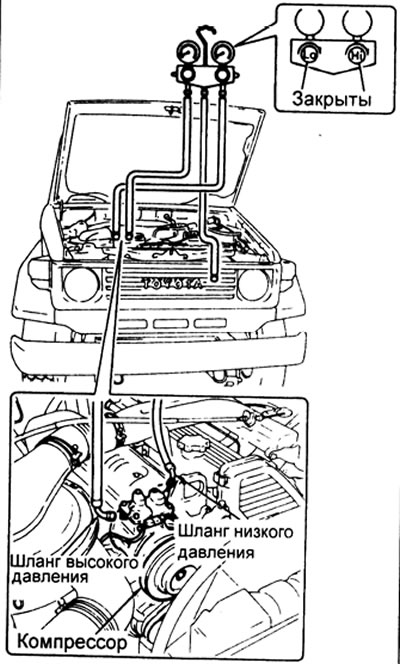
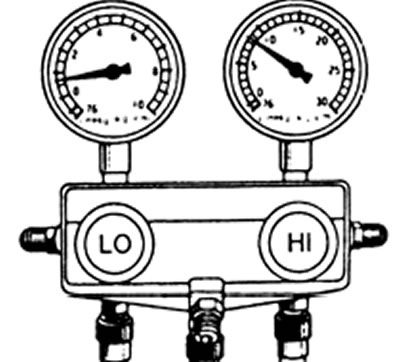
Installation of the block of manometers
1. Close both taps on the gauge block.
2. Connect the charging hoses of the gauge block to the service ports on the compressor. Make sure the high and low pressure hoses are connected to the correct service ports. Tighten the fasteners by hand.
Note: Do not lubricate connections with compressor oil.
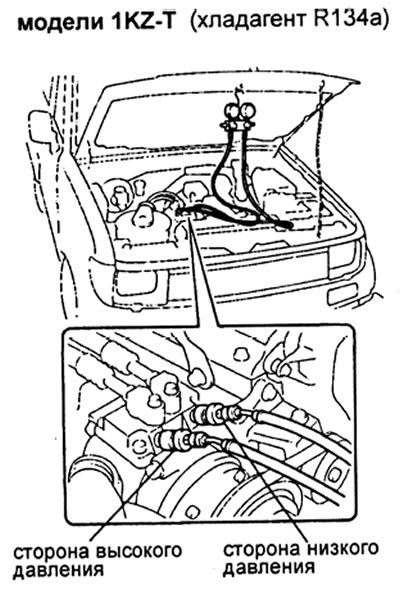
When using R134a refrigerant, quick-release adapters are used.

Place the adapter on the service valve, then press to secure.
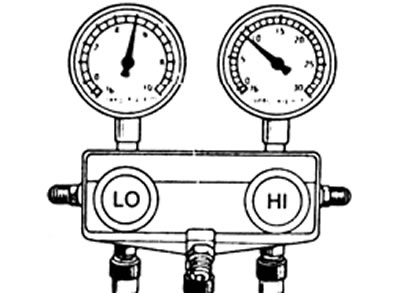
Checking the cooling system using a block of pressure gauges
1. Connect the gauge block.
2. Take readings from pressure gauges under the following conditions.
A) Air intake control switch in position "RECIRC" (air temperature in the air intake is 30-35°С).
b) The engine operates at 2000 rpm.
V) Fan switch in position "Hi" (High speed).
G) Temperature regulator in position "MAX COOL" (Maximum cooling).
Note: Meter readings may vary slightly depending on ambient temperature.
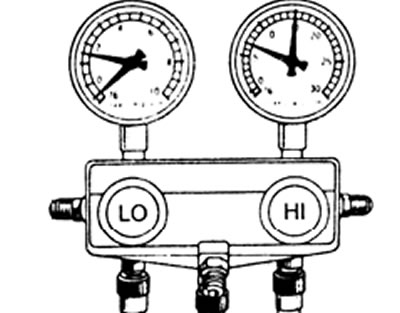
3. Indications of pressure gauges in good condition of the system:
Pressure line:
- low - 147-196 kPa (1.5-2.0 kgf/cm2)
- high - 1422-1471 kPr (14.5-15.0 kgf/cm2)
Presence of water in the system
The pressure in the low pressure line changes from normal to vacuum (cooling works only intermittently, then stops working).
Reason:
- water freezing in the expansion valve stops the cycle. After defrosting, the system returns to normal.
Remedy:
- A) Replace receiver.
- b) Remove water by evacuating the system.
- V) Charge the system with fresh refrigerant.
Lack of refrigerant
Reduced pressure in the entire system (insufficient cooling, bubbles in the service window).

Reason:
- lack of refrigerant.
Remedy:
- A) Check the system for leaks.
- b) Top up the refrigerant to the correct level.
Poor refrigerant circulation
Reduced pressure in the entire system (insufficient cooling? frost on the pipeline from the receiver to the cooling unit)
Reason:
- poor refrigerant circulation due to clogged receiver.
Remedy:
- replace receiver.
Insufficient cooling
1. Increased pressure in the entire system (insufficient cooling)
Reason A:
- the condenser plates are clogged, the condenser fan motor is faulty.
Remedy A:
- A) Clean the plates.
- b) Check fan operation.
Reason B:
- system recharge.
Remedy B:
- bleed off excess refrigerant slowly through the low pressure valve.
Reason B:
- air in the system.
Remedy B:
- A) Replace receiver.
- b) Check compressor oil level and cleanliness.
- V) Vacuum and prime the system (filling capacity see section "Air conditioning piping").
2. Insufficient cooling, frost or heavy condensate on the low pressure pipe).
Reason:
- The temperature sensitive tube is not adjusted, the expansion valve is incorrectly installed.
Remedy:
- check the temperature sensitive tube, if it is working, then check the expansion valve. Replace defective parts.
No refrigeration, refrigerant does not circulate
Vacuum in the low pressure line, reduced pressure in the high pressure line (no cooling; frost or condensate near the receiver or expansion valve).

Reason:
- the refrigerant is not circulating due to moisture or impurities in the system.
Remedy:
- A) Turn off the air conditioner for a while, then turn it on.
- If moisture is the cause, follow the steps "Presence of water in the system".
- If the cause is contamination, remove and purge the expansion valve. Replace valve if dirt cannot be removed.
- b) Vacuum and prime the system (filling capacity see section "Air conditioning piping").
Compressor failure
In the low pressure line - increased pressure, in the high pressure line - reduced pressure (no cooling).
Reason:
- compressor defective.
Remedy:
- repair or replace the compressor.
Checking the amount of refrigerant
1. Start the engine and set the speed to about 1500 rpm.
2. Turn on the air conditioner in the maximum cooling mode for a few minutes.
3. Check the amount of refrigerant by the presence of bubbles in the service window of the receiver.
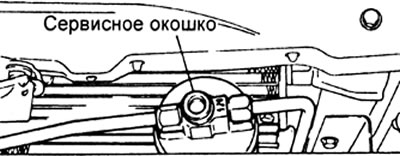
A) If bubbles are visible in the service window (lack of refrigerant), check for gas leaks in the system.
b) If bubbles are not visible (either the amount of refrigerant is normal, or the system is recharged, or there is no refrigerant), then the method of elimination - see p.p. (V) And (G).
V) If there is no temperature difference between the compressor inlet and outlet (either there is no refrigerant or the amount of refrigerant is minimal), charge the system fully, then check for gas leaks.
G) If there is a large temperature difference between the inlet and outlet of the compressor (either the amount of refrigerant is normal, or the system is recharged), then the method of elimination - see p.p. (d) And (e).
d) If the refrigerant in the service window becomes transparent immediately after turning off the air conditioner
(system recharge), bleed off the excess refrigerant.
e) If the refrigerant foams and then becomes clear after the air conditioner is turned off (the amount of refrigerant is normal), then the method of elimination - see p.p. (V) And (G).
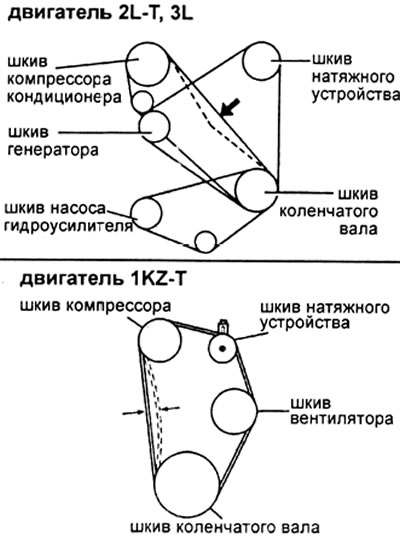
Checking the A/C Drive Belt
1. Check the drive belt for cracks, wear or oiling.
2. Check the correct installation of the drive belt. Make sure the belt is not touching the bottom of the pulley groove.
3. Press on the belt in the place indicated in the figure with a force of 98 N (10 kgf) and measure the deflection of the drive belt.
Drive Belt Deflection (with a force of 98 N):
- new - 13-16 mm
- used - 16-21 mm
Note: under "new belt" refers to a belt that has been used for less than 5 minutes with the engine running.
4. After installing the belt, make sure that it is correctly positioned in the grooves of the pulleys.