
Checking work
1. Press the brake pedal several times with the engine off. The pedal stroke should not change with each press.
2. Press the pedal and start the engine - the pedal should move forward a little.
Leak test
1. Start the engine, stop after 1-2 minutes.
2. Slowly press the pedal several times, the pedal travel should gradually decrease.
3. Start the engine and step on the pedal.
4. Keeping the pedal depressed, stop the engine - within 30 seconds after stopping, the position of the pedal should not change.
Removing
If the amplifier is faulty, then it will lie down to be replaced, the repair of the unit is impossible even in a car service.
1. Remove the master cylinder.
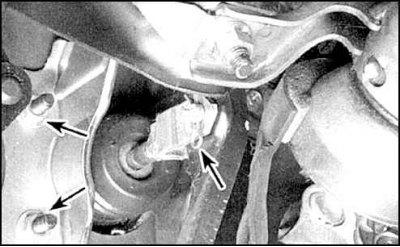
2. Remove the knee pad from the driver's side and find the booster pushrod fork (the arrows indicate the cotter pins of the axis of the pusher fork and the nuts of the brake booster).
3. Unpin the fork axle.
4. While holding the pushrod yoke, loosen the yoke locknut.
5. Disconnect the hose from the brake booster.
6. Remove the four nuts that secure the brake booster to the bulkhead of the engine compartment.
7. Gently push the booster in and remove when the studs are out of the baffle.
Installation
1. Installation is carried out in the reverse order.
2. If a new unit is installed, then adjust the protrusion of the master cylinder pusher above the amplifier housing. To do this, do the following.
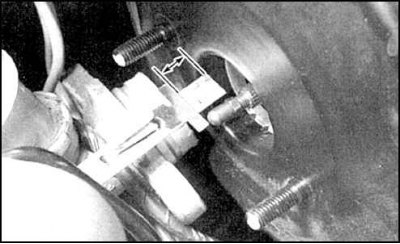
3. Measure the protrusion of the pusher. This is size A.
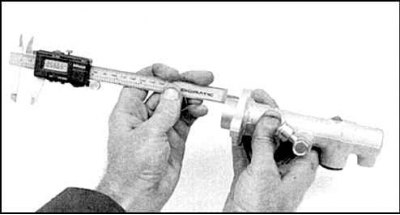
4. Measure the distance from the end face of the master cylinder to the flange. This is size B.
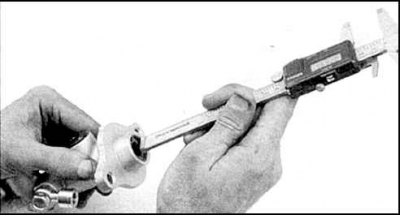
5. Measure the distance from the end face of the cylinder to the bottom of the piston recess. This is size S.
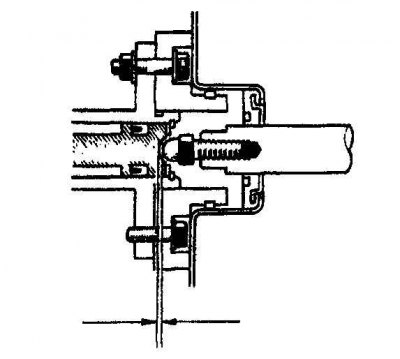
6. The clearance between the pusher and the piston is (B - C) - A must be equal to 0.
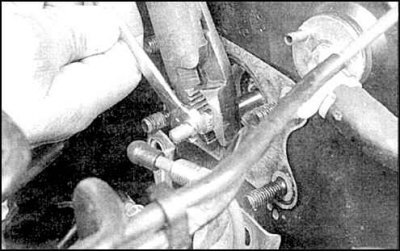
7. By rotating the tip of the pusher, set such protrusion A so that the gap is equal to B - C. Check the gap again.
8. Repeat the adjustment if necessary.
9. When finished, install the master cylinder, attach the tubes, adjust the pedal height and free play (see subsection 2.34).
10. Bleed the air from the hydraulic drive.