
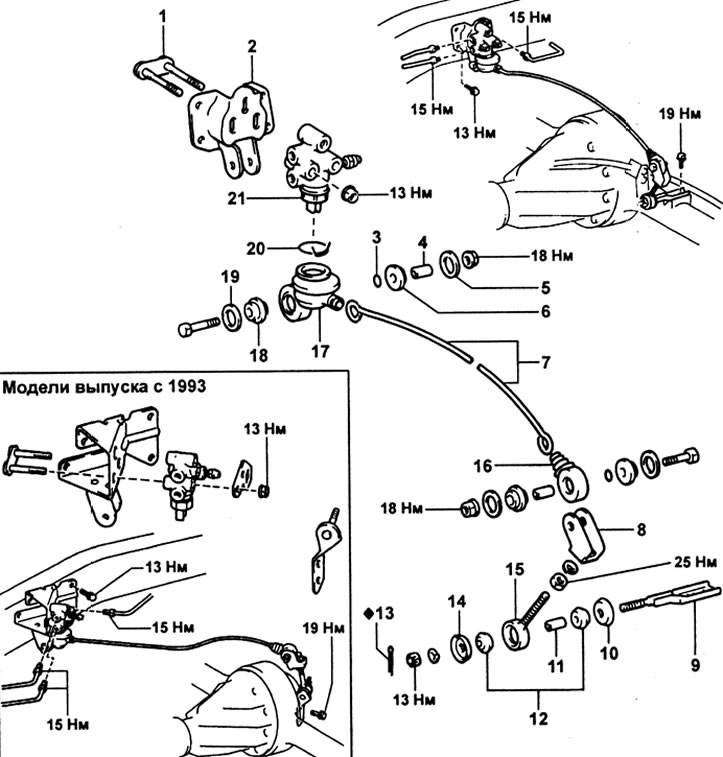
Brake force distribution valve. 1 - plate washer, 2 - clamp, 3 - valve mounting bracket, 4 - mounting plate, 5 - air release valve, 6 - valve, 7 - spring brake force sensor, 8 - plate washer, 9 - clevis bracket, 10 - earring, 11 - cotter pin, 12 - limiters, 13 - pillows, 14 - bracket for attaching the earring to the rear axle, 15 - bushing, 16 - spring sensor cuff, 17 - rubber bushing, 18 - washer, 19 - valve cuff, 20 - bushing, 21 - sleeve, 22 - sensor spring.
Checking and adjusting the pressure in the brake system
1. Adjust the amount of load on the rear axle (including the weight of the cargo).
Rear axle load:
- models before 1993 - 1010 kg
short wheelbase models since 1993:
- with drum brakes - 1150 kg with disc brakes 1120 kg
- long wheelbase models since 1993 - 1220 kg

2. Install front and rear brake pressure gauges and bleed the system.
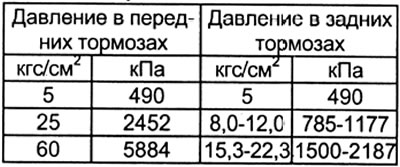
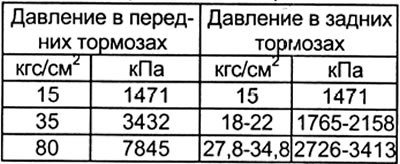
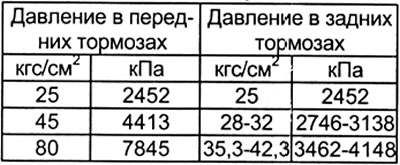
3. Increase the pressure in the front brakes to 80 kgf/cm2 (7845 kPa) and check the rear brake pressure.
Rear brake pressure:
- models until 1993 40.8±6 kgf/cm2 (4000-4700 kPa)
- short wheelbase models since 1993 with rear drum brakes - 41-53 kgf / cm2 (4021-5198 kPa)
- other models from 1993 - 49-61 kgf / cm2 (4805-5982 kPa)
Note: The brake pedal must not be double-depressed and/or released while the pressure is being measured. Read the pressure value in the rear brakes 2 seconds after increasing the pressure in the front brakes.
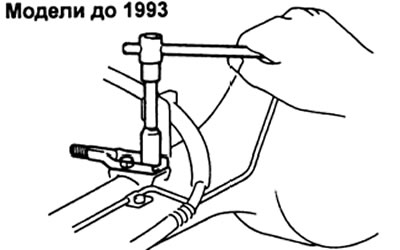
4. If necessary, adjust the brake fluid pressure.
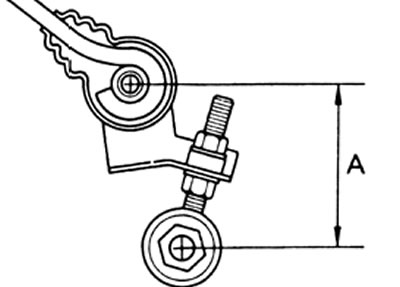
A) Disconnect the earring from the earring mounting bracket to the rear axle.
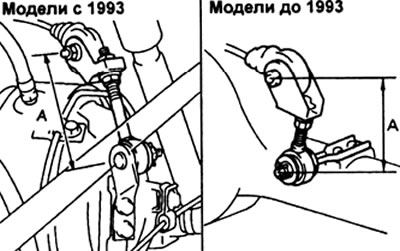
b) Adjust the length of the earring by rotating it. With low pressure, increase the distance "A", at high pressure - reduce the distance "A".
Initial installation length - 90 mm
Adjustment range - 84 - 96 mm
Note: one turn of the shackle allows you to change the brake fluid pressure by 65.7 kPa (0.67 kgf/cm2).
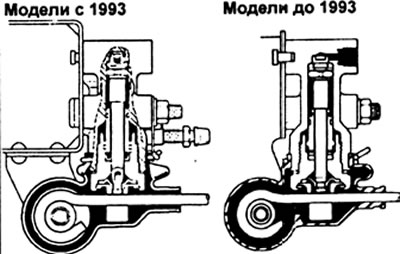
b) If the pressure cannot be adjusted with the shackle, adjust by raising or lowering the valve. At low pressure, lower the valve body; at high pressure, raise the valve body.

V) Tighten the fastening nuts.
Tightening torque - 13 N.m
G) Readjust the length of the earring. If adjustment is not possible, check the valve body.
5. Checking the valve body (if necessary).
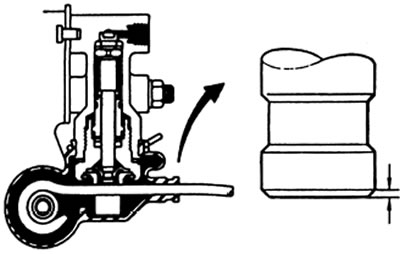
A) Check the valve body in the upper limit position.
Note: When using the brakes, the piston will move down about 1mm. However, the piston must not contact or move the spring sensor.
b) In this position, check the pressure in the rear brakes.
Release models before 1993:
Short wheelbase models since 1993 with rear drum brakes:
Other release models since 1993:
V) If the measured pressure is not correct, replace the valve body.
Removing
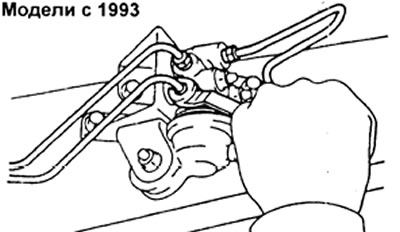
1. Disconnect the brake lines from the valve.
2. Removal of the valve of redistribution of brake forces.
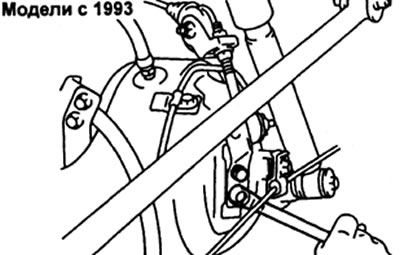
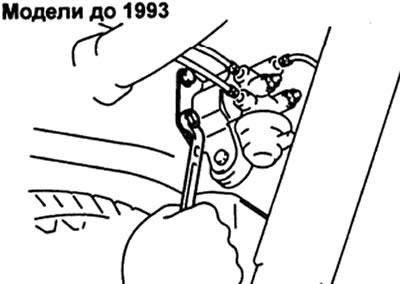
A) Turn away two bolts and remove an arm of fastening of an earring to the back bridge.
b) Loosen the mounting bolts and nuts of the valve bracket and then remove the valve itself.
Examination
Check valve plug pin and sensor contact surface for wear.
Limit wear - 0.7 mm
Installation
1. Install the brake force distribution valve on the mounting bracket and secure it with bolts.
Tightening torque - 13 N.m
2. Install the clevis mounting bracket to the rear axle and secure it with bolts.
Tightening torque - 19 N.m
3. Connecting the earring to the bracket.
A) Set size "A" by turning the earring.
Initial size - 90 mm
b) Tighten locknut.
Tightening torque - 25 N.m
V) Install two pads and a bushing onto the spring sensor earring.
G) Install the spring sensor on the bracket for attaching the earring to the rear axle using the retainer limiter and nut.
Tightening torque - 13 N.m
d) Install a new pin.
4. Connect the brake pipes.
Tightening torque - 15 N.m
5. Adjust the amount of load on the rear axle (see paragraph "Checking and adjusting the pressure in the brake system").
6. Installing the valve body.
A) When retracting the spring sensor down, make sure the plunger moves down unhindered.
V) Tighten the valve body nuts.
Tightening torque - 13 N.m
7. Bleed the brake system and check for leaks.
8. Check and adjust brake fluid pressure.