
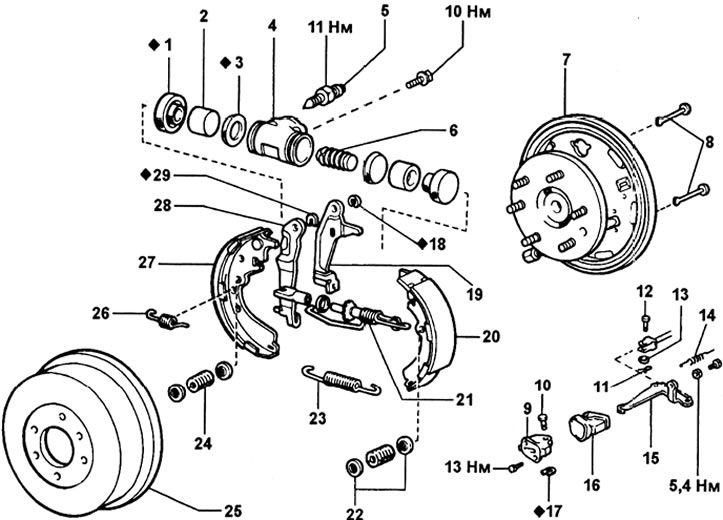
Rear drum brakes. 1 - cuff, 2 - piston, 3 - piston cuff, 4 - wheel brake cylinder, 5 - bleeder valve, 6 - spring, 7 - brake shield, 8 - retainer, 9 - crank arm bracket, 10 - pin, 11 - cotter pin, 12 - pin, 13 - spring washer, 14 - spring, 15 - crank, 16 - crank collar, 17 - circlip, 18 - stopper, 19 - automatic adjustment lever, 20 - rear brake shoe, 21 - adjusting device with return spring, 22 - detent cups, 23 - fixing spring, 24 - detent spring, 25 - brake drum, 26 - adjusting lever spring, 27 - front brake shoe, 28 - shoe dilution lever, 29 - retaining ring.
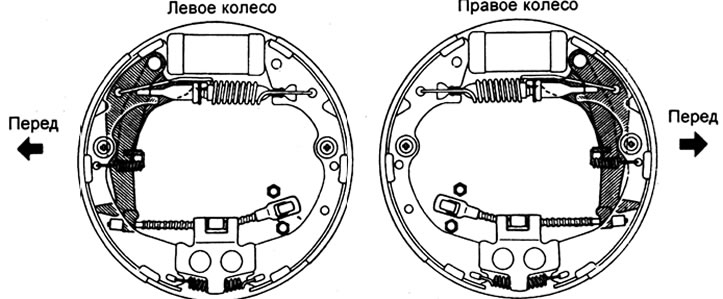
Removing
1. Remove the rear wheel and brake drum.
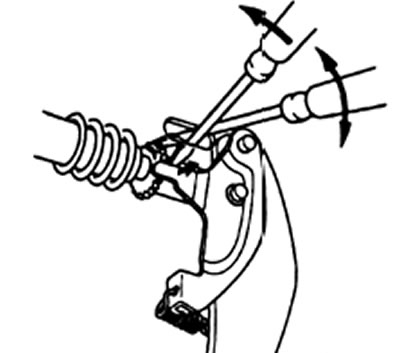
Note: If the brake drum cannot be easily dismantled, proceed as follows:
- Pass a screwdriver through the hole in the brake shield and move the automatic adjustment lever away from the adjusting bolt.
- Using another screwdriver, loosen the brake shoe adjustment by turning the adjusting bolt.
2. Removing the rear brake pad.
A) Disconnect the return spring from the rear brake shoe.
b) Remove retainer parts (cups and spring) and fixative.
V) Remove the rear brake shoe and mounting spring.
3. Removing the front shoe and adjuster.
A) Remove retainer parts (cups and spring) and fixative.
b) Disconnect the adjusting device and the return spring from the shoe spreading lever.
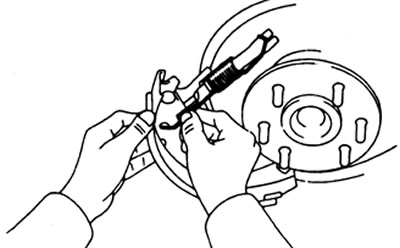
V) Remove the adjusting lever spring.
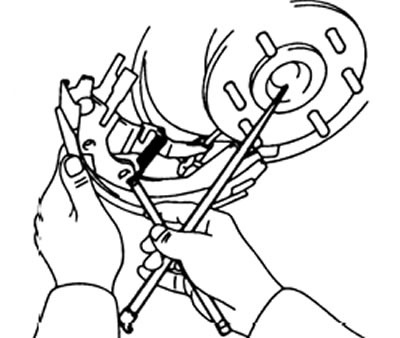
G) Disconnect the parking brake inner cable from the brake pad lever.
d) Remove the inner parking brake cable.
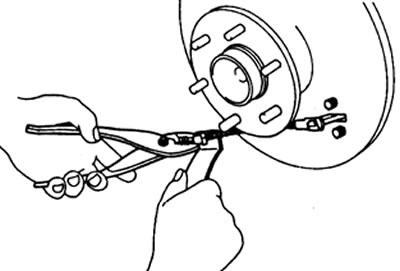
4. Removal and disassembly of the wheel brake cylinder (if necessary).
A) Disconnect the brake pipe. Drain the brake fluid into the reservoir.
b) Remove the two bolts and remove the wheel cylinder.
V) Remove anthers, pistons, piston cuffs and remove the spring from the brake cylinder housing.
6. If necessary, remove and disassemble the parking brake crank.
A) Remove tension springs.
b) Remove the pin.
V) Remove the pin and spring washer, then disconnect the parking brake cable.
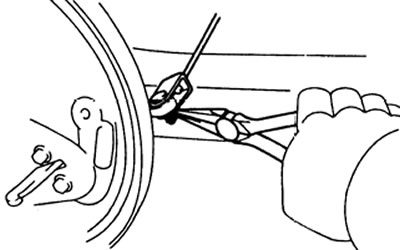
G) Loosen the two bolts and remove the parking brake crank.
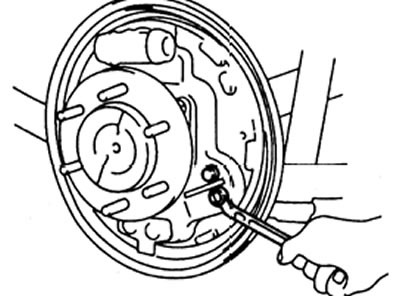
d) Remove the boot from the parking brake crank arm.
e) Use a screwdriver to remove the circlip and remove the pin.
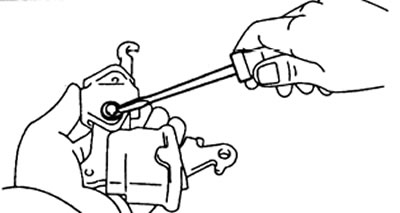
and) Remove the parking brake crank from the bracket.
h) Remove the collar from the crank arm.
Examination
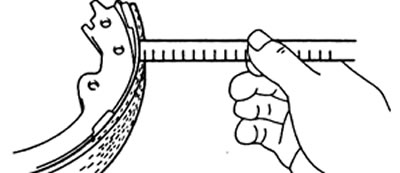
1. Measure the thickness of the brake lining. If the thickness of the lining is less than the minimum allowable value or the wear of the lining is uneven, then replace the brake pads.
Standard thickness - 5.0 mm
Minimum thickness - 1.0 mm
Note: If either brake pad needs to be replaced, both pads must be replaced to ensure uniform braking.
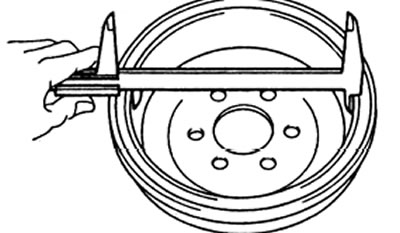
2. Measure the inner diameter of the brake drum. If the drum has scoring or increased wear, then it must be bored to the maximum internal diameter.
Max inside diameter:
- release models since 1993 - 297.0 mm
- production models before 1993 - 256.0 mm
Standard inner diameter:
- production models from 1993 - 295.0 mm
- production models before 1993 - 254.0 mm
3. Check up contact of a block with a brake drum. If the contact between the shoe and the drum is not correct, grind the lining or replace the entire brake shoe.
4. Check the wheel brake cylinder for signs of corrosion or damage.
5. Check the brake shield for wear or damage.
6. Check crank arm parts for bending, wear or damage.
Replacement of brake pads
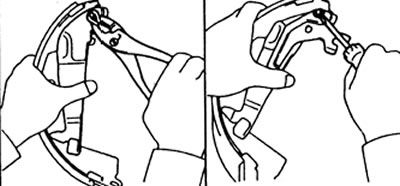
1. Use a screwdriver to separate the auto adjust lever from the front shoe.
2. Use a screwdriver to separate the parking brake shoe lever from the front shoe.
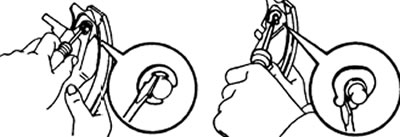
3. Install the shoe spreader lever on the front shoe and secure it with a new stopper using pliers.
4. Install the auto adjust lever with a new circlip.
Installation
Note: Install rear brakes for each wheel as shown.
1. Assembly and installation of the wheel brake cylinder.
A) Apply lithium-based grease to the dust boots, piston cups, and pistons themselves.
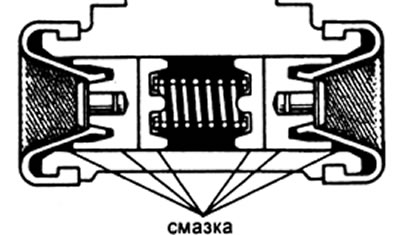
b) Install the spring and piston cups into the brake cylinder housing.
Note: The piston collar flanges must point inwards.
V) Insert the pistons into the cylinder and install the anthers.
G) Install the wheel cylinder on the brake shield and secure it with bolts.
Tightening torque - 10 N.m
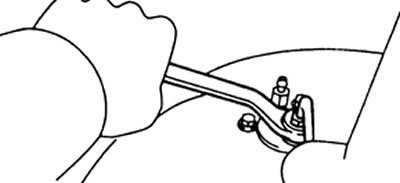
d) Connect the brake pipe.
Tightening torque - 15 N.m
2. If necessary, assemble and install the parking brake crank.
A) Apply lithium-based grease to the lever collar.
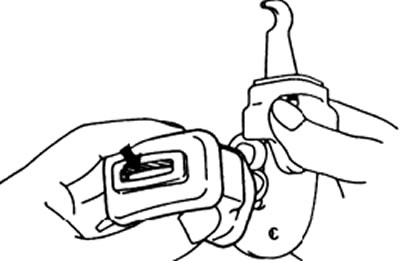
b) Install the collar on the parking brake crank.
V) Install the parking brake crank to the bracket.
G) Install the pin and secure it with a new circlip.
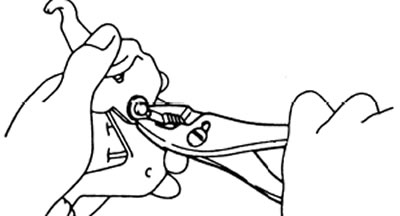
d) Fasten the crank (complete) parking brake on the brake shield using two bolts.
Tightening torque - 13 N.m
e) Connect the parking brake inner cable to the crank arm and secure with pin, spring washer and cotter pin.
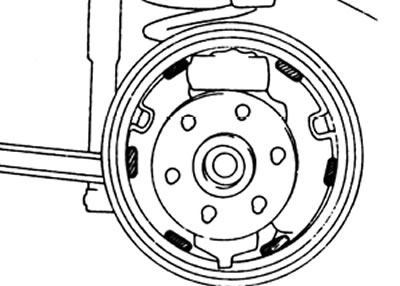
3. Apply refractory grease to the contact surfaces of the pads and brake shield (see picture).
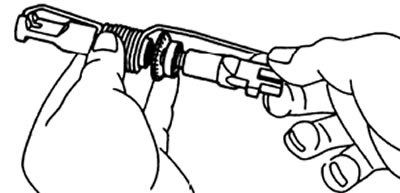
4. Apply high-temperature grease to the threads of the adjusting bolt and the ends of the device.
5. Installing the inner parking brake cable.
A) Connect the parking brake inner cable to the crank arm as shown.
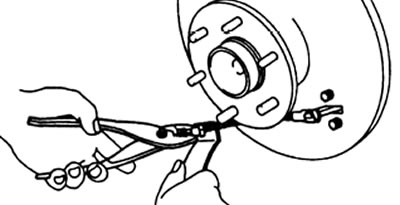
b) Connect the parking brake inner cable to the brake pad release lever.
6. Connection of the adjusting device with the front block.
A) Install the spring return adjuster on the front shoe.
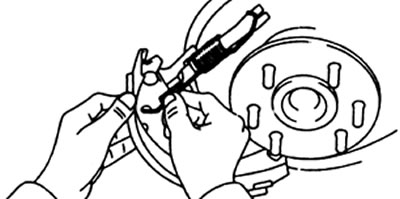
b) Install the adjusting lever spring.
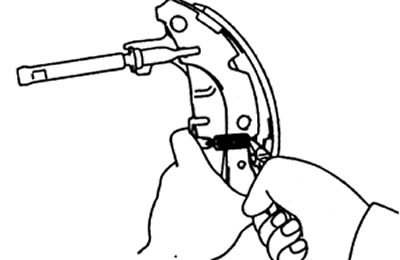
7. Installing the front pad.
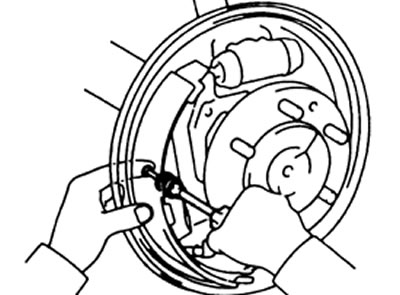
A) Install the front pad in place and insert the end of the pad into the piston.
b) Install retainer parts (cups and spring) and fixative.
8. Installing the rear pad.
A) Install the mounting spring between the front and rear shoes.
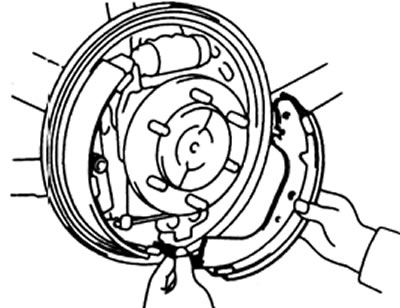
b) Install the rear pad in place and insert one end of it into the piston.
V) Install the fixing parts (cups and spring) and fixative.
G) Connect the rear shoe to the return spring.
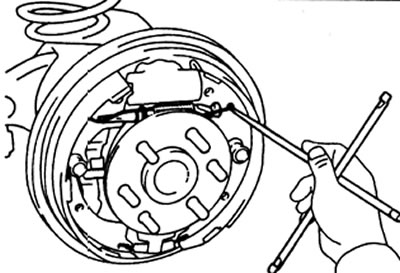
9. Checking the operation of the automatic adjustment mechanism.
A) Move the parking brake inner cable back so that the auto adjust lever is clear of the adjusting bolt. Check the ease of rotation of the adjusting bolt. If the bolt does not rotate, check that the rear pads are properly installed.
b) Using the adjusting device, set the minimum clearance between the shoe and the brake drum.
V) Install the brake drum.
G) Move the parking brake lever up and down until the clicking sound disappears.
10. Checking the gap between the brake shoes and the drum.
A) Remove the brake drum.
b) Measure the inner diameter of the brake drum and the outer diameter of the brake pads. Make sure that the difference between these diameters provides the required clearance.
Gap - 0.6 mm
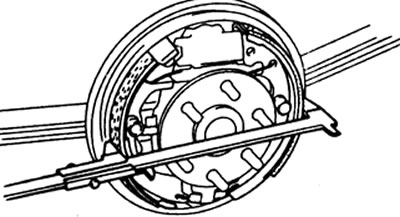
V) If the clearance is out of specification, check the parking brake system.
11. Toggle adjustment (if necessary).
A) Move the crank slightly in the direction "A" until the gap is selected for the part "IN".
b) Then turn the adjusting bolt until you get clearance "WITH".
Gap "WITH" - 0.2-0.7 mm
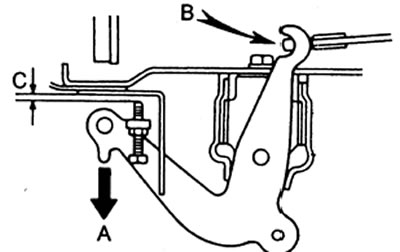
V) Lock the adjusting bolt with a lock nut.
G) Install two tension springs.
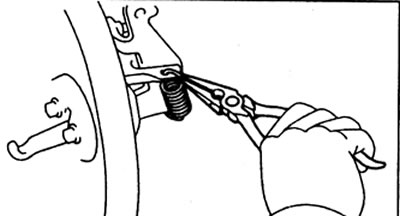
12. Install the brake drum and rear wheel.
13. Fill the reservoir with brake fluid and bleed the brake system.
14. Check the system for leaks.