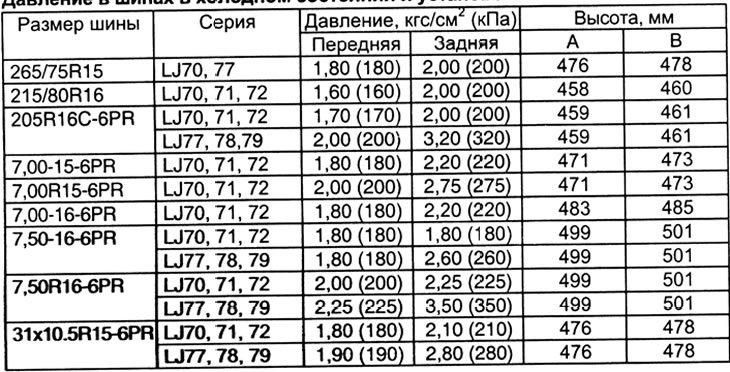
Tire cold pressure and mounting height.
Preliminary checks
1. Check tires for wear. Check that the tire pressures correspond to the values given in the table.
2. Check the lateral runout of the wheel on the rim.
Wheel runout - 1.2 mm or less
3. Check up an inhaling of bearings of forward wheels.
4. Check up fastening of a forward suspension bracket.
5. Check up fastening of elements of a drive of a steering.
6. Check up work of forward shock-absorbers.
Vehicle height check
1. Measure the installation height of the car.
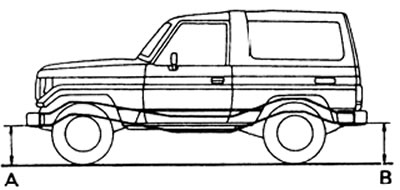
2. If the installation height does not match the values given in the table, then try to correct the situation by rocking the car.
2. If this operation does not achieve the required height, then check the quality of the springs or other parts of the suspension.
Note: when measuring the installation height, the distance from the road surface to the center of the front bolt of the longitudinal suspension rod is determined.
Camber and tilt check
Note: The difference in camber angles and inclination of the axis of rotation between the left and right wheels should not exceed 30'.
1. Install wheel alignment equipment.
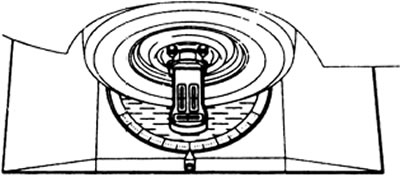
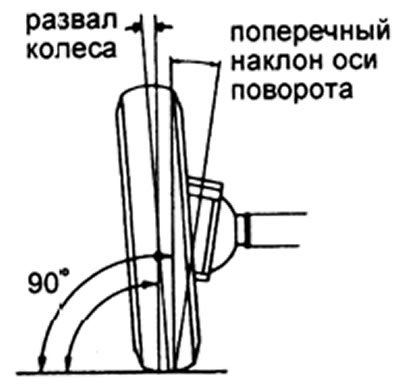
2. Check the camber of the front wheels and the transverse inclination of the axis of rotation.
Camber - 1°± 45'
Pivot Angle:
- production models before 1992 - 9°30'± 1°
- release models since 1992 12°± 45'
3. If the tilt of the axis of rotation is not within specifications after adjusting the camber, check the steering knuckle and front wheel for deformation and looseness.
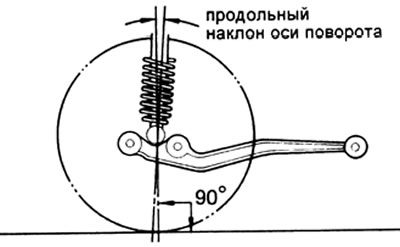
4. Check the pitch of the axis of rotation.
Longitudinal inclination of the axis of rotation:
- production models before 1992 - 4°05'± 1°
- production models since 1992 5°23'± 45'
5. If the pitch is not correct, check the parts for wear and damage.
Checking and adjusting the difference in the angles of rotation of the wheels
1. Install the steer wheels on the turntables.
2. Remove the caps from the steering knuckle lock bolts
3. Check wheel alignment.
Wheel angle limit:
- Inner wheel - 32°-+0°/-3°
- Outer wheel - 28°
Note: Make sure the steer wheels do not hit the body or brake lines when the steering wheel is turned all the way to the left or right.
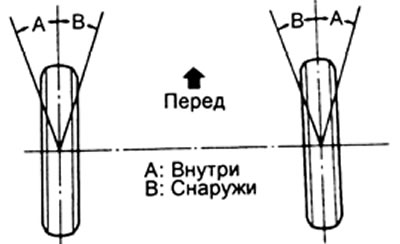
4. If the measured values of the steering angles differ from the limit values, then adjust the angle of rotation of the wheel using the locking bolts of the steering knuckle Bolt tightening torque 44 N·m
5. If the wheel angle cannot be adjusted within the specified limits, then the steering elements are worn or damaged
Toe adjustment
1. Rock the car up and down to stabilize the suspension.
2. Set the wheels to straight ahead and roll the vehicle forward about 5 meters.
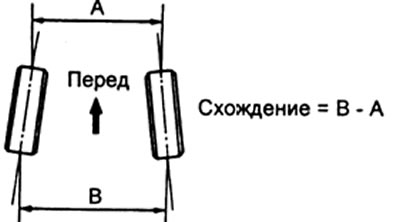
3. Mark the centers on the back of the tread of each tire and measure the distance "IN" between the marks on the right and left tires.
4. Roll the vehicle forward until the marks on the rear sides of the tires move to the front sides of the tires, the height at which the instrument is to be measured.
Note: when the tires pass the measuring point, repeat the operations starting from point "2".
5. Measure the distance "A" between the marks on the front sides of the tires.
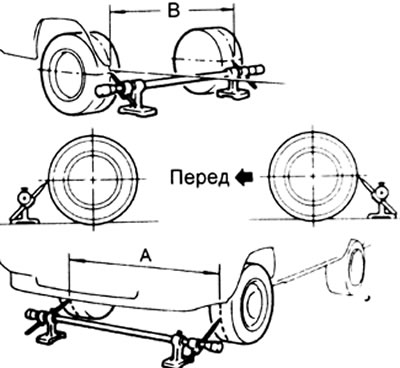
6. Determine the wheel alignment using the formula, see figure.
Convergence:
- for diagonal tires - 4±2mm
for radial tires:
- 215/80R16, 205R16C-6 - 1±2 mm
- 265/75R15, 31X10.5R15-6 - -1±2 mm
7. If the convergence does not correspond to norms, make adjustment of tips of cross steering draft.
and) Loosen the tie bolts and nuts.
h) Adjust the wheel alignment by turning the tie rod.
Note: Make sure that the threaded sections of the tie rod ends are equal in length.
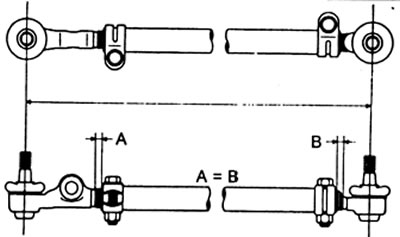
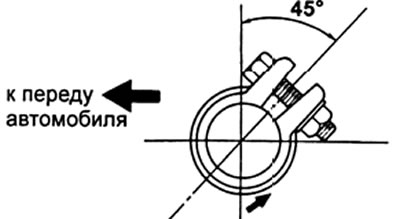
And) Secure the tie rod by tightening the pinch bolts.
Tightening torque - 37 N.m
Note: The clamps must be positioned as shown in the picture.
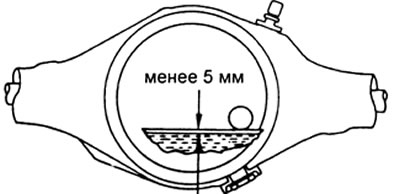
Checking the oil level in the crankcases of the axle gearboxes Make sure that the oil level in the crankcase of the gearbox is under the cut of the filler plug hole. If necessary, add oil to the gearbox housing.
Oil class according to API - GL-5
Recommended oil viscosity (temperature dependent) according to SAE:
- Above -18°C - SAE 90
- Below -18°C - SAE 80W or 80W-90
Filling capacity:
- Front axle gearbox - 1.9 l
- Rear axle gearbox - 1.85 l