
Attention: The designs of the left and right rear wheel brakes are different. Brake parts cannot be replaced. After dismantling, ensure the installation of parts in their places.
Removing
Mark the position of the wheel disk relative to the hub so that the balanced wheel can be installed in its original place.
Loosen the wheel nuts while the vehicle is on the ground.
Raise the rear of the car.
Remove wheel.
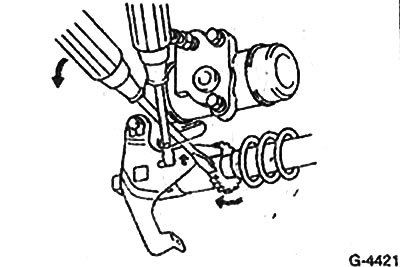
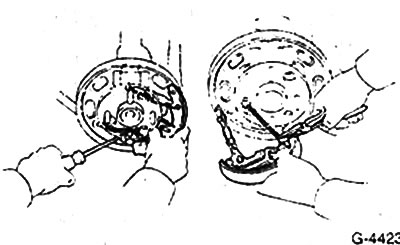
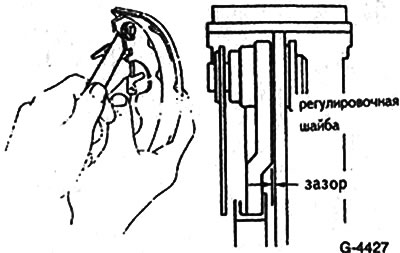
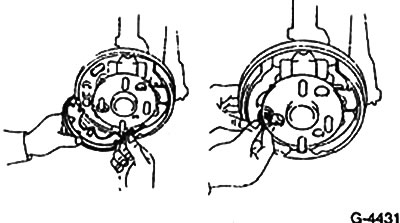
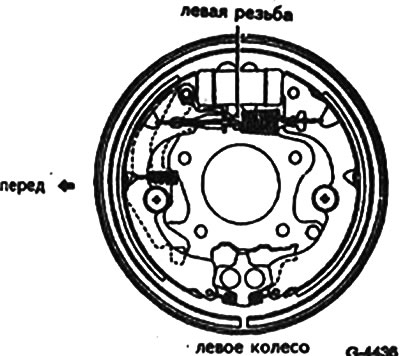
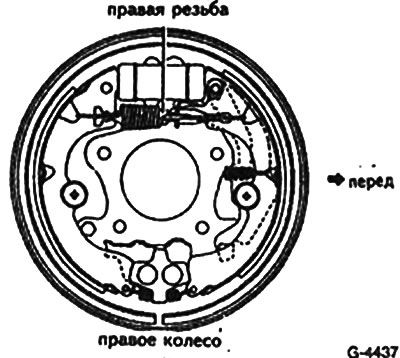
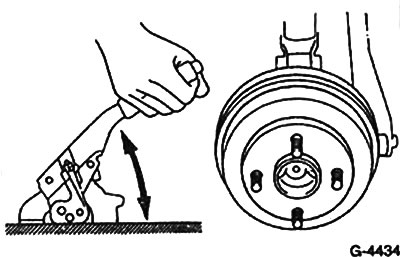
Remove brake drum. If the brake drum cannot be removed, bring the brake pads together. To do this, insert a screwdriver into the hole in the brake shield and press the lever of the automatic installation from the teeth of the adjusting screw with it. At the same time, turn the gear with a second screwdriver. Move the screwdriver from top to bottom, see illustration. This applies equally to both wheels of the rear suspension, as the adjusting screw on the left wheel has a left-hand thread, and on the right wheel a right-hand thread.
Attention: Do not press the brake pedal with the brake pads removed. Otherwise, the brake pistons could be squeezed out of the wheel cylinders. Installation of brake pistons, see section «Repair of working brake cylinders».
Before removing the return springs, it is recommended to write down the places of their installation. This will make their subsequent installation easier.
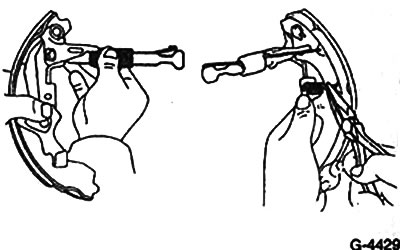
Remove the upper return spring with a screwdriver.
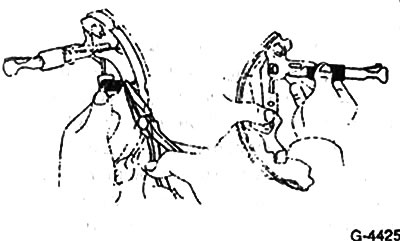
Front-wheel drive vehicles: Compress the spring plates with pliers and turn 90°. During compression, hold the pin at the back against the brake shield.
Four-wheel drive vehicles: Compress the spring and turn it 90°. During compression, hold the pin at the back against the brake shield.
Remove the lower spring from the front brake shoe.
Release the handbrake.
Remove the handbrake cable from the brake shield using a screwdriver.
Remove the rear brake shoe with the adjusting screw while pulling out the handbrake rod.
Remove the handbrake cable from the brake shoe with pliers.
Remove the adjusting lever spring and remove the adjusting screw together with the return spring.
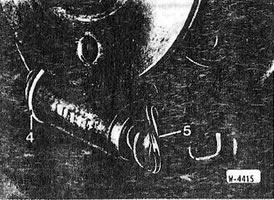
Remove dust boots -5- from wheel cylinder.
Caution: Do not remove the piston while doing this. Check if there is moisture behind the boot. Replace cylinder if necessary.
Install the boot on the brake cylinder.
Installation
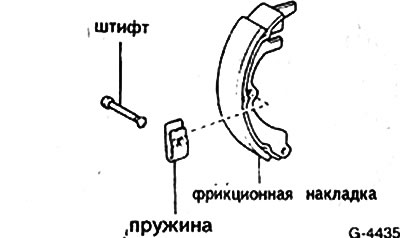
Despite the wear of even one of the brake pads, all four are always replaced. Install pads of only one brand. Clean the brake drum and brake shield with a vacuum cleaner or wash with alcohol. If there is brake fluid on the wheel cylinder, replace the cylinder. Check the threads of the adjusting screw and coat it with a thin film of MoS2 grease. To grind brake drums if they have superficial damages. Always grind both drums. Permissible groove diameter 201 mm.
Move the handbrake lever to new pads. To do this, remove the lock washers with a screwdriver and remove the lever with the adjusting washer.
Measure the gap between the handbrake lever and the new pad with a feeler gauge. The gap should be 0-0.35 mm. Otherwise, install a new shim of the required thickness. Washers are available in the range of 0.2-0.9 mm thickness in 0.1 mm increments.
Secure lever and brake pads with new washers. After that, check the gap again.
Clean the six contact points between the brake pads and the brake shield and coat with a thin layer of heat-resistant grease, preferably high-temperature copper paste.
Lightly lubricate the threads and contact surfaces of the adjusting screw.
Attention: Do not allow lubricant to get on the brake pads.
Install the adjusting screw and return springs on the rear brake shoe. Install the adjusting lever spring.
Connect the handbrake cable to the lever.
Attach the handbrake cable to the brake shield guide.
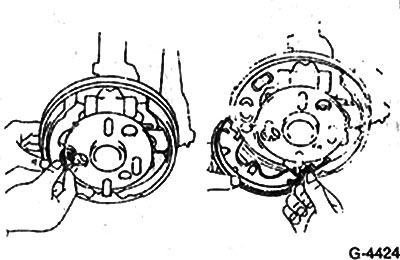
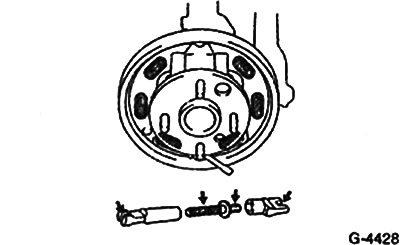
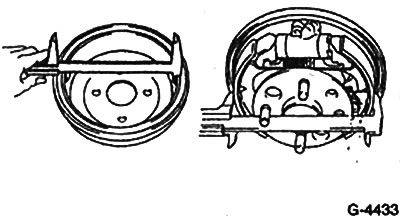
First install the rear and then the front brake pads on the brake shield and secure them with a pin with a compression spring. In this case, the pin at the back must be held, and the spring cups must be compressed with pliers and rotated 90°until it locks. In a four-wheel drive vehicle, another type of spring is mounted on the pin, compressed with pliers and fixed by turning 90°.
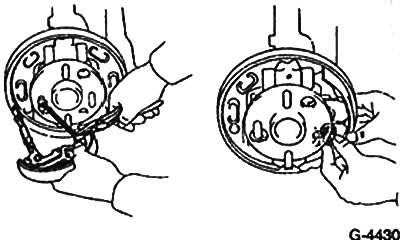
Install the upper and lower return springs into the brake shoes using the brake spring pliers.
Note: Make sure the springs are in the correct position.
Check the operation of the automatic adjustment device. To do this, move the handbrake lever back and forth. This should rotate the adjusting screw. If the screw does not turn, the brake pads are not installed correctly. Install them again.
Turn the adjusting screw at the gear with a screwdriver, setting the minimum length.
Install the brake drum and move the handbrake control lever in the passenger compartment to the extreme position.
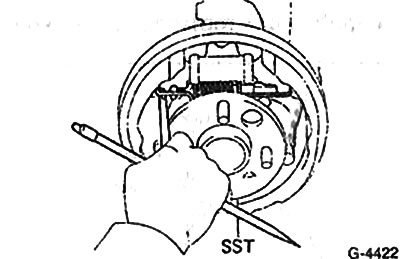
Remove brake drum.
Measure the inner diameter of the brake drum and the outer diameter of the brake pads. The diameter difference should be 0.6 mm. If the difference is greater adjust handbrake cable.
Install the brake drum.
Install the wheel as marked. Lower the vehicle and tighten the wheel nuts crosswise to 105 Nm.
Adjust the clearance in the rear brakes by repeatedly depressing the brake pedal. In this case, a characteristic sound will be heard until the backlash of the specified value is reached.
Adjust hand brake actuator.
Carry out a test of the brakes at an average speed on a road free of traffic.