
Removing
1. Disconnect the negative cable from the battery.
Attention! If the stereo system installed in the car is equipped with a security code, before disconnecting the battery, make sure that you have the correct combination to activate the audio system!
2. Turn away four bolts of fastening of ignition coils to a valvate cover put marking and remove coils.
3. From the driver's side:
- The dipstick for measuring the level of impellent oil may interfere with the removal of the cover - remove it and set it aside.
- Move fuel lines and charcoal canister vent hoses out of the way. There should be no need to disconnect them.
- Disconnect the crankcase ventilation hose.
4. From the passenger side (on right):
- Disconnect the L-shaped crankcase ventilation hose.
- Unclip the power steering vacuum hose leading to the intake manifold and lay it aside.
5. Give nine bolts of fastening of a cover of a head of cylinders and carefully remove it. Be careful: the aluminum cover is easily damaged. If the cover cannot be removed, tap it around the perimeter with a hammer through a wooden block, if necessary, use a spatula or a knife with a thin blade to cut the layer of dried sealant.
Attention! In order to avoid the development of leaks, in no case pry the cover with a lever under the mating surface!
Installation
1. The mating surfaces of the cylinder heads and their covers must be absolutely clean and dry. Using a scraper, remove all traces of the old sealant and fragments of the destroyed gasket, then wipe the surfaces with a rag soaked in acetone. The presence of traces of oil on the mating surfaces can lead to the development of leaks.
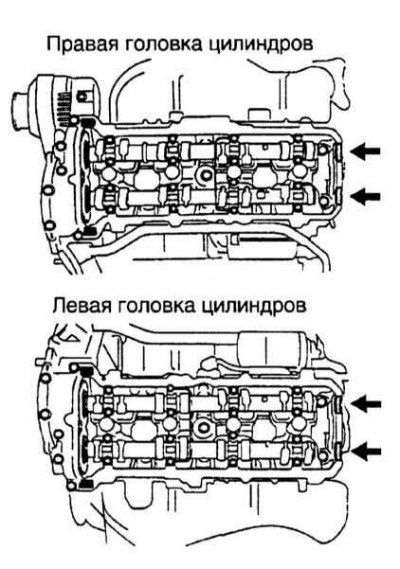
2. Insert the segmented rubber plugs into your slots, making sure they fit. Lubricate them with FIPG sealant (Toyota № 08826-00080), with the same sealant, fill two points in the cylinder head immediately behind the timing belt covers (refer to accompanying illustration). Mark the position of these points before cleaning so that new sealant can be applied there.
3. Firmly seat the sealing gasket in the receiving groove and press the cover against the cylinder head. Install sealing washers, screw fasteners.
4. Tighten the fastener to the required torque in three or four steps (6 Nm).
5. Install the remaining components in the reverse order of their dismantling.