
Replacing the oil seal without removing the gearbox from the car
1. Disconnect the driveshaft from the differential.
A) Put marks on the flanges for their subsequent alignment.
b) Remove the four bolts and nuts and disconnect the propeller shaft.
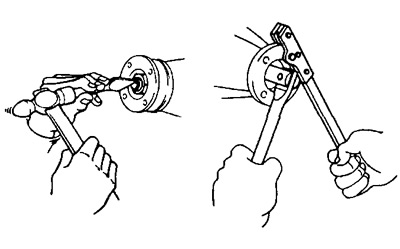
2. Remove the counter flange.
A) Loosen the nuts with a hammer and chisel.
b) Using the special tool to hold the flange, loosen the nut.

Rear axle gearbox.
1 - For machines with an axle: Type A - 31 Nm; Type B - 47 Nm; Type C - 50 Nm,
2 - Gasket,
3 - Bushing,
4 - Bearing,
5 - Oil deflector,
6 - Oil seal,
7 - Reciprocal flange,
8 - For axles with Type A and Type B - 74 Nm; Type C - 88Nm,
9 - Cardan shaft.
V) Remove the counter flange with a special key.

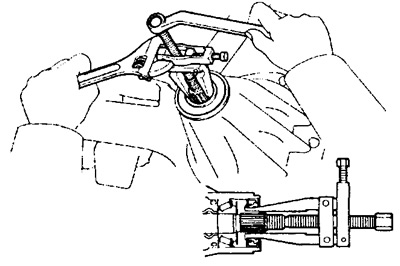
3. Remove the oil seal and oil deflector.
A) Using a special tool, remove the oil seal and oil deflector.
4. Remove the bearing and sleeve.
A) Using the special tool, remove the bearing from the drive gear.
b) Remove bushing.
5. Install a new bushing and bearing.
6. Establish an epiploon and an oil deflector.
A) Install the oil deflector.
b) Using a tool head of the correct diameter, install the oil seal.
- Seal installation depth — 1.0 mm
V) Apply grease to the lip of the seal.
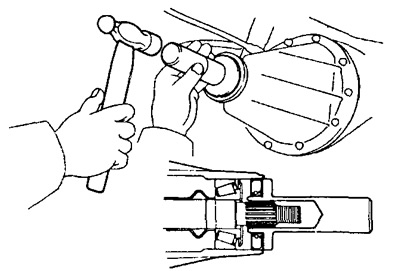
7. Install the counter flange.
A) Install the counter flange with the special tool.
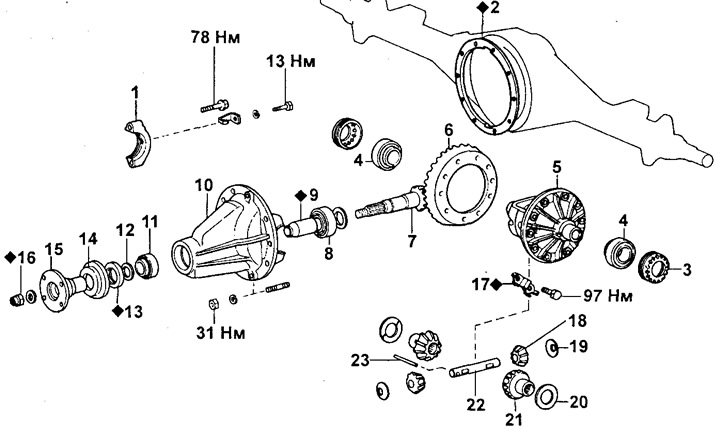
Reducer (Type A).
1 - Bearing cap,
2 - Gasket,
3 - Adjusting nut,
4, 8, 11 - Bearing,
5 - Differential cup,
6 - driven gear,
7 - Drive gear,
9 - Bushing,
10 - gearbox housing,
12 - Oil deflector,
13 - Oil seal,
14 - Dust cover,
15 - Reciprocal flange,
16 - Nut,
17 - Locking plate,
18 - Satellite,
19, 20 - Thrust washer,
21 - Axle gear,
22 - Axis of satellites,
23 - Cotter pin.
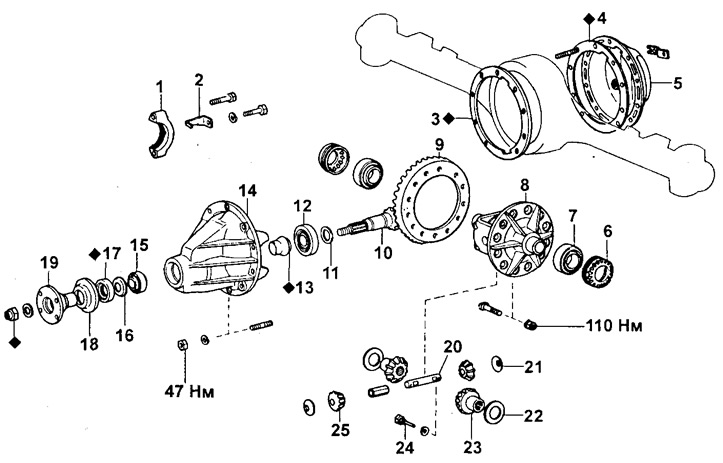
Reducer (Type B).
1 - Bearing cap,
2 - Lock nut,
3, 4 - Gasket,
5 - Rear differential cover,
6 - Adjusting nut,
7, 12, 15 - Bearing,
8 - Differential cup,
9 - driven gear,
10 - Drive gear,
11, 21, 22 - Thrust washer,
13 - Spacer,
14 - gearbox housing,
16 - Oil deflector,
17 - Oil seal,
18 - Dust cover,
19 - Reciprocal flange,
20 - Axis of satellites,
23 - Axle gear,
24 - Cotter pin,
25 - Satellite.
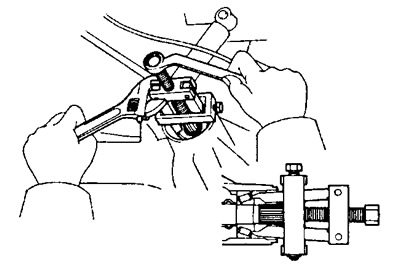
b) Apply gear oil to the threads of the new nut.
V) Tighten the nut while holding the flange.
Torque:
- Type A - 270 Nm
- Type B - 343 Nm
- Type C - 304 Nm
Note: Tighten the nut to the torques shown above and adjust the drive gear preload as shown below.
Preload (elementary):
- Type A - 0.9- 1.3 Nm
- Type B - 0.7-1.0 Nm
- Type C - 0.8-1.3 Nm
8. Caulk the pinion nut.
9. Connect the cardan shaft to the mating flange.
A) Align the marks on the flanges and tighten the four bolts and nuts.
Torque:
- Type A and Type B - 74 Nm
- Type C - 88 Nm
10. Check the transmission oil level and top up if necessary.
- Oil type - APL GL-5
Viscosity:
- Above -18°C - SAE 90
- Below -18°C - SAE 80W or 80W - 90
Filling capacity:
- Type A - 1.8 l
- Type B - 2.5 l
- Type C - 3.8 l
Removing the gearbox
1. Drain gear oil.
2. Remove the half shaft
- Dyna 100 - page 155
- Dyna 150 - Single tires page 157
- Dyna 150 - Dual tires page 158
Note: (Dyna 150 Single tires) To avoid damage to the drive gear and washer, after removing the axle shafts, install the pinion axle and cotter pin.
3. Disconnect the cardan shaft from the mating flange.
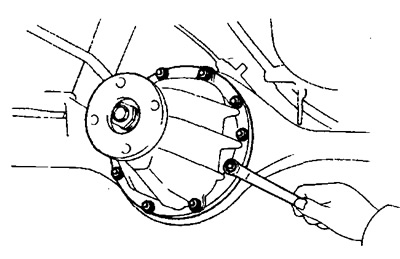
4. Remove the gearbox assembly.
Installing the gearbox
1. Install new gasket, reducer assembly and tighten nuts.
Torque:
- Type A - 31 Nm
- Type B - 47 Nm
- Type C - 50 Nm
2. Connect the cardan shaft.
3. Install the axle shaft.
4. Check the transmission oil level and top up if necessary.
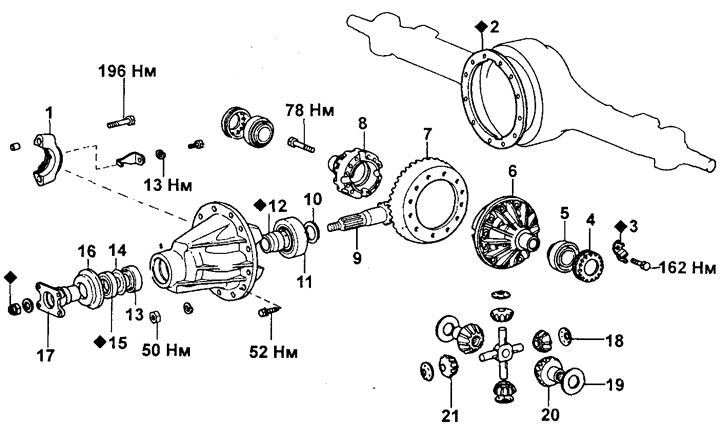
Reducer (Type C).
1 - Bearing cap,
2 - Gasket,
3 - Locking plate,
4 - Adjusting nut,
5, 11, 13 - Bearing,
6 - Differential cup,
7 - driven gear,
8 - Differential cup cover,
9 - Drive gear,
10 - Adjusting washer,
12 - spacer,
14 - Oil deflector,
15 - Oil seal,
16 - Dust cover,
17 - Reciprocal flange,
18, 19 - Thrust washer,
20 - Axle gear,
21 - Satellite.