
Removing the oil pump
Reminder: When repairing the oil pump, the oil pan and oil receiver must be removed and cleaned.
1. Drain engine coolant (see section "Cooling system").
2. Drain engine oil (see relevant paragraph).
3. Remove the timing belt and pulleys except for the camshaft pulley (see related section).
4. Remove the water pump (see section "Cooling system").
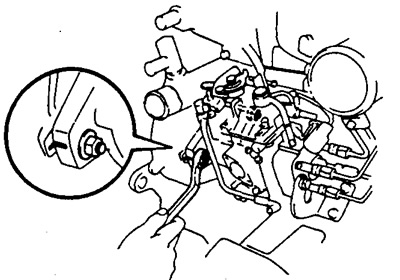
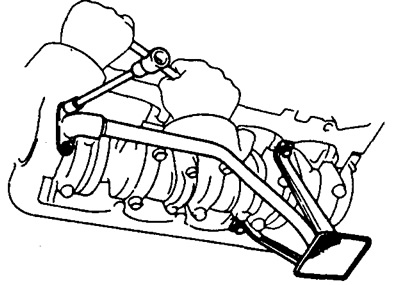
5. Remove the oil pan.
A) Remove fourteen bolts and four nuts.
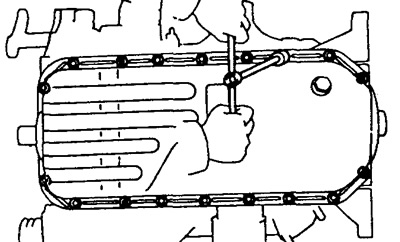
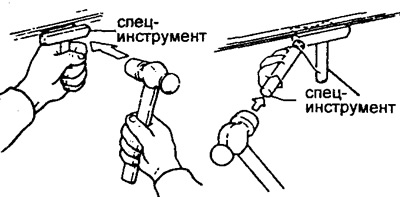
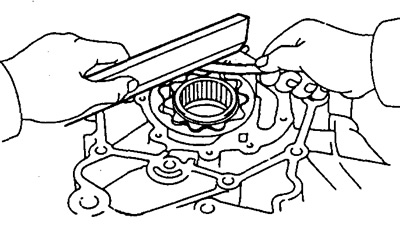
b) Insert the blade of a special tool between the cylinder block and the oil pan, cut off the applied sealing material and remove the oil pan.
Warning: Do not use the special tool to remove the timing belt cover and rear oil seal holder.
Be careful not to damage the oil pan flange.
6. Remove the oil receiver and gasket by unscrewing the two bolts and two nuts.
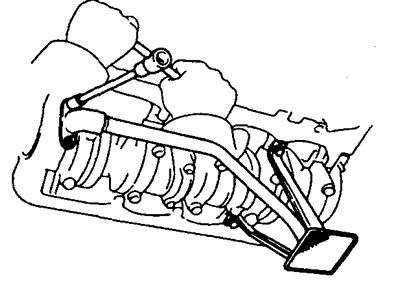
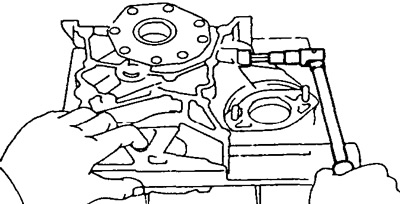
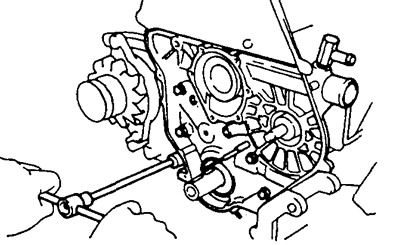
7. Remove the oil pump, (timing belt cover).
A) (With heating control). Disconnect the water bypass hose of the thermostat unit from the timing belt cover.
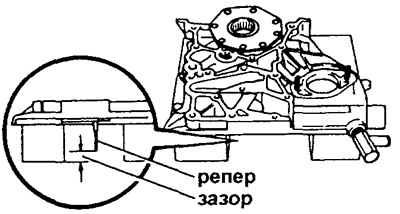
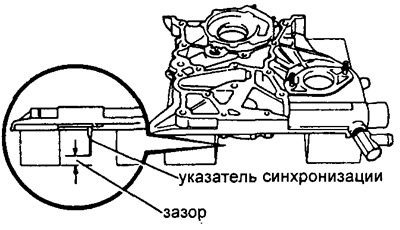
b) Before removing the two nuts securing the timing belt cover to the injection pump, check the alignment of the injection pump marks.
If there are no marks, apply new marks for reinstallation.
V) Remove two nuts.
G) Turn away five bolts, remove a casing of a gear belt and a lining.

Oil pump disassembly
1. Place the timing belt cover on wooden stands.
Warning: It is necessary to choose the height of the supports so as not to damage the TDC indicator.
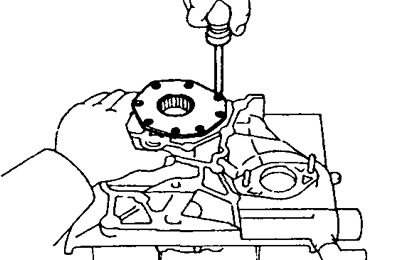
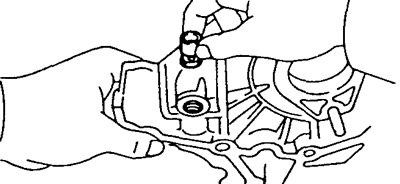
2. Remove pressure reducing valve. Using a hex wrench (12 mm), remove the plug, gasket, spring and pressure reducing valve.
3. Remove the drive and driven gears. Remove the six screws, then remove the pump housing cover, male and female rotors.
Oil pump monitoring
1. Check the condition of the pressure reducing valve.
Lubricate the valve with engine oil and check the smoothness of its lowering down (in valve hole) under the influence of its own weight. If this condition is not met, replace the pressure reducing valve. If necessary, replace the oil pump housing.
2. Check the condition of the drive and driven gears.
A. Using a feeler gauge, check the clearance between the outer diameter of the driven gear and the housing.
- Nominal clearance - 0.144 - 0.219 mm
- Maximum clearance - 0.40 mm
If the clearance exceeds the maximum allowable value, then replace the gears as a set.
If necessary, replace the oil pump housing.
B. Check the end clearance of the gears. Using a feeler gauge, measure the clearance between the gears and the precision square.
- Nominal end clearance - 0.035 - 0.085 mm
- Maximum end clearance - 0.15 mm
If the end clearance exceeds the maximum allowable value, then replace the gears as a set. If necessary, replace the oil pump housing.
B. Check the clearance on the tops of the gears. Using a feeler gauge, measure the gap between the tops of the driven and drive gear teeth.
- Nominal clearance at the tops - 0.110-0.240 mm
- Maximum top clearance - 0.30 mm
If the top clearance exceeds the maximum allowable value, then replace the gears as a set.
Oil pump assembly
1. Place the timing belt cover on wooden stands.
Warning: It is necessary to choose the height of the supports so as not to damage the TDC indicator.
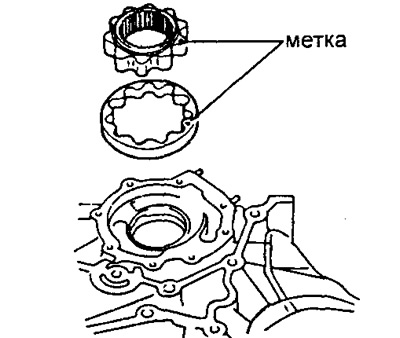
2. Install the drive and driven gears.
A) Place the drive and driven gears in the timing belt case with the marks facing up.
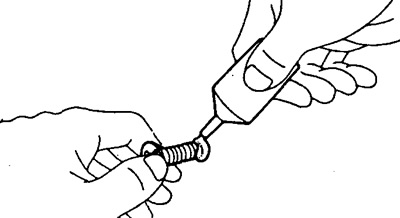
b) Apply adhesive to two or three screw threads. Adhesive: 14108833-00070, THREE BOND 1324 or equivalent.
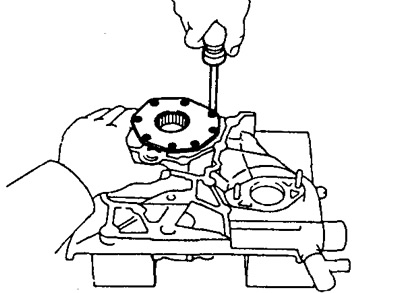
V) Install the pump housing cover with six screws.
- Tightening torque - 10 Nm
2. Install pressure reducing valve.
A) Insert the valve and spring into the timing belt housing mounting hole.
b) Using a hex wrench (12 mm), install a new gasket and plug.
- Tightening torque - 37 Nm

Oil pump installation
1. Install the oil pump (timing belt cover).
A) Put a new gasket on the cylinder block.
b) Install the timing belt cover with five bolts.
- Tightening torque - 23 Nm
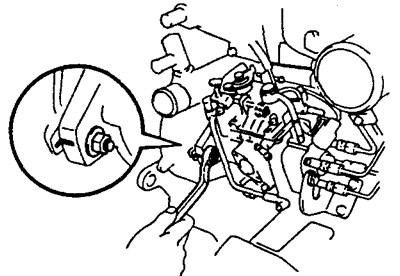
V) Install the two nuts securing the injection pump to the timing belt cover.
- Tightening torque - 21 Nm
G) Check the alignment of the injection pump marks.
If there is no correct alignment, then align the marks by tilting the injection pump.
d) Connect the unit water bypass hose from the thermostat to the timing belt cover.
2. Install the oil receiver. Install a new gasket and oil receiver with two bolts and two nuts.
- Tightening torque - 12 Nm
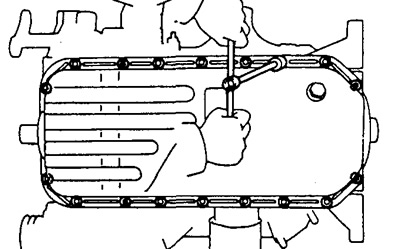
3. Install the oil pan.
A) Remove the old sealing material; being careful not to let oil drip onto the contact surfaces of the oil pan and cylinder block.
Using a razor blade and scraper, remove the old sealing material from the gasket surfaces and seal grooves. Thoroughly clean all components.
Using solvent, clean both sealing surfaces.
Warning: Do not use solvent that will damage painted surfaces.
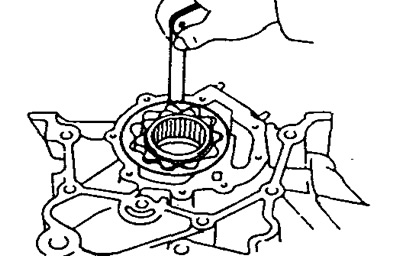
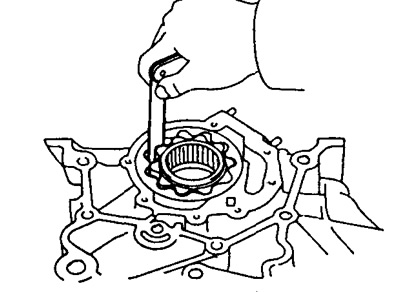
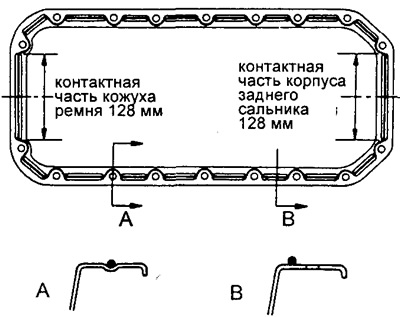
b) Apply sealant to the oil pan as shown.
Reminder: Apply a layer of sealant at least 5 mm thick (preferably a little more) to the areas of the oil pan that are in contact with the timing belt cover and the rear oil seal retainer.
Sealant element #08826-00080 or equivalent.
Reminder: Do not apply excess sealant to the surface. Take special care near lubrication channels.
Assembly must be completed no later than five minutes after applying the sealant. Otherwise, the sealant must be removed and then reapplied.
V) Install the oil pan with fourteen bolts and four nuts.
- Tightening torque - 18 Nm
4. Install the water pump (see section "Cooling system").
5. Install pulleys and timing belt (see section "Engine mechanisms").
6. Fill with engine oil.
7. Fill in engine coolant.
8. Start the engine and check for leaks.