
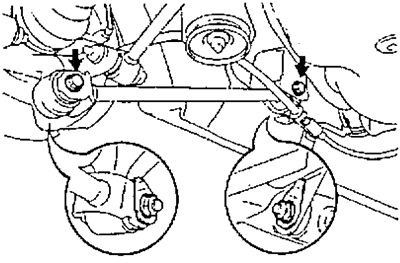
A) Attach the #1 lower suspension arm to the rear beam.
Attention: Orient the lever with the paint mark applied towards the rear.

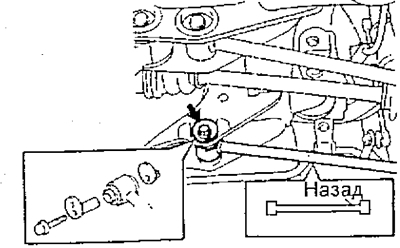
b) Jack up the rear beam, install the rear beam bushing and secure it with a nut.
- Tightening torque - 162 Nm
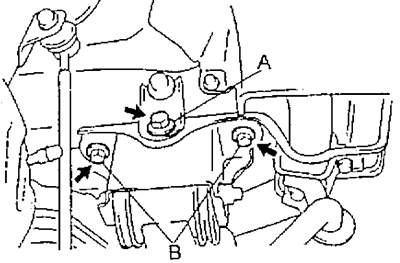
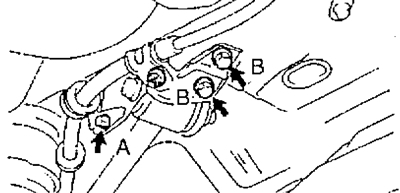
V) Tighten the three #2 lower arm bracket bolts.
Torque:
- Bolt (A) - 66 Nm
- bolts (IN) - 74 Nm
G) Lower the jack.
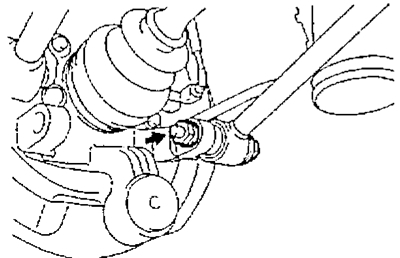
d) Connect the lever to the fist.
Note: The final tightening of the nut is done after the suspension has stabilized.
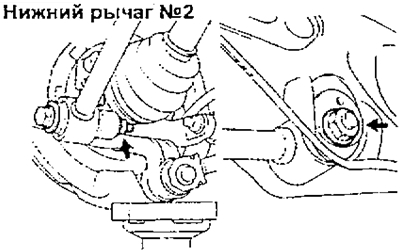
2. Install the #2 lower suspension arm.
A) Connect the lever to the rear beam.
Note:
- - orient the lever with the marked applied paint towards the rear part;
- - Align the marks made during disassembly.
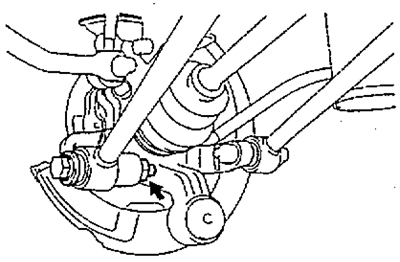
G) Connect the lever to the fist.
Note: The final tightening of the nut is done after the suspension has stabilized, when the weight of the vehicle is "on wheels"
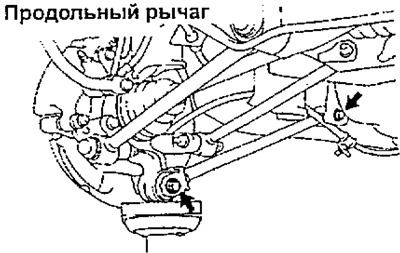
3. Install the trailing arm, and temporarily install the two bolts and nuts as shown.
4. Stabilize the suspension.
A) Install the rear wheel and lower the car.
- Tightening torque - 105 Nm
b) By pushing the body down and lifting it up, stabilize the suspension.
5. Jack up the car and remove the rear wheel.
6. Finally tighten bolts and nuts of fastening of levers.
A) Jack up your fist.
b) Tighten the bolts and nuts securing the suspension arms.
Tightening torque for fastening bolts:
- to the rear beam - 115 Nm
- to the fist - 125 Nm
Attention: when tightening the bolts for fastening the lower arm No. 2, make sure that the marks made when removing the label are aligned.
 |  |
7. Connect the parking brake cable and tighten the bolts.
Torque:
- Bolt (A) - 5 Nm
- bolts (IN) - 13 Nm
8. Connect the cardan shaft to the shaft of the rear axle gearbox, aligning the marks made when removing.
- Tightening torque - 75 Nm
9. Install the muffler center pipe.
- Tightening torque - 44 Nm
10. Install the rear wheel.
- Tightening torque - 105 Nm
11. Check rear wheel alignment.