Removing
Note: Installation is in reverse order of removal. After installation, check the rear wheel alignment and the operation of the speed sensors (ABS).
Attention: after installation, press down on the body and lift it up to stabilize the suspension.
1. Jack up the car and remove the rear wheel.
2. Remove the cover.
A) With a drill (5 mm), drill out the rivet heads, then knock them out.
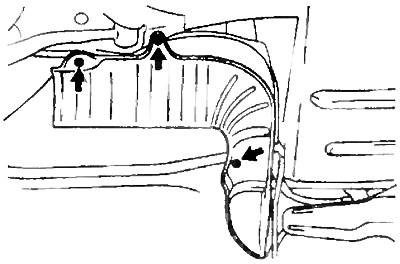
b) Remove the cover.
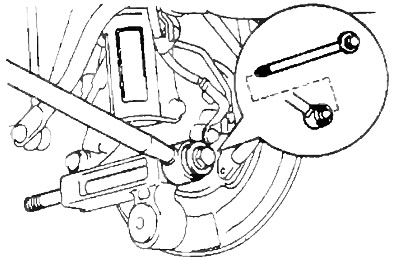
3. Remove the trailing arm.
A) Remove two bolts and nuts.
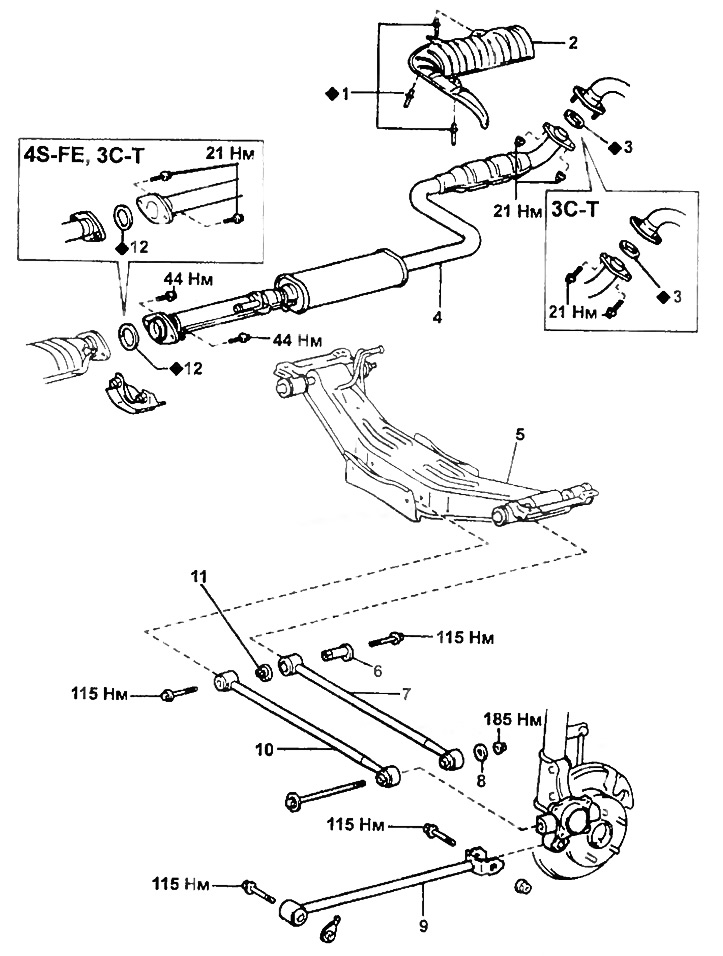
Lower and trailing arms (2WS models).
1 - rivet,
2 - casing,
3, 12 - gasket,
4 - the central pipe of the muffler,
5 - rear beam,
6 - toe adjustment eccentric bushing,
7 - lower suspension arm No. 2,
8 - washer,
9 - trailing arm,
10 - lower suspension arm No. 1,
11 - toe adjustment eccentric.
Attention: make the final tightening after stabilization of the suspension.
- Tightening torque - 115 Nm
b) Remove the trailing arm.
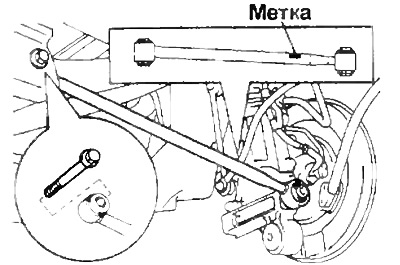
4. Remove the #2 lower suspension arm. Installation Note: Orient the lever with the paint mark toward the rear.
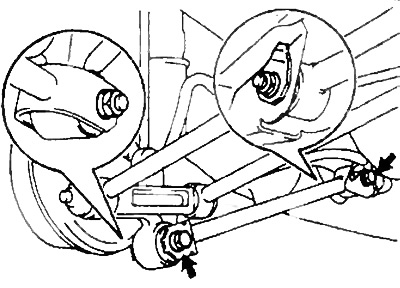
A) Place match marks on the camber adjustment cam bush and rear beam.
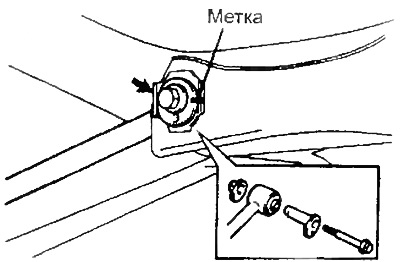
b) Turn away a bolt, remove the eccentric and disconnect the lever from a back beam.
Attention: make the final tightening after stabilization of the suspension.
- Tightening torque - 115 Nm
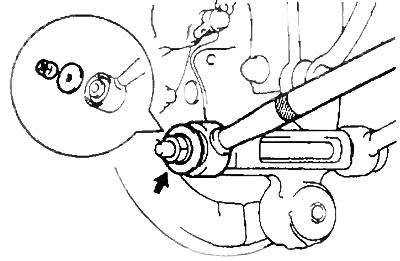
V) Loosen the nut, remove the washer and lever from the knuckle
Attention: make the final tightening after stabilization of the suspension.
- Tightening torque - 185 Nm
5. Remove the #1 lower control arm.
Installation Note: Orient the lever with the marked paint mark toward the rear.
A) Turn away a bolt and disconnect the lever from a back beam.
Attention: make the final tightening after k stabilization of the suspension.
- Tightening torque - 115 Nm
b) Remove the bolt and lever from the knuckle.