
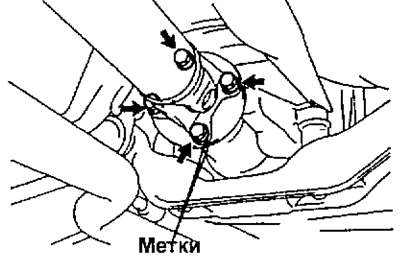
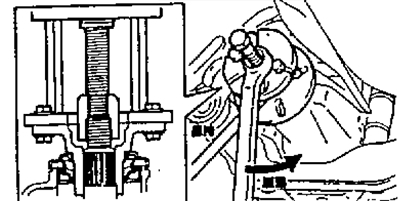
2. Disconnect the cardan shaft from the gearbox.
A) Loosen the four screw connections indicated in the figure.
b) Place a rag as shown in the illustration so as not to damage the seal.
V) Using a brass rod and a hammer, remove the propeller shaft.
G) Remove the four mounting bolts and disconnect the cardan shaft.
Note: Fix the cardan shaft.
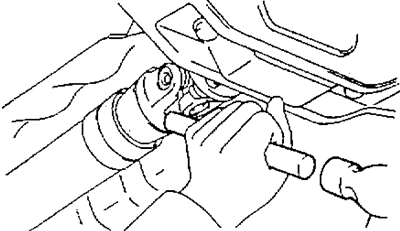
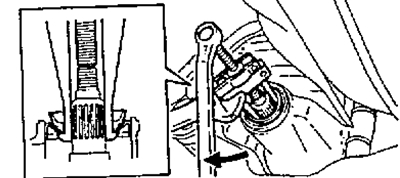
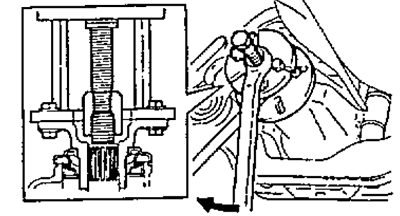
3. Remove the connecting flange.
A) Loosen the nut.

b) While holding the flange, unscrew the nut.
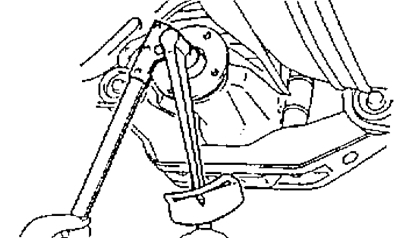
V) Using a puller, remove the connecting flange.
4. Remove the front oil seal and oil deflector.
A) Using a puller, remove the seal.
b) Remove the oil deflector.
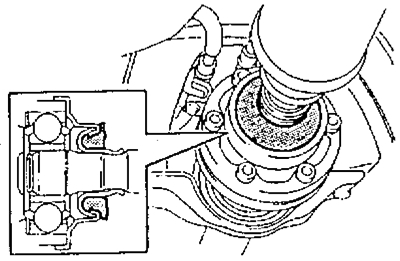
5. Remove front bearing and spacer.
A) Using a puller, remove the front bearing.
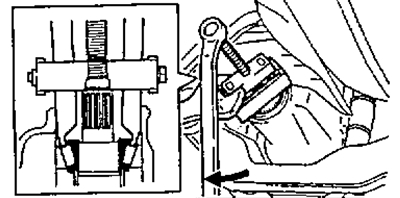
b) Remove the spacer sleeve.
6. Install a new spacer and front bearing.
A) Install a new spacer onto the shaft.
b) Install the front bearing onto the shaft.
7. Install the oil deflector and a new oil seal.
A) Install the oil deflector.
b) Using a drift, install a new oil seal.
- Installation depth - 1.7-2.3 mm
V) Apply grease to the seal lip.
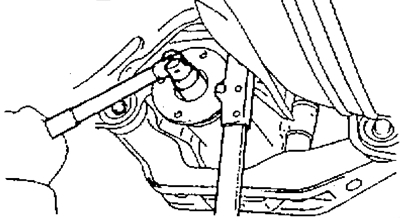
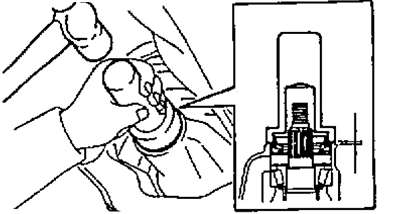
8. Install the connecting flange.
A) Using the special tool, install the flange onto the shaft.
b) Apply grease to the threads of the new nut.
V) While holding the flange, tighten the nut.
- Tightening torque - 110 Nm
G) Using a torque wrench, measure the final drive pinion bearing preload.
Bearing preload:
- new - 1.0-1.6 Nm
- used - 0.5-0.8 Nm

If the preload is greater than the allowable value, replace the spacer sleeve.
If the preload is less than the allowable value, then retighten the nut with the specified tightening torque increment until the preload reaches the specified value (do not exceed the tightening torque of 240 Nm).
- Nut tightening torque pitch - 13 Nm
If the preload exceeds the maximum allowable when re-tightening the nut, then replace the spacer and repeat the adjustment procedure.
Note: Do not adjust preload by loosening the nut.
9. Lock the nut and connect the cardan shaft.
10. Fill gear oil into gearbox.