
1. Prepare fresh transmission fluid of the correct grade (see Specifications at the beginning of the chapter).
2. Other necessary tools and materials for the upcoming procedure include: a trolley jack, props to fix the car in a raised position, a drain container with a volume of at least 7.6 liters and a supply of rags and old newspapers.
3. Park the vehicle on a hard, level surface, jack it up and place it on jack stands so that the transmission oil pan drain plug is easily accessible.
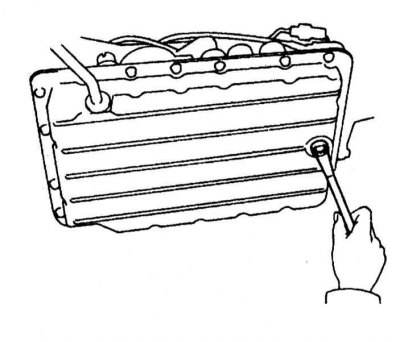
4. Place a drain container and all necessary equipment under the pan. Try not to touch the heated components of the power unit and the exhaust system located under the bottom of the car. After placing the receiving container properly, unscrew the drain plug (refer to accompanying illustration). When the flow of fluid has completely stopped, wipe the drain plug, screw it into place and tighten it firmly.
5. At the corresponding complete set of the car remove protection of a crankcase of transmission, then turn out the fixing bolts located on perimeter of the pallet.
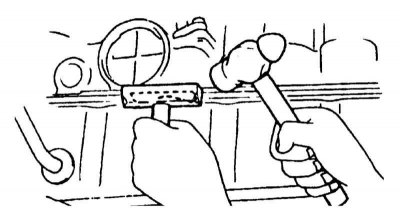
6. Use a soft-faced hammer to gently tap the pan to break the sealant layer (refer to accompanying illustration).
Note. To avoid damage to the mating surfaces, do not try to pry the pallet with a lever.
7. Lower the pan and drain the remaining ATF from it.
8. Remove the fixing screws (refer to accompanying illustration) and remove the ATF filter from the valve assembly housing.
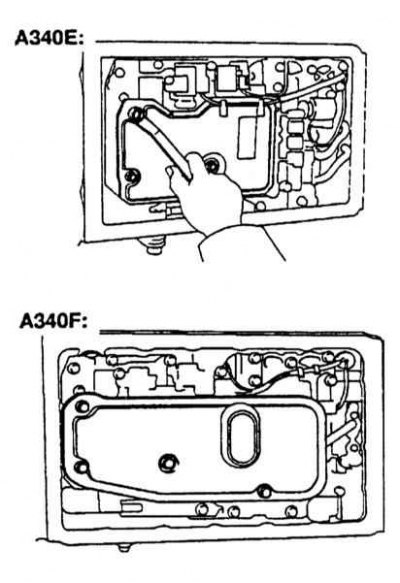
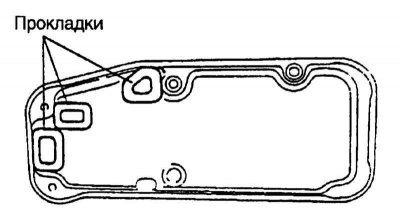
9. Carefully inspect the inner surfaces of the sump, evaluate the condition of the filter element and the drained ATF. During use, the transmission fluid can change its original bright red color to dark red and even brown, as well as acquire a burning smell - such changes usually indicate transmission overheating during vehicle operation. If metal filings or particles of friction material are found in the liquid, pan or filter, the condition of the internal components of the AT or the rotation converter should be checked. To collect metal filings, magnets are provided, when removing them, it is necessary to remember their location - if they are installed incorrectly, the pallet will not close tightly (refer to accompanying illustration). If you are not sure when determining the condition of the fluid or filter, contact a car service specialist.
10. Wash the sump with solvent and, if possible, dry it with compressed air. Use a scraper to remove traces of old gasket material from the mating surfaces of the sump, crankcase and valve body.
Note. Be careful not to damage the mating surface of the lightweight aluminum alloy body of the valve assembly.
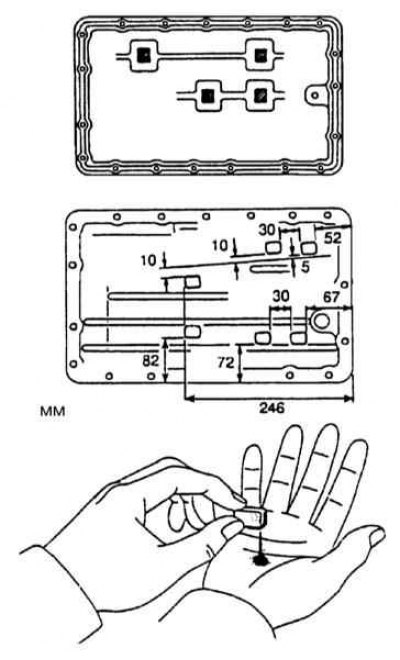
Replacing gaskets (refer to accompanying illustration), install a new ATF filter.
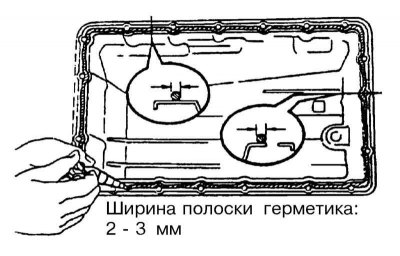
11. Make sure the sump mating surface is absolutely clean and dry and apply a pad of Three Bond 1281 Sealant or equivalent (refer to accompanying illustration). Slide the filler neck onto the dipstick guide tube and press the sump against the transmission case. Moving along the perimeter of the pallet, tighten the fixing bolts in several stages with the required force.
12. Lower the vehicle to the ground and fill the required grade of ATF through the filler neck into the transmission (see Section Check of level of working liquid AT).
13. Move the transmission to the position «R», set the parking brake and start the engine.
14. Alternately move the AT selector lever through all positions, finally returning it to the position «R». check the ATF level, if necessary, make the appropriate correction by bringing the fluid level to the correct mark on the dipstick blade.
15. During the first few days of vehicle operation, look under the vehicle, checking the transmission for signs of leaks developing. Check the ATF level again, correct if necessary (see Section Check of level of working liquid AT).