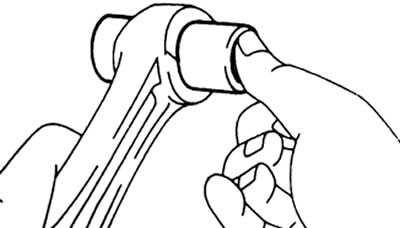
A) Using a scraper, remove carbon deposits from the piston crown.
b) Using the broken ring, clean the piston ring grooves.
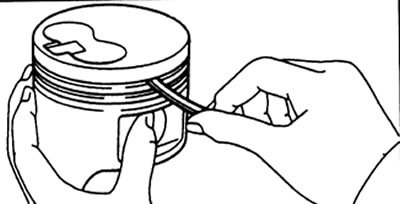
V) Using solvent and a soft brush, thoroughly clean the piston.
Caution: Do not use wire (metal) brush.
2. Check piston diameter and clearance between piston and cylinder.
Note: There are three nominal piston diameter sizes marked "1", "2" And "3" respectively. Marking is applied by branding on the piston bottom.
A) Using a micrometer, measure the piston diameter at right angles to the pin axis at a distance of 58 mm for 2L, 2L-T, 1KZ-T engines and 56 mm for 3L engines from the piston crown.
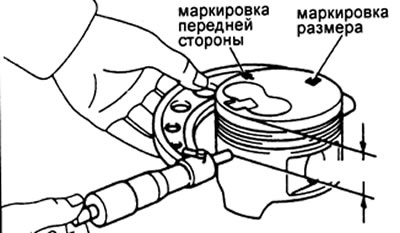
Nominal piston diameter:
Engines 2L, 2L-T
- Marking "1" - 91.94 - 91.95 mm
- Marking "2" - 91.95 - 91.96 mm
- Marking "3" - 91.96 - 91.97 mm
Engine 3L, 1KZ-T
- Marking "1" - 95.94 - 95.95 mm
- Marking "2" - 95.95 - 95.96 mm
- Marking "3" - 95.96 - 95.97 mm
Repair (+0.50 mm):
- Engines 2L, 2L-T - 92.44 - 91.47 mm
- Engine 3L 96.44 - 96.47 mm
- Engine 1KZ-T - 96.44 - 96.47 mm
Repair (+0.75 mm):
- Engine 1KZ-T - 96.69 - 96.72 mm
3 repair (+1.00 mm):
- Engine 1KZ-T - 96.94 - 96.97 mm
b) Measure the diameter of the cylinder in the transverse direction (see above)
V) Subtract the piston diameter measurement from the cylinder diameter measurement.
Nominal clearance - 0.05 - 0.07 mm
Maximum clearance - 0.14 mm
If the gap exceeds the maximum allowable value, then replace the four pistons and bore all four cylinders. If necessary, replace the cylinder block.
Note: When installing the nominal size piston, the markings on the old and new pistons must match the markings on the cylinder block.
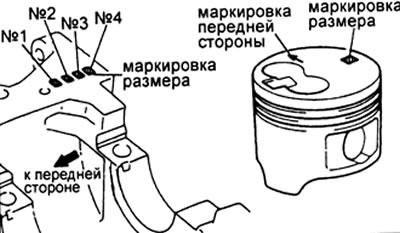
L series engines
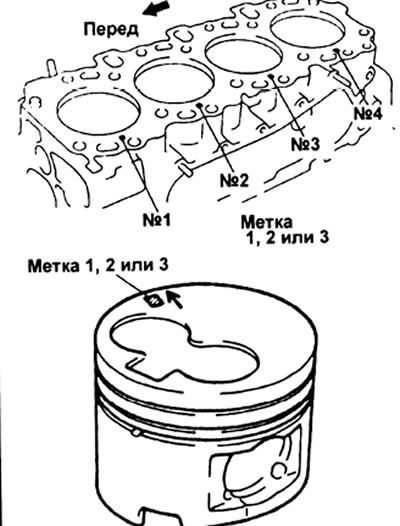
KZ series motors
3. Check the clearance between the ring and the piston groove with a feeler gauge.
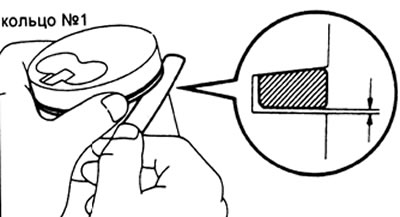
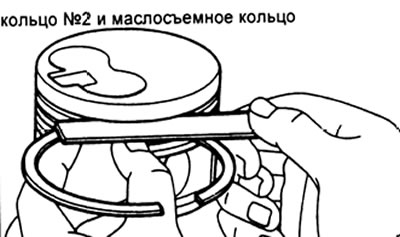
Clearances:
Ring #1:
- L series - 0.028 - 0.077 mm
- KZ series - 0.060 - 0.110 mm
Ring #2:
- except 2L-T - 0.060 - 0.105 mm
- only 2L-T - 0.070 - 0.115 mm
Oil scraper:
- L series - 0.030 - 0.070 mm
- KZ series - 0.020 - 0.060 mm
Maximum clearance - 0.20 mm
If the clearance is more than acceptable, replace the piston.
4. Check up a backlash in the lock of a piston ring.
A) Install the ring in the cylinder.
b) Using a piston, push the piston ring to a depth of 140 mm (L-series) or 120 mm (KZ-series) from the plane of the cylinder block.
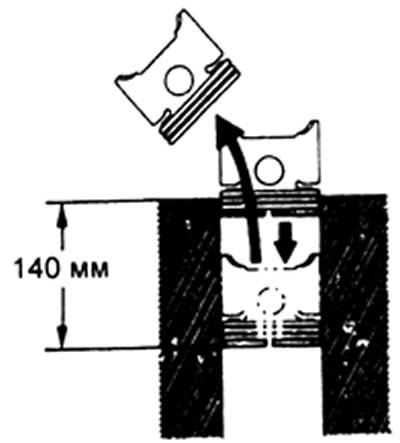
V) Using a feeler gauge, measure the gap in the ring lock.
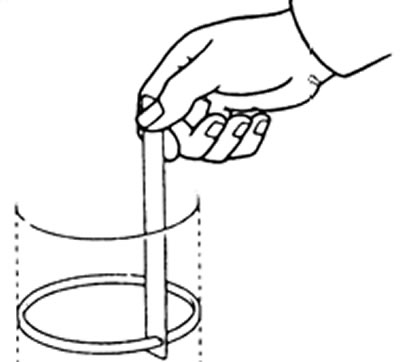
Nominal clearance in the lock:
ring number 1
- L series 0.35 - 0.65 mm
- KZ series 0.35 - 0.57 mm
ring number 2
- L series 0.30 - 0.60 mm
- KZ series 0.40 - 0.60 mm
- oil scraper - 0.20 - 0.50 mm
Max Clearance:
ring number 1
- L series - 1.50 mm
- KZ series - 1.03 mm
ring number 2
- L series - 1.40 mm
- KZ series - 1.10 mm
oil scraper
- L series - 1.40 mm
- KZ series - 0.87 mm
If the gap in the lock of the ring exceeds the maximum allowable value, then replace the piston ring.
If this gap exceeds the maximum allowable value even after installing a new ring, bore all four cylinders or replace the cylinder block.
5. Check the fit of the piston pin: at a piston temperature of 60°C (L-series) or 80°С (KZ-series) The finger must enter the piston by hand.
6. Check up a condition of a rod.
A. Using a connecting rod tester, check the connecting rods for bending and twisting.
Maximum bend 0.05mm (L-series) or 0.03 mm (KZ-series) per 100 mm length.
Maximum twist 0.15 mm per 100 mm length.
If bending or twisting exceeds the maximum allowable value, replace the connecting rod.
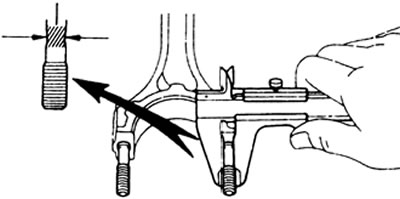
B. Measure the diameter of the connecting rod bolt.
Nominal diameter - 8.40 - 8.60 mm
Minimum diameter - 8.20 mm
If the diameter is less than the minimum allowable value, then replace the connecting rod bolt.
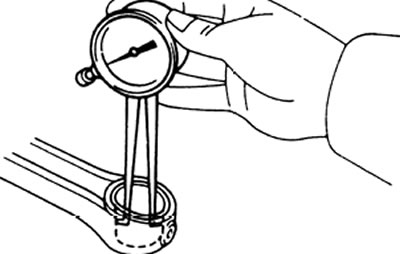
B. Check the gap between the piston pin and the upper connecting rod head.
A) Measure the inside diameter of the connecting rod bush.
Sleeve inner diameter:
- 2L (T) - 27.008 - 27.02 mm
- 3L - 29.008-29.02 mm
- 1KZ-T - 34.012 - 34.024 mm
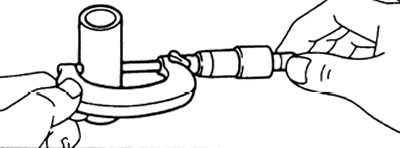
b) measure the diameter of the piston pin.
Piston pin diameter:
- 2L (T) - 27.000-27.012 mm
- 3L - 29.000-29.012 mm
- 1KZ-T - 34.000 - 34.012 mm
V) Subtract the piston pin diameter measurement from the bushing inside diameter measurement.
Rated clearance
- L series - 0.004 - 0.012 mm
- KZ series - 0.008 -0.016 mm
Max Clearance
- L series - 0.05 mm
- KZ series - 0.03 mm
7. If necessary, replace the connecting rod bushings.
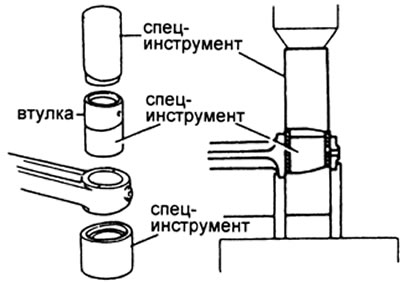
A. Remove the connecting rod bushings. Using a tool and a press, press out the bushing.
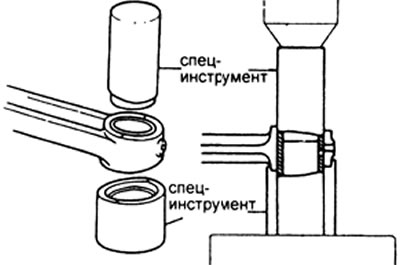
B. Install new connecting rod bushings.
A) Using a round file, lightly file off any roughness in the top end of the connecting rod.
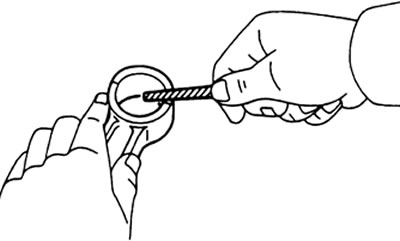
b) Install the bushing on the tool so that the ball of the tool enters the hole in the bushing.
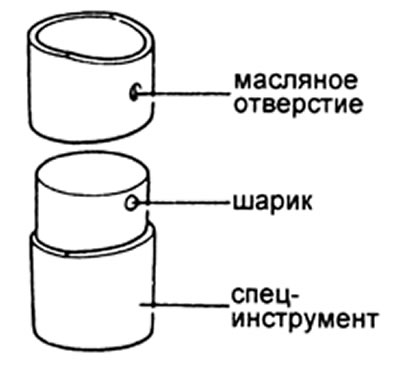
V) Align the lubrication holes of the bushing and connecting rod.
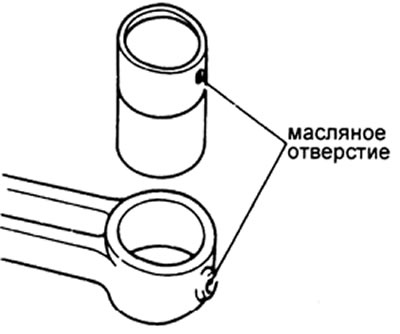
G) Using a tool and a press, press in the bushing.
d) Using a piston pin grinder, hone the bushing until the nominal clearance between the bushing and the piston pin is reached (see above).
e) Check piston pin fit at room temperature. Lubricate the piston pin with engine oil, then push it into the connecting rod bush with your thumb.