
- Release all the air from the shock absorber by moving the piston up and down several times, making sure the piston makes a full stroke each time. Pull out the piston rod when the side of the steering knuckle is down; recess the piston rod when the side of the steering knuckle is at the top.
- Place the lower rubber cushion of the spring and the rubber bumper onto the shock absorber strut or onto the piston rod, as shown in Figure 187. As can be seen from Figure 188, the end of the spring must fit exactly into the guide marked with a circle.
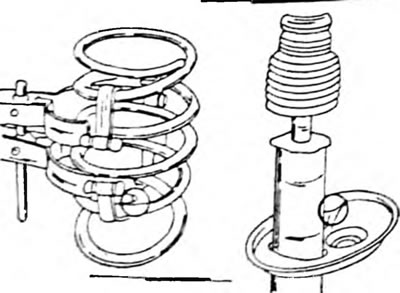
Pic. 188. When putting on the spring, ensure that the spring with the end of its lower coil enters the spring cushion
- Align the hole surface of the upper spring cup with the guide surfaces of the piston rod. Cup side with inscription "OUT" should be facing outwards. If both shock absorber struts are removed at the same time, be careful not to mix up both spring cups. To avoid mistakes, the right spring cup is marked "R", and the left one - "L".
- Lubricate the outside of the dust protection ring with multi-purpose grease and install it.
- Compress the coil spring using the device shown in Figure 186, put on the upper bearing of the shock absorber strut and screw a new nut onto the piston rod. While tightening the nut, hold the spring cup. At TOYOTA service stations, a special device is used for this, which is placed on the bosses of the upper spring cup ("4" in figure 187). Figure 189 shows the use of this device. The nut is tightened with a tightening torque of 50 Nm.
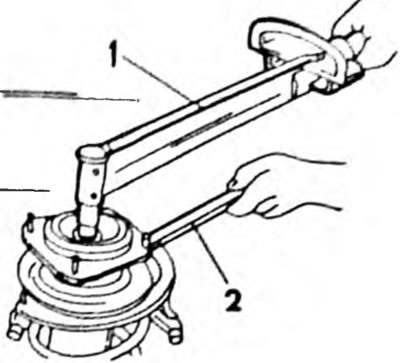
Pic. 189. When tightening the piston rod nut with a torque wrench, keep the spring cup from turning 1. Torque wrench; 2. Retaining device.
- Fill the bearing in the shock-absorbing strut support with grease and install the cap.