
- The pistons and connecting rods are removed from the inside of the cylinder with the hammer handle upwards, after removing the connecting rod bearing caps and bearing shells. When carrying out this work, the instructions regarding markings, installation positions, etc. must be observed.
- Number each piston and corresponding connecting rod according to the number of the cylinder from which they are removed. This is best done by painting the bottom of the piston. Also mark the piston crown with an arrow towards the front of the engine.
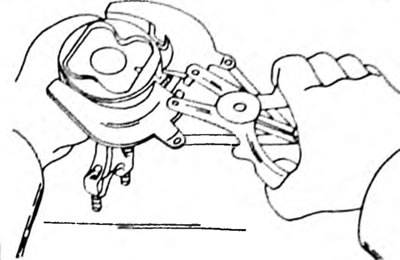
- When removing the piston with connecting rod, take into account the exact installation position and immediately after removal mark the cylinder number on one side of the bearing cap. This is best done using a core (cylinder No. 1 - one blow, etc. Fig. 22).
- Mark the bearing shells in relation to the connecting rod and the bearing cap. Also mark the lower and upper bearing shells with paint on the back side.
- Remove the bearing caps and shells and remove the parts as mentioned above. If necessary, remove the ring of burnt oil deposits from the top of the cylinders.
- Using piston ring pliers, remove the piston rings one by one (Pic. 87). If the rings are to be installed again, mark them accordingly. If you don't have piston ring pliers, you can slide metal strips under the ring on opposite sides of the piston and slide the ring off. To avoid scratches, place a strip under the joint of the ring.
Pic. 87. Removing or installing a piston ring using piston ring cylinders. To avoid breaking the ring, there is no need to move the tongs apart.
Pistons and connecting rods should only be disassembled when absolutely necessary. To check the condition of the pistons and connecting rods, hold the connecting rod in your hand as shown in Figure 88 and tilt the piston in both directions. If the piston "capsizes", replace the pistons and connecting rods as a set. The pins are pressed into the connecting rods and must be released using a press.
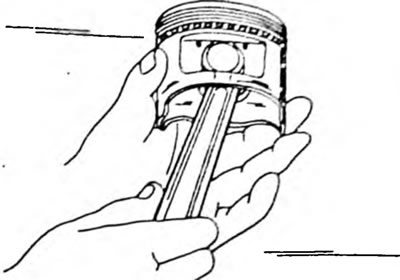
Pic. 88. Piston group control