



System diagnostics
1. Checking the airbag system warning light.
Turn the ignition switch to the "ACC" or "ON" position, check that the indicator lamp comes on and goes out after about 6 seconds.
Note: If the ignition switch is in the ACC or ON position and the indicator light remains on or flashes, check the fault code.
If the indicator light comes on occasionally or remains on even when the ignition switch is in the "OFF" position, check for a short in the indicator light circuit.
2. Reading fault codes.
a) Turn the ignition switch to the "ACC" or "ON" position and wait approximately 20 seconds.
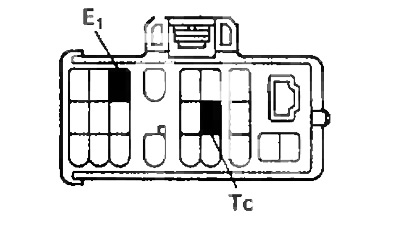
b) Connect the terminals "TWITH" ("11") and "E₁" ("3") of the diagnostic connector.
Note: Incorrect connection of terminals may cause system failure.
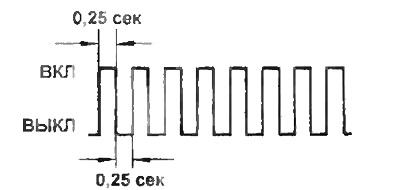
c) If there is no fault, the indicator will flash 2 times per second.
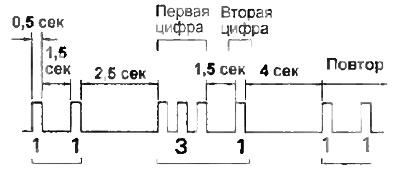
d) If there is a malfunction, the indicator will start to flash with a variable frequency. Determine the malfunction codes. The figure shows an example of the output of codes "11" and "31".
3. Clearing fault codes.
a) Set the ignition switch to the OFF (LOCK) position.
b) Connect two wires to terminals "5" (AB) and "11" (TC).
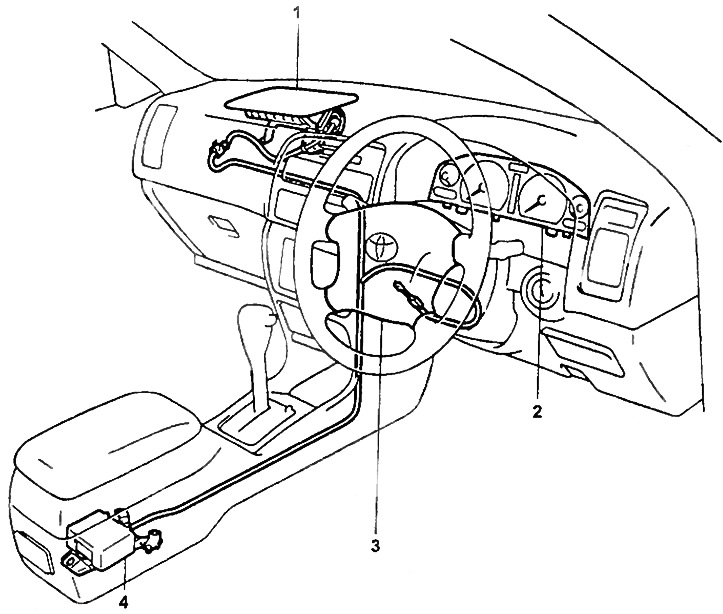
SRS system produced since 1996.
1 - passenger airbag,
2 - SRS warning light,
3 - driver's airbag,
4 - central SRS sensor.
c) Set the ignition switch to the ACC or ON position, wait 6 seconds.
d) At intervals of 1 second, ground first the "TC" terminal, then "AB" (while simultaneously disconnecting the "ground" from the "TC" terminal).
d) Make sure that the indicator will flash 2 times per second.
SRS Trouble Code Table
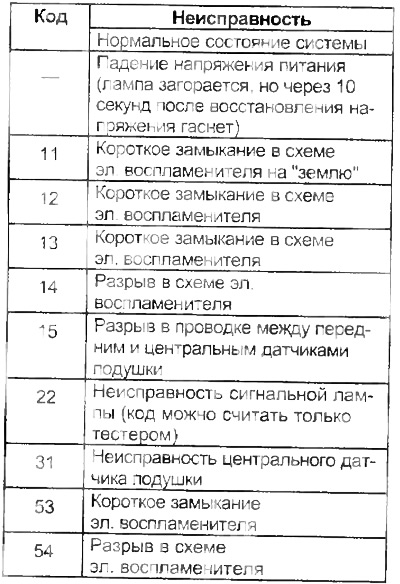
Note:
- When two or more fault codes are displayed, they are displayed starting with the lowest number.
- If a code not listed in the table is displayed, the airbag sensor is faulty.
Driver's airbag
Removal and installation
Disconnect the parts shown in the figure.
When installing, tighten the threaded connections to the specified torque.
Installation of spiral cable
1. Install the spiral cable so that the protrusions on it match the corresponding recesses (see picture).
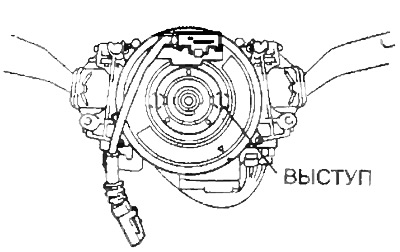
2. Fix the spiral cable with four screws and connect the connector
Note: When installing a new spiral cable, remove the safety pin.
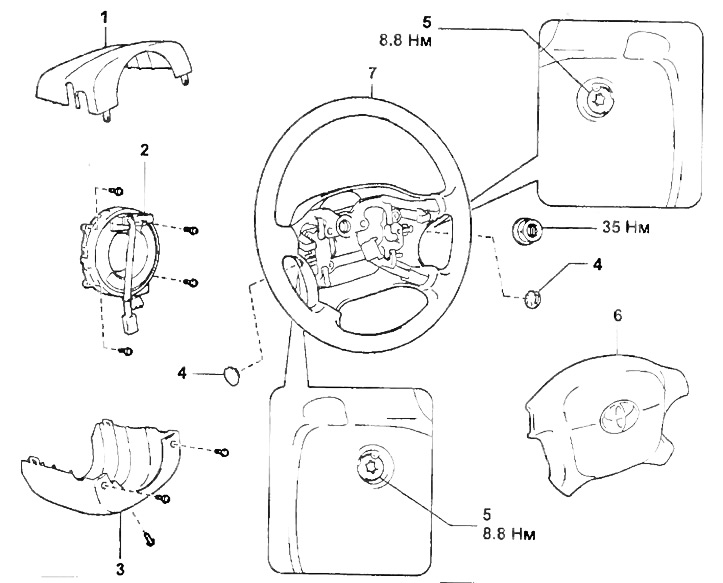
Removing and installing the driver's airbag:
1 - upper steering column cover,
2 - spiral wire,
3 - lower steering column cover,
4, 5 - bolt cap and steering wheel trim mounting bolt,
6 - steering wheel cover,
7 - steering wheel.
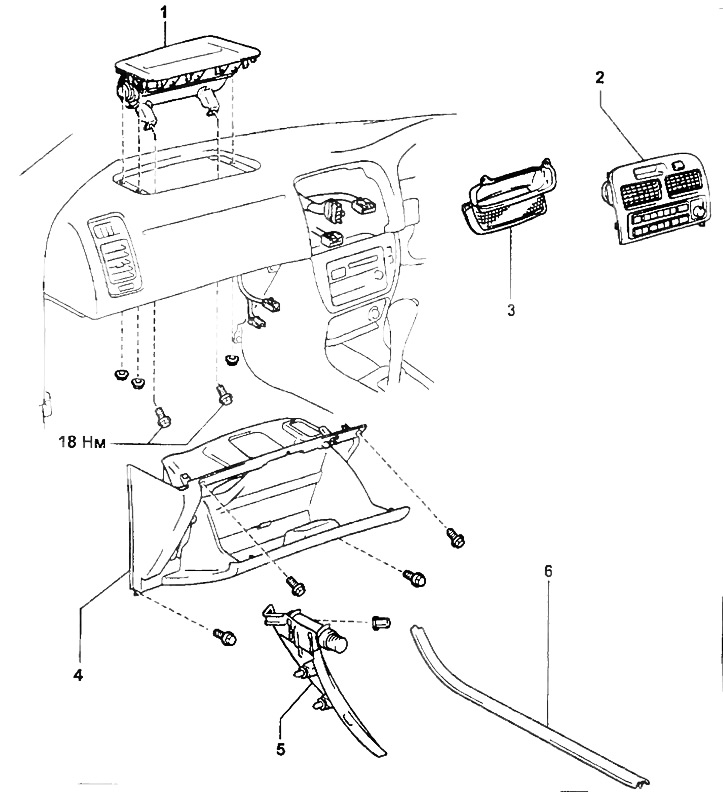
Removing and installing the passenger airbag:
1 - airbag unit,
2 - control panel for air conditioning and heating systems,
3 - connecting casing and air filter,
4 - storage box,
5 - side body trim,
6 - left front door sill trim.
Passenger airbag
Removal and installation
1. Disconnect the battery.
2. Disconnect the airbag connector.
a) Remove the glove compartment trim panel and disconnect the connector from it.
b) Disconnect the connector.
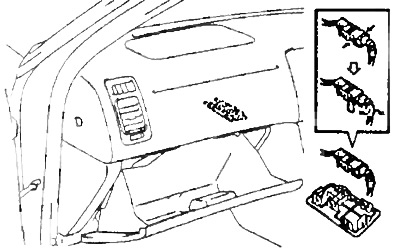
3. Remove the airbag.
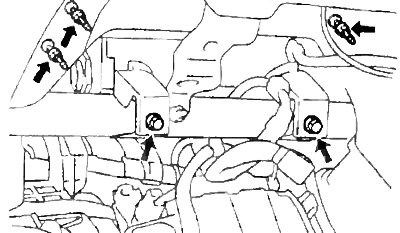
a) Remove 4 screws and remove lower trim panel No.2 of the instrument panel.
b) Remove 2 bolts and disconnect the airbag from the instrument panel reinforcement.
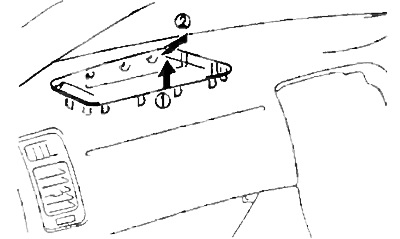
c) Unscrew the 3 nuts, remove the fasteners and remove the cushion from the instrument panel.
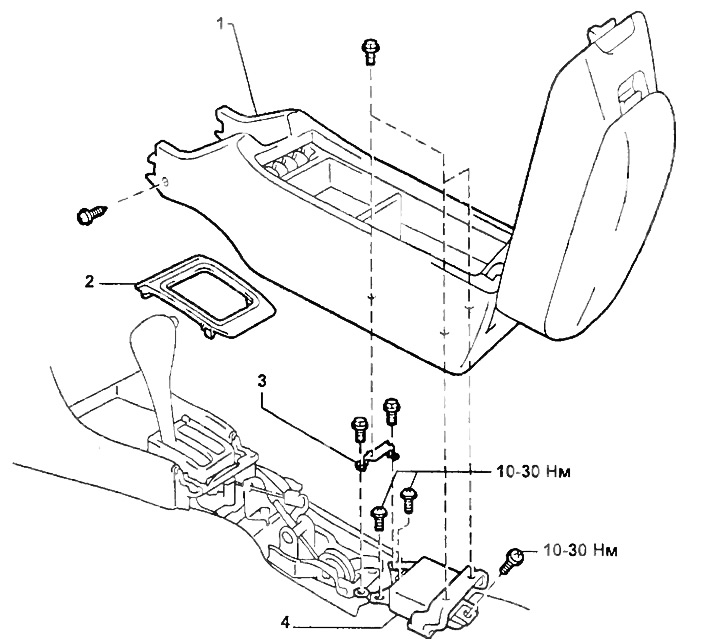
Removing the airbag control unit:
1 - center console,
2 - automatic transmission selector trim panel,
3 - bracket No.1 for fastening the center console box,
4 - airbag control unit.
Airbag control unit
The airbag control unit is mounted on the floor under the center console. The unit consists of an airbag sensor, diagnostic and control circuits, etc.
Removal
1. Disconnect the battery,
2. Remove the center console.
3. Remove the automatic transmission selector trim panel.
4. Remove the airbag control unit.
a) Disconnect the airbag connector from the control unit.
b) Unscrew 3 bolts and remove the control unit.
5. Check the control unit for deformation, damage. In case of malfunction, replace it with a new one.
Note: Do not measure the resistance of the control unit circuits or disassemble it.
Installation
1. Set the ignition switch to the OFF or LOCK position. Disconnect the battery. Do not perform the following work earlier than 90 seconds later.
2. Then secure the central airbag sensor with bolts.
Publication Reprinted from a web portal [www.TOYOTAMAN.ru]
Note: When installing the unit, tighten the threaded connections to the specified torque.
3. Connect the connector to the sensor.
4. Check fault codes.