



Share information:
Electrical equipment of the car engine Toyota Camry 1 (XV10)

Technical characteristics of the engine electrical equipment
Setting the ignition timing (all models) with test clamps TE1 and E1 10° before TDC without test clamps TE1 and E1 12 – 22° before TDC Ignition coil Ignition coil mounted on the distributor – resistance of the primary...
Setting the ignition timing (all models) with test clamps TE1 and E1 10° before TDC without test clamps TE1 and E1 12 – 22° before TDC Ignition coil Ignition coil mounted on the distributor – resistance of the primary...

Battery — Removal and Installation
Warning! If your radio has an anti-theft code, check that you have the connection codes before disconnecting the battery. Caution! On models from 1993 onwards, the air bag system is disabled if the battery is...
Warning! If your radio has an anti-theft code, check that you have the connection codes before disconnecting the battery. Caution! On models from 1993 onwards, the air bag system is disabled if the battery is...

Ignition system — design description
The four-cylinder 5S-FE engines and the six-cylinder 3VZ-FE engines are equipped with an electronic ignition system with a distributor. The 1MZ-FE V6 engines are equipped with an electronic ignition system without a...
The four-cylinder 5S-FE engines and the six-cylinder 3VZ-FE engines are equipped with an electronic ignition system with a distributor. The 1MZ-FE V6 engines are equipped with an electronic ignition system without a...
Ignition system with ignition distributor — check
1. If the engine turns over with the starter but does not start, remove the spark plug wire from any spark plug and, using a tool with insulated handles, place the end of the wire 6 mm from the ground. 2. While turning...
1. If the engine turns over with the starter but does not start, remove the spark plug wire from any spark plug and, using a tool with insulated handles, place the end of the wire 6 mm from the ground. 2. While turning...

Ignition system without distributor — check
1. Using a special tester for checking the ignition system without a distributor, connect the tester clamp to the ground and the high-voltage wire and, while turning the engine with the starter, observe the tester...
1. Using a special tester for checking the ignition system without a distributor, connect the tester clamp to the ground and the high-voltage wire and, while turning the engine with the starter, observe the tester...

Ignition Coil, Mounted Separately — Checking and Replacing
Examination Warning! If your radio has an anti-theft code, check that you have the connection codes before disconnecting the battery. Caution! On models from 1993 onwards, the airbag system is disabled if the battery is...
Examination Warning! If your radio has an anti-theft code, check that you have the connection codes before disconnecting the battery. Caution! On models from 1993 onwards, the airbag system is disabled if the battery is...

Internal Ignition Coil — Checking and Replacing
Examination Warning! If your radio has an anti-theft code, check that you have the connection codes before disconnecting the battery. Caution! On models from 1993 onwards, the airbag system is disabled if the battery is...
Examination Warning! If your radio has an anti-theft code, check that you have the connection codes before disconnecting the battery. Caution! On models from 1993 onwards, the airbag system is disabled if the battery is...

Ignition system without distributor — check and replacement
Examination 1. Disconnect the electrical connectors from the ignition coils. Connect an ohmmeter to the ignition coil terminals and check the resistance of the ignition coil winding. Replacement 1. Remove the ground...
Examination 1. Disconnect the electrical connectors from the ignition coils. Connect an ohmmeter to the ignition coil terminals and check the resistance of the ignition coil winding. Replacement 1. Remove the ground...

Ignition distributor — removal and installation
Removal 1. Remove the ground cable from the battery. 2. Disconnect the electrical connectors from the ignition distributor. 3. On the distributor cap, mark the position of the high-voltage wire of the first cylinder. 4....
Removal 1. Remove the ground cable from the battery. 2. Disconnect the electrical connectors from the ignition distributor. 3. On the distributor cap, mark the position of the high-voltage wire of the first cylinder. 4....

Checking and adjusting the ignition timing angle
Tools needed to check and adjust ignition timing 1 - Vacuum plugs, which must be used to close off vacuum hoses that are disconnected during ignition timing testing; 2 – stroboscope; 3 – a wrench required to loosen the...
Tools needed to check and adjust ignition timing 1 - Vacuum plugs, which must be used to close off vacuum hoses that are disconnected during ignition timing testing; 2 – stroboscope; 3 – a wrench required to loosen the...

Ignition unit (switch) — removal and installation
Warning! If your radio has an anti-theft code, check that you have the connection codes before disconnecting the battery. Caution! On models from 1993 onwards, the airbag system is disabled if the battery is...
Warning! If your radio has an anti-theft code, check that you have the connection codes before disconnecting the battery. Caution! On models from 1993 onwards, the airbag system is disabled if the battery is...

Pulse sensor — check
Examination 1. Disconnect the distributor electrical connector. 2. Using an ohmmeter, check the resistance between the pulse sensor contacts. 3. If the resistance differs from the required values, replace the ignition...
Examination 1. Disconnect the distributor electrical connector. 2. Using an ohmmeter, check the resistance between the pulse sensor contacts. 3. If the resistance differs from the required values, replace the ignition...

Charging system — design description
Electrical diagram of the charging system Location of the charging system components on the vehicle The charging system includes an alternator, voltage regulator, load indicator, battery, fuses and electrical wires. If...
Electrical diagram of the charging system Location of the charging system components on the vehicle The charging system includes an alternator, voltage regulator, load indicator, battery, fuses and electrical wires. If...

Generator — removal and installation
Warning! If your radio has an anti-theft code, check that you have the connection codes before disconnecting the battery. Caution! On models from 1993 onwards, the air bag system is disabled if the battery is...
Warning! If your radio has an anti-theft code, check that you have the connection codes before disconnecting the battery. Caution! On models from 1993 onwards, the air bag system is disabled if the battery is...

Checking and replacing generator components
Generator parts 1 – pulley; 2 – front cover; 3 – bearing; 4 – bearing retainer; 5 – bearing; 6 – bearing cover; 7 – retaining ring; 8 – rotor; 9 – rubber insulator; 10 – insulator; 11 – back cover; 12 – insulating...
Generator parts 1 – pulley; 2 – front cover; 3 – bearing; 4 – bearing retainer; 5 – bearing; 6 – bearing cover; 7 – retaining ring; 8 – rotor; 9 – rubber insulator; 10 – insulator; 11 – back cover; 12 – insulating...
Engine Starting System — Check
If the starter does not work in the "engine start" key position, the following reasons are possible: the battery is faulty; open circuit between ignition switch, traction relay, battery and starter; traction relay is...
If the starter does not work in the "engine start" key position, the following reasons are possible: the battery is faulty; open circuit between ignition switch, traction relay, battery and starter; traction relay is...
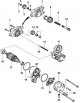
Starter — removal and installation
Warning! If your radio has an anti-theft code, check that you have the connection codes before disconnecting the battery. Caution! On models from 1993 onwards, the airbag system is disabled if the battery is...
Warning! If your radio has an anti-theft code, check that you have the connection codes before disconnecting the battery. Caution! On models from 1993 onwards, the airbag system is disabled if the battery is...

Traction relay — removal and installation
1. Remove the starter. 2. Before removing the traction relay from the starter, apply alignment marks to the starter housing and traction relay. 3. Disconnect the starter motor power wire from the traction relay. 4....
1. Remove the starter. 2. Before removing the traction relay from the starter, apply alignment marks to the starter housing and traction relay. 3. Disconnect the starter motor power wire from the traction relay. 4....
This section is available on: russian, bulgarian, belarusian, ukrainian, serbian, croatian, romanian, polish, slovak, hungarian
Similar sections for other Toyota models
➥ Engine electrical equipment Toyota Carina T190 (1992-1996)
➥ Engine electrical equipment Toyota Cruiser 100 (1998-2007)
➥ Engine electrical equipment Toyota Highlander 1 (2000-2007, petrol)
➥ Engine electrical equipment Toyota RAV 4 XA20 (2000-2005)
➥ Engine electrical equipment Toyota Corona T190 (1992-1997)
Link in different formats to this article
TEXTHTMLBB Code
- User manual
- Vehicle description
- Keys, locks and alarms
- Governing bodies
- Salon equipment
- Driving and operation
- Maintenance
- Power unit
- 4-cylinder engine
- Control system (I4)
- Engine overhaul (I4)
- 6-cylinder engine
- Control system (V6)
- Engine overhaul (V6)
- Transmission
- Clutch
- Mechanical gearbox
- Automatic gearbox
- Drive mechanism
- Chassis, running gear
- Wheels and tires
- Car suspension
- Steering
- Brake system
- Body and interior
- Exterior (external elements)
- Doors, locks and windows
- Air conditioning and heater
- Electrical equipment
- Equipment and devices
- Power devices
- Electrical circuits
- General information
- Controls and instruments
- Driving and operation
- Daily care
- Maintenance
- Power unit
- 4-cylinder engine
- 6-cylinder engine
- Engine overhaul
- Engine electrical equipment
- Cooling system
- Heating and ventilation
- Fuel system
- Exhaust system
- Transmission
- Mechanical gearbox
- Automatic gearbox
- Clutch
- Chassis, running gear
- Suspension and axle shafts
- Steering
- Brake system
- Body and interior
- Exterior (external elements)
- Interior (internal elements)
- Doors, locks and windows
- Electrical equipment
- Equipment and devices
- Electrical circuits
- General information
- User manual
- Maintenance
- Power unit
- 4-cylinder engine
- 6-cylinder engine
- Overhaul of engines
- Cooling and heating
- Fuel system
- Engine electrical equipment
- Control system
- Transmission
- Mechanical gearbox
- Automatic gearbox
- Clutch and drive shafts
- Chassis, running gear
- Brake system
- Car suspension
- Steering
- Body and interior
- Exterior (external elements)
- Interior (internal elements)
- Doors, locks and windows
- Electrical equipment
- Equipment and devices
- Headlights and lighting
- Electrical circuits
- General information
- User manual
- Maintenance
- Power unit
- Petrol engines
- Diesel engines
- Engine overhaul
- Cooling and lubrication system
- Fuel system (diesel)
- Fuel injection (petrol)
- Engine electrical equipment
- Transmission
- Clutch and cardan
- Automatic gearbox
- Chassis, running gear
- Front suspension
- Rear suspension
- Steering
- Brake system
- Body and interior
- Body elements
- Air conditioning and heater
- SRS security system
- Electrical equipment
- Equipment and devices
- Electrical circuits