



Share information:
Car engine overhaul Toyota Camry 1 (XV10)

Technical characteristics of engine overhaul
Four-cylinder engine 5S-FE Working volume 2.2 liters Compression pressure Nominal 12 bar Minimum 10 bar Oil pressure (the engine is hot): - in idle mode minimum 0.3 bar – at 3000 rpm 2.5 – 4.9 bar Cylinder head...
Four-cylinder engine 5S-FE Working volume 2.2 liters Compression pressure Nominal 12 bar Minimum 10 bar Oil pressure (the engine is hot): - in idle mode minimum 0.3 bar – at 3000 rpm 2.5 – 4.9 bar Cylinder head...
General information about engine overhauls
This section includes general techniques for disassembling the cylinder head and other engine components. The information concerns the sequence of preparation for repair and a step-by-step description of the operations...
This section includes general techniques for disassembling the cylinder head and other engine components. The information concerns the sequence of preparation for repair and a step-by-step description of the operations...

Checking the compression in the cylinders
Caution: On the 1MZ-FE V6 engine, disconnect the electrical connectors from the ignition coils. Measuring oil pressure on the 5S-FE engine Measuring oil pressure on the 3VZ-FE engine Location of oil pressure sensor on...
Caution: On the 1MZ-FE V6 engine, disconnect the electrical connectors from the ignition coils. Measuring oil pressure on the 5S-FE engine Measuring oil pressure on the 3VZ-FE engine Location of oil pressure sensor on...
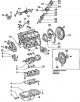
Recommendations for engine removal
Parts of the six-cylinder V6 3MZ-FE engine (the 3MZ-FE engine is similar to the 1MZ-FE engine shown except for the oil pan) 1 – oil drain plug; 2 – gasket; 3 – oil pan; 4 – oil pan partition; 5 – main bearing cap; 6 –...
Parts of the six-cylinder V6 3MZ-FE engine (the 3MZ-FE engine is similar to the 1MZ-FE engine shown except for the oil pan) 1 – oil drain plug; 2 – gasket; 3 – oil pan; 4 – oil pan partition; 5 – main bearing cap; 6 –...

Removal and installation the engine
Caution: Read the entire engine removal section before removing the engine. Caution: Since the vehicle is equipped with an air bag that may deploy if work is performed with the battery connected, it is necessary to...
Caution: Read the entire engine removal section before removing the engine. Caution: Since the vehicle is equipped with an air bag that may deploy if work is performed with the battery connected, it is necessary to...

Engine disassembly sequence
Removal the right powertrain mount Attention! When dismantling the above parts, pay attention to the features of their removal. Remember the installation positions of gaskets, sealing rings, spacers, pins, brackets,...
Removal the right powertrain mount Attention! When dismantling the above parts, pay attention to the features of their removal. Remember the installation positions of gaskets, sealing rings, spacers, pins, brackets,...

Disassembling the cylinder head
1. When disassembling the cylinder head, mark the parts so that they can be installed in their proper places. 2. Before removing the valves, prepare a storage area for the relevant parts. 3. Using a valve spring...
1. When disassembling the cylinder head, mark the parts so that they can be installed in their proper places. 2. Before removing the valves, prepare a storage area for the relevant parts. 3. Using a valve spring...

Cleaning and inspection of the cylinder head
Cleaning 1. Remove the remains of the old gasket from the cylinder head. 2. Clean carbon deposits from combustion chambers, then wash the head in a suitable solvent. 3. Clean any carbon deposits from the valves, perhaps...
Cleaning 1. Remove the remains of the old gasket from the cylinder head. 2. Clean carbon deposits from combustion chambers, then wash the head in a suitable solvent. 3. Clean any carbon deposits from the valves, perhaps...

Cylinder head assembly
1. Dip the valve stem seal into fresh engine oil and install it on the valve guide. Use a special metal mandrel to install the valve stem seals. 2. Lubricate the valve stems with engine oil and insert them into their...
1. Dip the valve stem seal into fresh engine oil and install it on the valve guide. Use a special metal mandrel to install the valve stem seals. 2. Lubricate the valve stems with engine oil and insert them into their...

Removal pistons with connecting rods
1. Remove the cylinder head, oil pan and oil pickup pipe. 2. On 5S-FE engines, remove the balancer assembly. 3. If there is carbon deposits on the top of the cylinder, remove them with a soft scraper or special tool....
1. Remove the cylinder head, oil pan and oil pickup pipe. 2. On 5S-FE engines, remove the balancer assembly. 3. If there is carbon deposits on the top of the cylinder, remove them with a soft scraper or special tool....

Removal the crankshaft
Caution! The crankshaft can only be removed from the engine that has been removed from the vehicle. Also, it is necessary to remove the flywheel, vibration damper, toothed belt, oil pan, oil receiver pipe with mesh...
Caution! The crankshaft can only be removed from the engine that has been removed from the vehicle. Also, it is necessary to remove the flywheel, vibration damper, toothed belt, oil pan, oil receiver pipe with mesh...

Engine Cylinder Block — Cleaning and Checking
Cleaning 1. Remove all components and electrical sensors from the cylinder block. For complete cleaning, remove the service plugs. To remove the service plug, use a punch to turn the service plug in the socket and... 2....
Cleaning 1. Remove all components and electrical sensors from the cylinder block. For complete cleaning, remove the service plugs. To remove the service plug, use a punch to turn the service plug in the socket and... 2....

Pistons and connecting rods — check
1. Before checking the pistons with connecting rods, remove the piston rings from the pistons and thoroughly clean the pistons. 2. To remove piston rings from pistons, spread the piston ring and insert two or three old...
1. Before checking the pistons with connecting rods, remove the piston rings from the pistons and thoroughly clean the pistons. 2. To remove piston rings from pistons, spread the piston ring and insert two or three old...

Crankshaft — Check
1. Clean the crankshaft using a suitable solvent and dry it with compressed air. 2. Check the crankshaft main and connecting rod journals for wear, corrosion and cracks. 3. Wear of the connecting rod journal is...
1. Clean the crankshaft using a suitable solvent and dry it with compressed air. 2. Check the crankshaft main and connecting rod journals for wear, corrosion and cracks. 3. Wear of the connecting rod journal is...
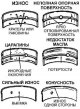
Inspection and selection of main and connecting rod bearings
Inspection Typical bearing defects Even though the main and connecting rod bearings are subject to replacement during an engine overhaul, they should be carefully inspected as they can provide valuable information...
Inspection Typical bearing defects Even though the main and connecting rod bearings are subject to replacement during an engine overhaul, they should be carefully inspected as they can provide valuable information...

Checking the balancer assembly play (engine 5S-FE)
5S-FE Engine Balancer Parts 1. Set the marks on balance shaft No.2 as shown in the figure. 2. Then turn the balance shaft so that the mark D is aligned with the pointer on the casing. 3. Using pliers, secure balance...
5S-FE Engine Balancer Parts 1. Set the marks on balance shaft No.2 as shown in the figure. 2. Then turn the balance shaft so that the mark D is aligned with the pointer on the casing. 3. Using pliers, secure balance...
Sequence of engine assembly during major repairs
Assembly of a four-cylinder engine must be performed in the following order: piston rings; crankshaft and main bearings; pistons and connecting rods; rear crankshaft seal ring; balancer assembly; cylinder head and...
Assembly of a four-cylinder engine must be performed in the following order: piston rings; crankshaft and main bearings; pistons and connecting rods; rear crankshaft seal ring; balancer assembly; cylinder head and...

Installing piston rings
1. Before installing new piston rings, check the piston ring gap. 2. Position the pistons and piston rings according to the cylinders they will operate in. 3. Install the top sealing ring into the first cylinder and use...
1. Before installing new piston rings, check the piston ring gap. 2. Position the pistons and piston rings according to the cylinders they will operate in. 3. Install the top sealing ring into the first cylinder and use...

Installing the crankshaft and checking the bearing clearances
1. Installing the crankshaft is the first step in assembling the engine. Make sure the cylinder block and crankshaft are clean. 2. Remove the bolts and main bearing caps or cap assembly and arrange the bearing caps in...
1. Installing the crankshaft is the first step in assembling the engine. Make sure the cylinder block and crankshaft are clean. 2. Remove the bolts and main bearing caps or cap assembly and arrange the bearing caps in...

Installing the rear crankshaft seal ring
1. Using a drift and hammer, tap the rear crankshaft seal ring out of the rear crankshaft cover. 2. Lubricate the outside surface of the new crankshaft rear seal ring and, using a wooden block, install the seal ring...
1. Using a drift and hammer, tap the rear crankshaft seal ring out of the rear crankshaft cover. 2. Lubricate the outside surface of the new crankshaft rear seal ring and, using a wooden block, install the seal ring...

Installing pistons and connecting rods, checking bearing clearances
Location of piston ring locks on the piston 1. Clean the back of the bearing and its installation place in the connecting rod and the connecting rod cap. The lubrication holes in the connecting rod and bearing should be...
Location of piston ring locks on the piston 1. Clean the back of the bearing and its installation place in the connecting rod and the connecting rod cap. The lubrication holes in the connecting rod and bearing should be...

Installing the balancer assembly (engine 5S-FE)
Initial position of balancer marks No.2 Sequence of tightening the balancer assembly mounting bolts Positions in which it is necessary to measure the play of the balance shaft No.1 in relation to the crankshaft...
Initial position of balancer marks No.2 Sequence of tightening the balancer assembly mounting bolts Positions in which it is necessary to measure the play of the balance shaft No.1 in relation to the crankshaft...
Starting the engine after major repairs
1. With the engine installed in the engine bay of the vehicle, check the engine oil and coolant levels. Check that all previously removed wires and hoses are in place. 2. Disconnect the electrical connector from the...
1. With the engine installed in the engine bay of the vehicle, check the engine oil and coolant levels. Check that all previously removed wires and hoses are in place. 2. Disconnect the electrical connector from the...
This section is available on: russian, bulgarian, belarusian, ukrainian, serbian, croatian, romanian, polish, slovak, hungarian
Similar sections for other Toyota models
➥ Engine overhaul Toyota RAV 4 XA20 (2000-2005)
➥ Engine overhaul Toyota Corona T190 (1992-1997)
➥ Engine overhaul Toyota 4Runner N120 (1989-1995)
➥ Overhaul engine Toyota Dyna Y50/Y60 (1984-1995)
➥ Engine repair Toyota Carina T190 (1992-1996)
➥ Overhaul of engines Toyota Highlander 1 (2000-2007, petrol)
Link in different formats to this article
TEXTHTMLBB Code
- User manual
- Vehicle description
- Keys, locks and alarms
- Governing bodies
- Salon equipment
- Driving and operation
- Maintenance
- Power unit
- 4-cylinder engine
- Control system (I4)
- Engine overhaul (I4)
- 6-cylinder engine
- Control system (V6)
- Engine overhaul (V6)
- Transmission
- Clutch
- Mechanical gearbox
- Automatic gearbox
- Drive mechanism
- Chassis, running gear
- Wheels and tires
- Car suspension
- Steering
- Brake system
- Body and interior
- Exterior (external elements)
- Doors, locks and windows
- Air conditioning and heater
- Electrical equipment
- Equipment and devices
- Power devices
- Electrical circuits
- General information
- Controls and instruments
- Driving and operation
- Daily care
- Maintenance
- Power unit
- 4-cylinder engine
- 6-cylinder engine
- Engine overhaul
- Engine electrical equipment
- Cooling system
- Heating and ventilation
- Fuel system
- Exhaust system
- Transmission
- Mechanical gearbox
- Automatic gearbox
- Clutch
- Chassis, running gear
- Suspension and axle shafts
- Steering
- Brake system
- Body and interior
- Exterior (external elements)
- Interior (internal elements)
- Doors, locks and windows
- Electrical equipment
- Equipment and devices
- Electrical circuits
- General information
- User manual
- Maintenance
- Power unit
- 4-cylinder engine
- 6-cylinder engine
- Overhaul of engines
- Cooling and heating
- Fuel system
- Engine electrical equipment
- Control system
- Transmission
- Mechanical gearbox
- Automatic gearbox
- Clutch and drive shafts
- Chassis, running gear
- Brake system
- Car suspension
- Steering
- Body and interior
- Exterior (external elements)
- Interior (internal elements)
- Doors, locks and windows
- Electrical equipment
- Equipment and devices
- Headlights and lighting
- Electrical circuits
- General information
- User manual
- Maintenance
- Power unit
- Petrol engines
- Diesel engines
- Engine overhaul
- Cooling and lubrication system
- Fuel system (diesel)
- Fuel injection (petrol)
- Engine electrical equipment
- Transmission
- Clutch and cardan
- Automatic gearbox
- Chassis, running gear
- Front suspension
- Rear suspension
- Steering
- Brake system
- Body and interior
- Body elements
- Air conditioning and heater
- SRS security system
- Electrical equipment
- Equipment and devices
- Electrical circuits