



Location of electric window lift control system components
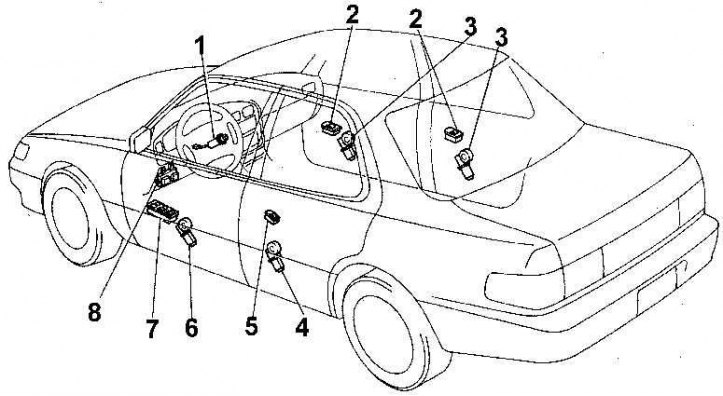
1 – ignition switch; 2 – window lift switch; 3 – window lift motor; 4 – window lift motor; 5 – window lift switch; 6 – window lift motor; 7 – Driver's door window switch; 8 – connection block No.1 (fuse and main relay)
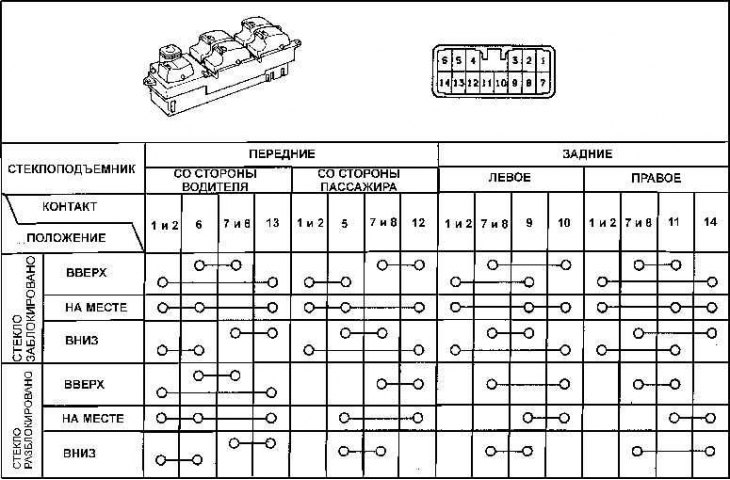
Main window switch and the state of the contacts on the switch at different switch positions
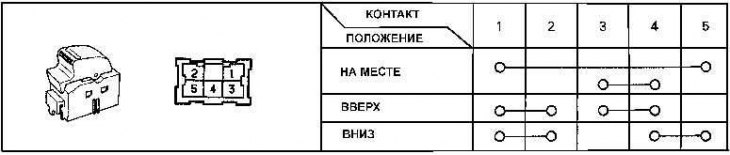
Window lift switch and state of contacts on the switch at different switch positions
Electric windows only operate when the ignition is on.
Each window lifter has a separate reversing motor. The position of the window lifter switch determines the polarity of the voltage supplied to the motor and sets the direction of rotation of the electric motor. On some vehicles, an overload relay is installed in the power supply circuit of each window lifter motor.
To test the functionality of the main window switch located on the driver's door, remove the electrical connector from the switch and remove the switch from the door.
Using an ohmmeter, check the switch contacts for closure in different switch positions (see fig. Main window switch and state of contacts on the switch at different switch positions).
To test the remaining door window switches, remove the switch and, using an ohmmeter, check for contact closure at the switch in various switch positions (see fig. Window lift switch and state of contacts on the switch at different switch positions).
If the window switches are OK but the window does not work, check the power supply to the window motor.
If power is reaching the window motor and the window does not operate, disconnect the door glass from the window motor and move the glass manually to check for ease and smoothness of movement. If the glass moves easily, replace the window motor.