
Removing the windshield
1. Remove the ventilation grill.
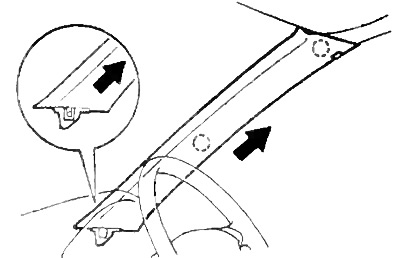
2. Disconnect two pistons and remove the top furnish of a forward rack, as it is shown in drawing.
3. Remove sun visors and holders.
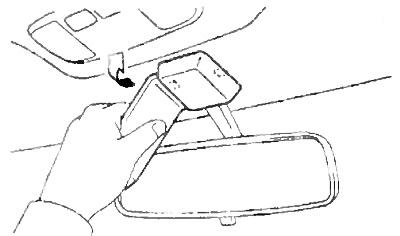
4. Remove an internal mirror.
5. Remove the front dome light assembly.
6. Remove the top lateral handles of salon.
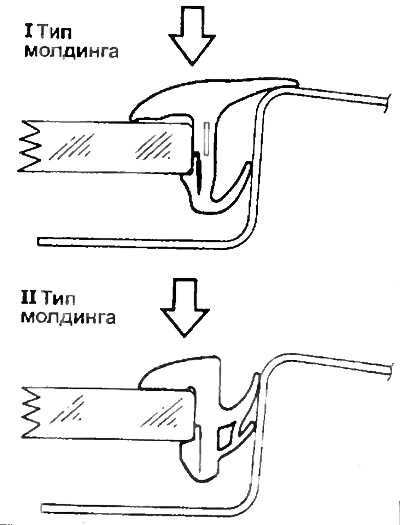
7. Remove the side and top windshield moldings.
8. Remove the windshield.
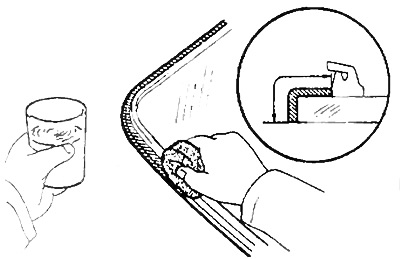
A) Pull the string from the saloon.
b) Fasten the ends of the string to wooden blocks.
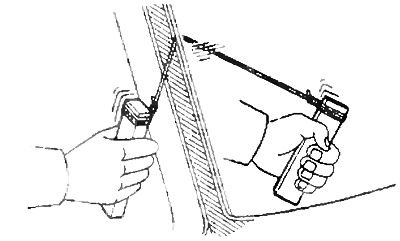
Note: Apply adhesive tape to the outer surface of the windshield to avoid scratching the surface.
Attention: when removing the glass, take care not to damage the painted surfaces and finishes. To avoid damaging the panel when removing the windshield, place a plastic sheet between the string and the panel.
V) Use a string to cut off the layer of glue.
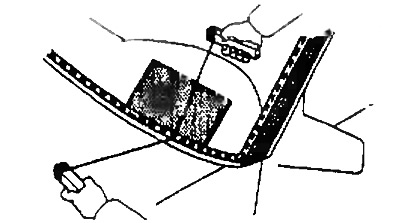
G) Remove glass.
Attention: when cutting, leave as much glue as possible on the body.
Windshield installation
1. Align and clean the contact surface of the body.
A) Use a knife to even out the layer of glue remaining on the body, be careful not to damage the paintwork of the body.
b) Clean the cut surface with solvent.
2. If necessary, replace the stopper.
A) Replace damaged stopper.
b) Clean the place of installation of the stopper from the old glue.
Note: When cleaning, take care not to damage the painted surface of the body.
V) Clean the stopper installation site with solvent.
G) Install a new stopper on the car body.
3. Clean the windshield.
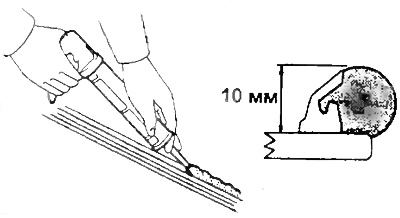
A) Using a scraper, remove the adhesive remaining on the glass.
b) Clean glass with solvent.
Attention: do not touch the cleaned glass surface.
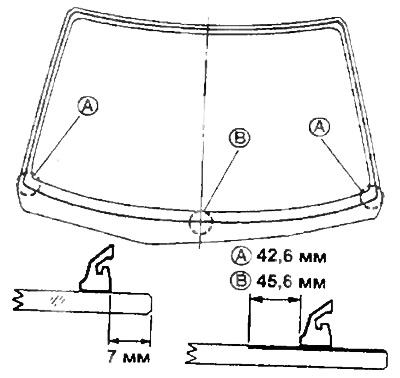
4. Remove old and install new holders as shown.
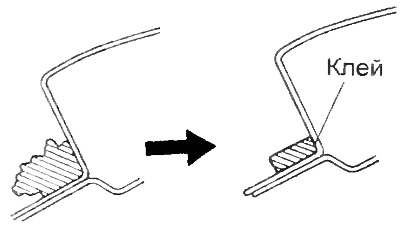
5. Installing the seal.
A) Stick double-sided adhesive tape on the glass.
b) Position the seal on the adhesive tape as shown in the illustration.

Windshield.
1, 2 - glass seal,
3 - top seal,
4 - stopper,
5 - fixing element,
6 - holder,
7 - molding,
8 - windshield,
9 - front door seal,
10 - finishing of the front pillar,
11 - side molding (left and right),
12 - upper molding,
13 - interior mirror,
14 - sun visor,
15 - holder,
16 - front cover of lighting assembly,
17 - handle,
18 - wiper leash,
19 - ventilation grill,
20 - sealant.
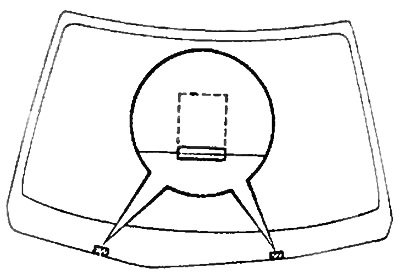
6. Mark.
A) Position the glass as shown in the illustration.
b) Make sure that the glass contact surface is completely flat and does not touch the bottom brackets.
V) Apply alignment marks to the glass and body.
G) Remove glass.
7. Coat the contact surface of the stele with a primer.
Attention:
- the drying time of the primer is at least 3 minutes.
- do not prime the adhesive.
- open primer cannot be reused.
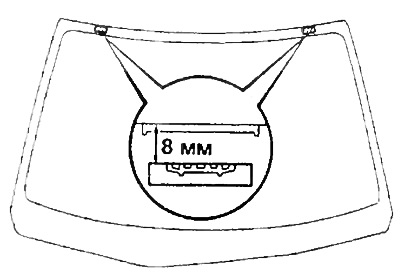
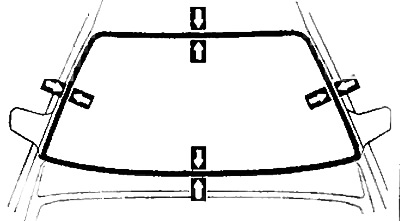
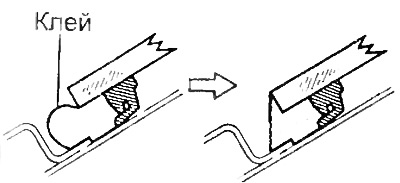
8. Using a syringe, apply adhesive to all glass contact surfaces along the ledge as shown.
9. Install glass.
Note: Make sure the seal is installed correctly as shown in the picture.
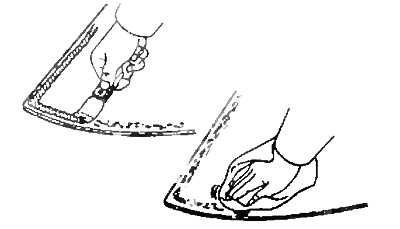
A) Position the glass according to the alignment marks and carefully push it along the rim.
b) Apply adhesive to the edge of the glass with a spatula.
V) Remove excess adhesive with a spatula.
G) Press firmly on the glass to keep it on the adhesive.
10. Checking and eliminating leaks in the connection.
A) After the curing time has elapsed, check the tightness of the joint.
b) Repair leaks with automotive glass sealant.
11. Apply adhesive and install windshield top and side moldings.
12. Install the following parts:
A) Side and upper windshield moldings.
b) Upper side handles.
V) Front light cover assembly.
G) Internal mirror.
d) Sun visors and holders.
e) The upper trim of the front pillar.
and) Ventilation grill.