
Front and rear door adjustment
Note: If necessary, replace the center bolt with a standard one.
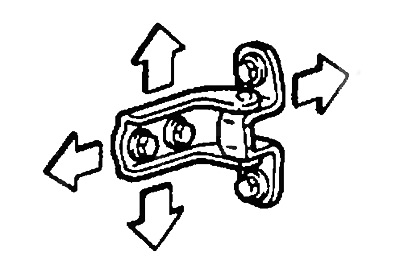
1. Door adjustment in longitudinal and vertical directions.
Loosen the door hinges to the body and adjust the door.
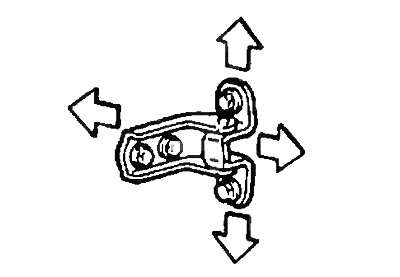
2. Door adjustment in transverse and vertical directions.
Loosen the hinges on the door and adjust the door.
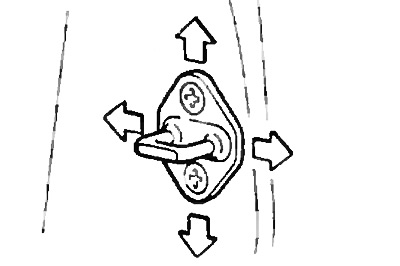
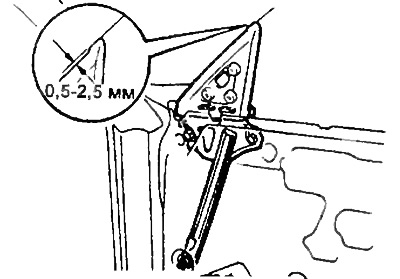
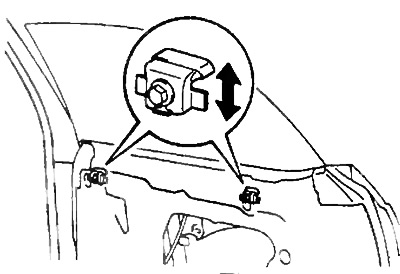
3. Adjustment of the lock bracket.
Slightly loosen the bracket fixing screws, tapping with a plastic mallet to adjust the bracket position.
Frameless Front Door - Glass Adjustment
Note:
- Before adjusting the position of the glass, check and, if necessary, adjust the gaps between the body and the front door (see fig. "Front and rear doors without frame. Adjustment of gaps between body and doors").
- The gaps between the body and the doors are shown in the figure "Front door without frame. Glass position adjustment".
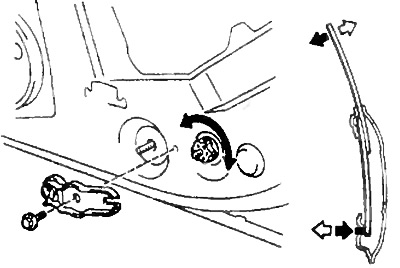
1. To adjust the position of the upper edge of the glass (in the direction "inside-out") turn the adjusting nut in the desired direction as shown in the figure.
2. If you need to adjust the position of the glass guide, select the shims of the desired thickness.
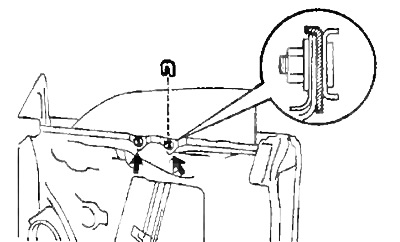
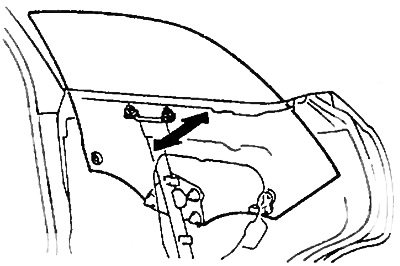
3. Loosen the nuts securing the glass to the rail and adjust the position of the glass in the directions shown in the figure.
4. If necessary, adjust the position of the glass travel stops as shown in the figure.
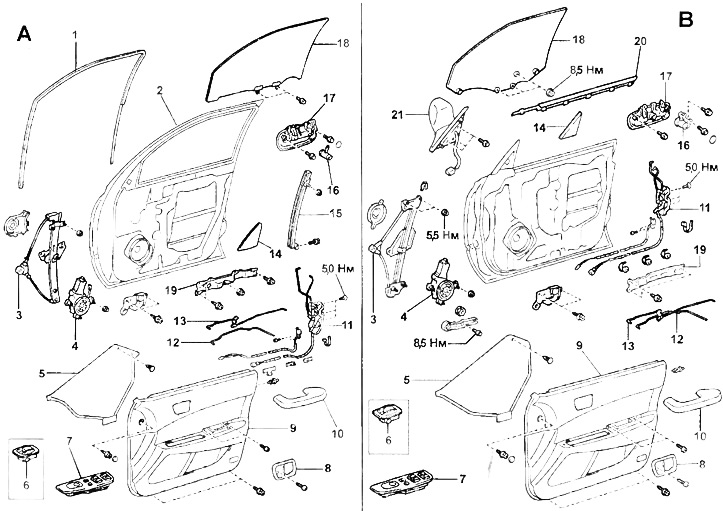
Front door
A - a door with a frame,
B - door without a frame,
1 - glass seal,
2 - door frame,
3 - power window mechanism,
4 - power window motor,
5 - technological hole cover,
6 - power windows control panel (passenger side door),
7 - power windows control panel (driver's side door),
8 - internal handle for tearing off the door,
9 - finishing panel of the door,
10 - internal handle for closing the door,
11 - door lock,
12 - internal locking rod,
13 - lock rod,
14 - outside mirror cover,
15 - lower frame of the glass guide,
16 - lock cylinder,
17 - outer door handle,
18 - door glass,
19 - amplifier,
20 - lower molding,
21 - outside mirror.
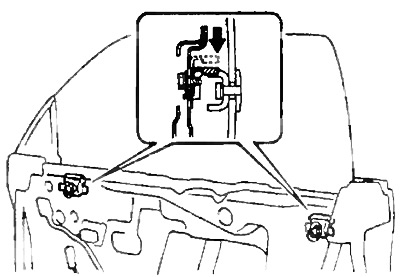
5. If you need to adjust the gap between the glass and the front guide, remove the trim, loosen the guide fasteners and adjust the gap.
Rear door without frame - glass adjustment
Note:
- Before adjusting the position of the glass, check and if necessary. adjust the gaps between the body and the rear door (see fig. "Front and rear doors without frame. Adjustment of gaps between body and doors").
- The gaps between the body and the doors are shown in the figure "Back door without frame. Glass position adjustment".
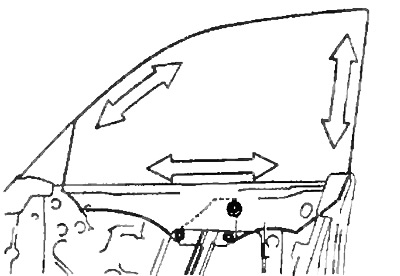
1. To adjust the position of the upper edge of the glass (in the direction "inside-out") turn the adjusting nut in the desired direction as shown in the figure.
2. If it is necessary to adjust the position of the glass guide, loosen the fastening nuts and move the guide in the desired direction.
3. Loosen the nuts securing the glass to the rail and adjust the position of the glass in the directions shown in the figure.
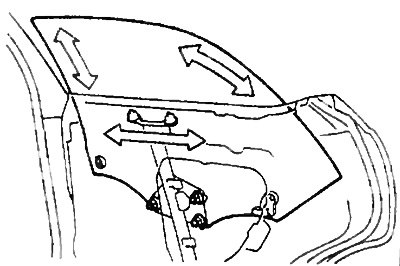
4. If necessary, adjust the position of the glass travel stops as shown in the figure.
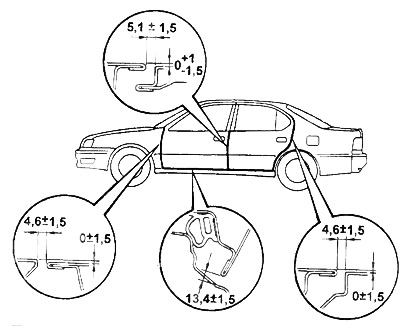
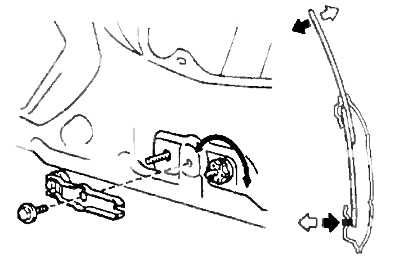
Front and rear doors with frame. Adjustment of clearances between body and doors.
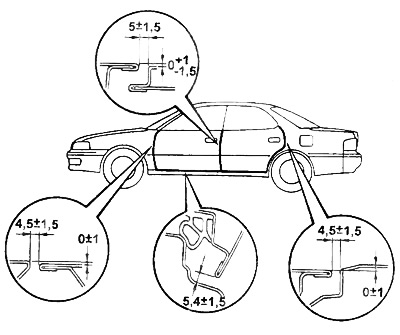
Front and rear doors without frame. Adjustment of clearances between body and doors.
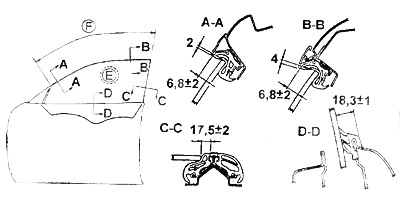
Front door without frame. Glass position adjustment.
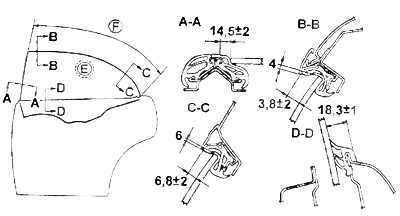
Back door without frame. Glass position adjustment.
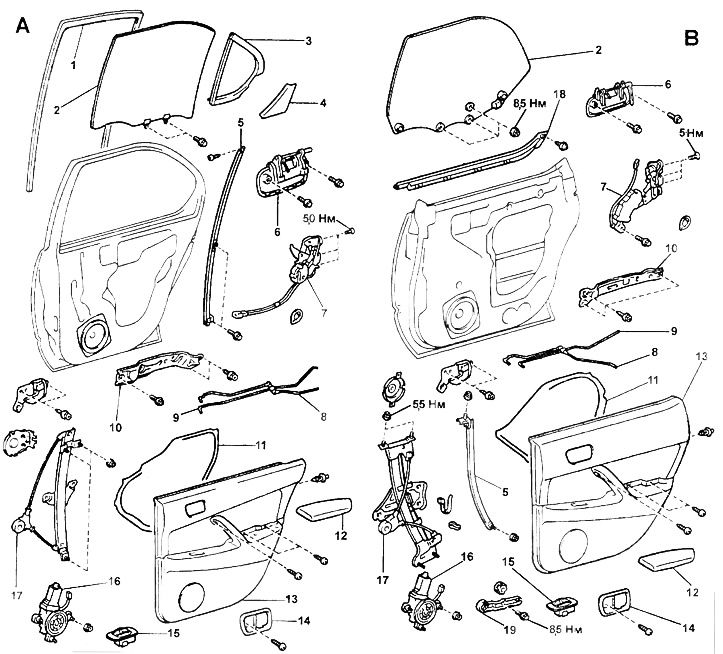
Backdoor.
A - a door with a frame,
B - door without a frame,
1 - glass seal,
2 - door glass,
3 - side rear window,
4 - upper door trim,
5 - glass guide,
6 - external door handle,
7 - door lock,
8 - lock rod,
9 - internal locking rod,
10 - amplifier,
11 - technological hole cover,
12 - armrest pad,
13 - finishing panel of the door,
14 - internal handle for opening the door,
15 - power window control panel,
16 - power window motor,
17 - power window mechanism,
18 - lower molding,
19 - adjusting bracket.