
Elements of the heater control panel
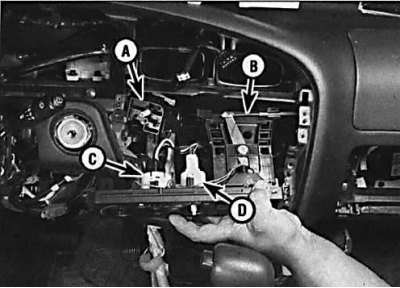
A - temperature adjustment knob;
B - heater control cable;
С – fan switch;
D - electrical connector.
1. Remove the ground wire from the battery.
Attention! If your radio has an anti-theft code, check that you have the pairing codes before disconnecting the battery.
Attention! On models since 1993, the airbag system is disabled if the battery is disconnected for an extended period. If the airbag warning light comes on and stays on after reconnecting the battery, take it to a specialist workshop to restore the system to normal.
2. Remove decorative finishing of a combination of devices and remove a radio receiver.
3. Remove the control knobs.
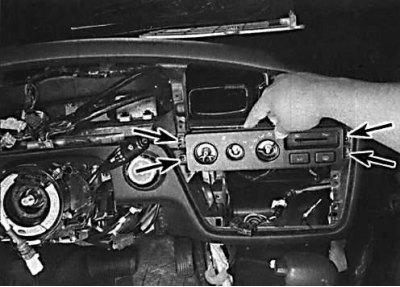
4. Unscrew 4 screws securing the heater control panel.
5. Pull the heater control panel forward. At the same time, the temperature control knob must remain in place (see fig. Elements of the heater control panel).
6. Installation is made in sequence, return to removal.
Control cable adjustment
1. To adjust the air distribution control cable, set the control lever to the position "Fresh air" and secure the cable sheath with a clamp.
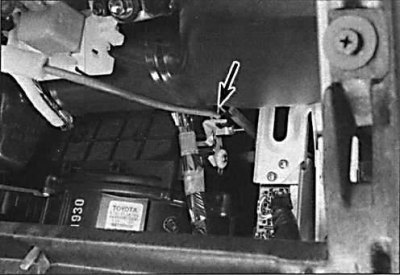
2. To adjust the intake air temperature control cable, set the lever to the position "cold" and secure the cable sheath with a clamp.
Checking the electrical circuit
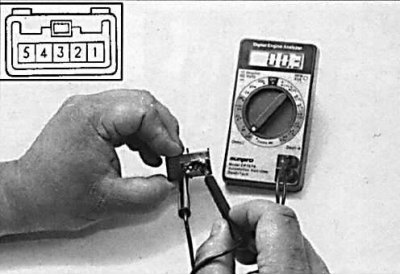
Check of serviceability of an electric chain on a socket of the block of management
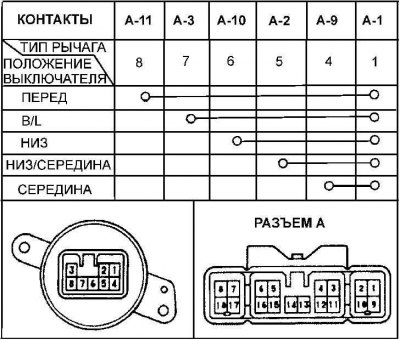
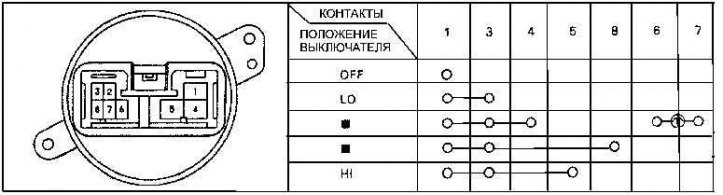
Checking the heater fan switch
1. Check that pins 2 and 5 of the A/C switch close when the switch is turned on.
2. Using a tester connected to the control unit connector, check the operation of the switches (see fig. Check of serviceability of an electric chain on a socket of the block of management).
3. Using a tester, check the operation of the switch (see fig. Checking the heater fan switch).