



Contents: Removal ↓ Installation ↓
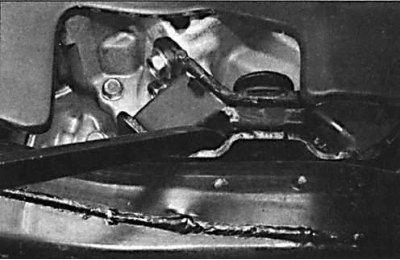
1. Insert a large screwdriver or pry bar between the metal and rubber parts of the transmission mount.
2. By moving the crowbar to the sides, check that the gearbox moves slightly. Otherwise, check the integrity of the rubber element of the gearbox mount support.
3. To replace the gearbox mount support, support the gearbox with a jack, unscrew the bolts and nuts and remove the support.
4. Installation is carried out in the reverse order of removal.
Removal
Location of skid plate mounting bolts on a four-cylinder engine
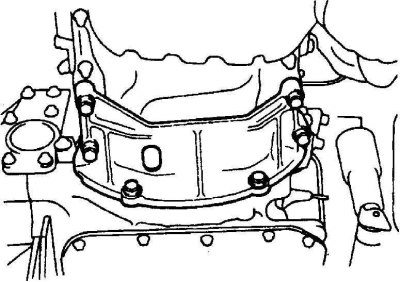
Location of skid plate mounting bolts on a six-cylinder engine
1. Remove the hood.
2. Relieve pressure in the fuel system.
3. Remove the ground cable from the battery.
Warning: If your radio has an anti-theft code, make sure you have the connection codes before disconnecting the battery.
Caution! On models from 1993 onwards, the airbag system is disabled if the battery is disconnected for an extended period of time. If the airbag warning light comes on and remains on after the battery is reconnected, contact a specialist workshop to restore the system to working order.
4. Disconnect the electrical connector and remove the cruise control actuator.
5. Remove the battery and battery tray.
6. Remove the air intake and air filter housing. Disconnect the fuel lines from the engine and plug them.
7. Remove the fuel filter and fuel filter bracket.
8. Remove the charcoal canister along with the bracket.
9. Remove the windshield washer reservoir and expansion tank.
10. Disconnect the accelerator cable from the throttle control lever.
11. Label and disconnect all vacuum hoses, coolant hoses, electrical connectors and ground straps.
12. Remove the radiator fan and fan shroud. Drain the coolant from the cooling system, remove the radiator and disconnect the hoses from the heater.
13. Disconnect the gear selector cable from the gear selector lever.
14. Raise the car and secure it on stands. Remove the wheels.
15. Disconnect the exhaust pipe from the exhaust manifold.
16. Remove the mudguards.
17. Drain the engine oil.
18. Remove the drive belts.
19. Drain the oil from the gearbox.
20. Disconnect the drive shaft joints from the gearbox.
21. On models with power steering, remove the power steering pump mounting bolts and move the pump to the side without disconnecting the hoses from it.
22. On models with air conditioning, remove the A/C compressor mounting bolts and move it to the side without disconnecting the hoses from it.
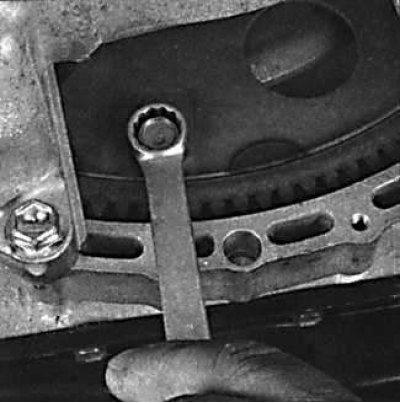
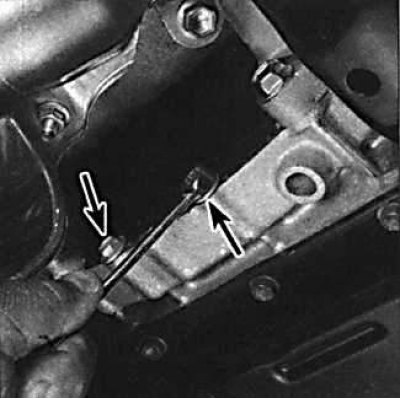
23. Disconnect the hoses from the transmission oil cooler and immediately plug them. On models with four-cylinder engines, remove the oil filter and oil cooler. To access the torque converter drive plate, unscrew the bolts and remove the protective plate (see Fig. Location of the bolts for fastening the protective plate on a four-cylinder engine and Fig. Location of the bolts for fastening the protective plate on a six-cylinder engine). Unscrew the 6 bolts securing the drive plate to the torque converter, while turning the crankshaft to access the mounting bolts.
24. Attach the engine and gearbox to a lifting mechanism and lift it so that the weight of the engine is supported by the lifting mechanism.
25. Unscrew the power unit support mounting bolts.
26. Carefully, slowly remove the engine and gearbox from the engine compartment of the vehicle.
27. Lower the power unit onto wooden blocks and position it so that a jack can be installed under the gearbox.
28. Remove the starter.
29. Supporting the gearbox with a jack, unscrew the bolts securing the gearbox to the engine.
30. Move the transmission away from the engine and remove it, being careful not to dislodge the torque converter from the transmission input shaft.
31. Remove the torque converter from the transmission input shaft.
Installation
1. Install the torque converter onto the transmission input shaft.
2. Carefully install the transmission onto the engine, rotating the torque converter so that the bolt holes in the torque converter and drive plate align.
3. Secure the gearbox to the engine with bolts, tightening them to the required torque.
4. Carefully, slowly install the gearbox with the engine into the engine compartment of the vehicle.
5. Secure the gearbox to the engine with bolts, tightening them to the required torque.
6. Carefully, slowly install the gearbox with the engine into the engine compartment of the vehicle.
7. Install the powertrain supports and secure them with bolts.
8. Further installation is carried out in the reverse order of removal.
9. Add coolant to the cooling system, engine oil to the engine and oil to the transmission.