



Contents: Removal ↓ Installation ↓
Removal
1. Raise and support the vehicle. Remove the gearbox.
2. Remove the pressure plate and clutch disc (for engines with manual transmission).
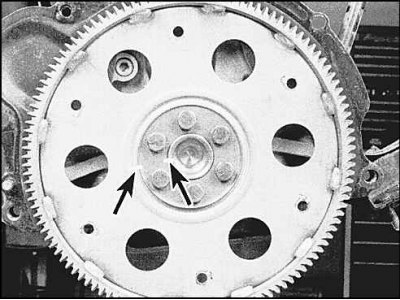
3. Make timing marks (arrows) on the flywheel and crankshaft.
4. Remove the flywheel/drive plate bolts, if necessary, lock the flywheel with a screwdriver.
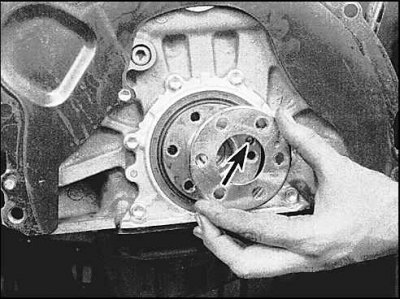
5. Remove the flywheel/drive plate. On vehicles with automatic transmission, there are spacers on both sides of the drive plate. When assembling, the hole in the spacer ring must align with the pin (indicated by the arrow).
Installation
1. Clean the flywheel and inspect its surface for cracks, scratches and burnt areas. Minor damage can be removed by sanding the surface. Check for missing teeth and for deformed flywheel.
2. Replace the rear crankshaft oil seal if necessary.
3. Install the flywheel onto the crankshaft, using the marks made during the removal procedure. Apply sealant to the bolt threads and insert the bolts. Tighten the bolts to the specified torque.