
Latch
1. Raise the glass and remove the door lining and water shield (see subsection 11.16.).
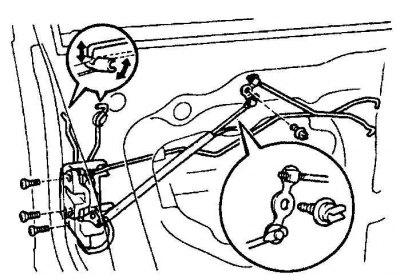
2. Through the opening in the door frame, disconnect the rods from the outer handle to the latch, from the lock to the latch and from the inner handle to the latch. The latch is attached to the end of the door with three screws.
3. All rods of the locking mechanism are fastened with plastic brackets. To disconnect them, pry the bracket at the point of engagement with the rod and remove the rod from the hole. On vehicles with a power lock, disconnect the connector from the latch.
4. Loosen the screws and remove the latch through the opening in the door frame.
5. Installation is carried out in the reverse order.
Outside door handle and lock
1. Raise the glass, remove the door trim and water shield (see subsection 11.16.).
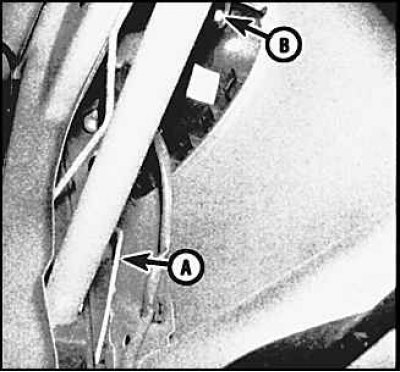
2. Disconnect the rod through the opening in the door frame (A) from the outer handle to the latch and unscrew the bolts securing the lock and handle (IN).
Attention! You can also unscrew the bolts and get the handle from the outside, which makes it easier to disconnect the rod.
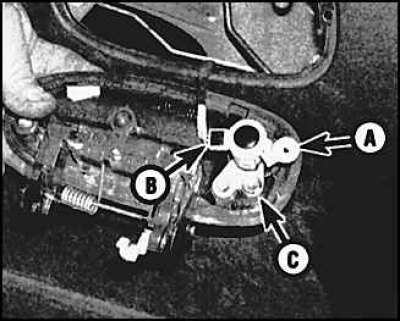
3. Remove the handle and lock. If necessary, disconnect the rod in the hinge (A), remove the retaining ring or disconnect the connector B and unscrew the bolt C of the lock switch mounting (on models with electric lock).
4. Installation is carried out in the reverse order.