
Location of the evaporator casing
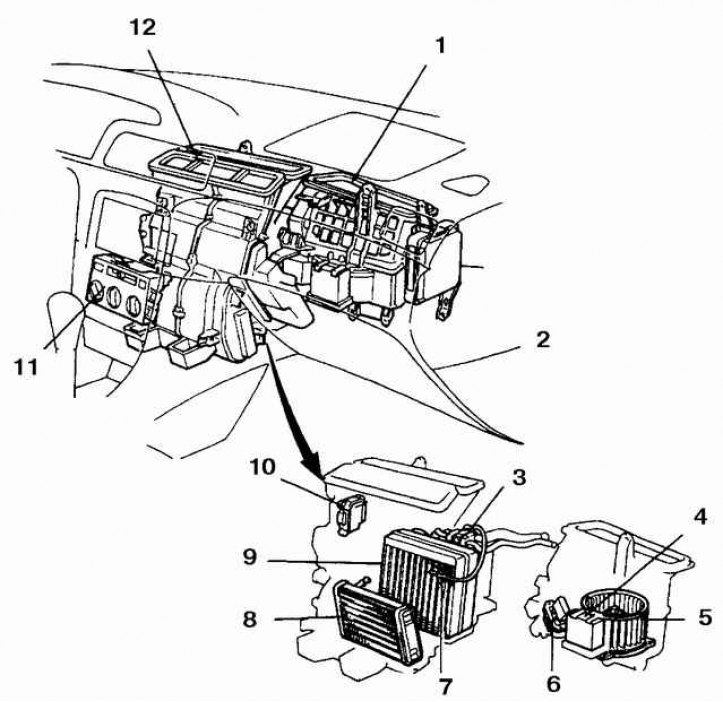
- 1. Blower unit
- 2. Amplifier air conditioner (4-cylinder engines)
- 3. Control valve
- 4. Amplifier air conditioner (6-cylinder models)
- 5. Electric motor of the discharge fan
- 6. Blower fan resistor
- 7. Thermistor
- 8. Heater radiator
- 9. Evaporator
- 10. Air outlet flap servo
- 11. Air conditioner control panel
- air conditioner switch
- blower speed switch
- mode switch
- 12. Air conditioning unit
The evaporator shroud is located under the central part of the dashboard, next to the blower fan.
Removing
1. Release the pressure in the system.
2. Disconnect the negative battery cable.
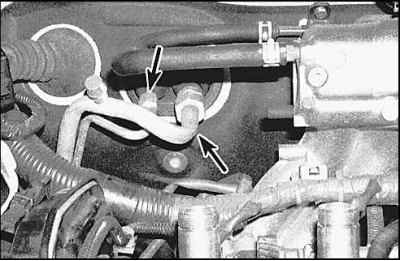
3. Disconnect the two refrigerant pipes (indicated by arrows) from the barrier.
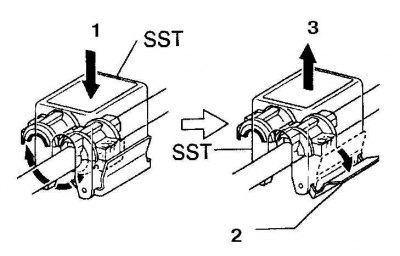
1. Press on top
2. Turn the lever
3. Pull up
4. On 1999 models, a special tool is used to disconnect the refrigerant pipes.
5. Drain the coolant and disconnect the hoses from the heater block.
6. Remove the dashboard trim and dashboard.
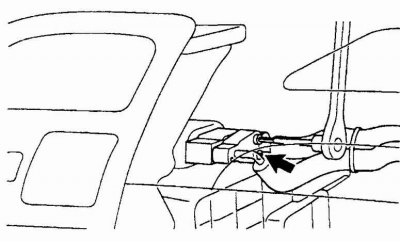
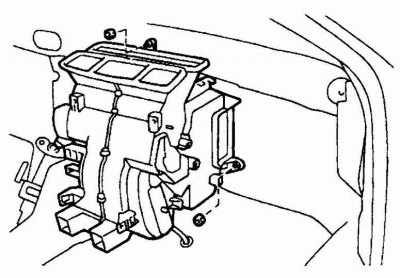
7. Disconnect wires from evaporator and blower shroud.

8. Remove the electrical wire connector block located at the bottom of the blower. Remove clamps and air pipe. Remove the blower fan shroud mounting bolts (indicated by arrows). Remove the blower assembly.
9. Remove the bolts securing the expansion valve to the evaporator.
10. Remove the evaporator clamps, disconnect the drain hose and remove the evaporator shroud.
11. Remove the thermostat sensor, unscrew the screws and remove the evaporator from the casing.
Installation
Installation is carried out in the reverse order of removal.