
Removing
Note. Install in the reverse order of removal. If some of the installation steps have distinctive features, they are mentioned in the appropriate section with a common title «Installation».
After disconnecting the 15 mounting clips, remove the boot lid trim.
Unscrew the two nuts securing the spoiler from the inside of the trunk lid.
Use an electric lamp to heat the spoiler to a temperature of 40-60°C.
Attention! Try not to overheat the spoiler.
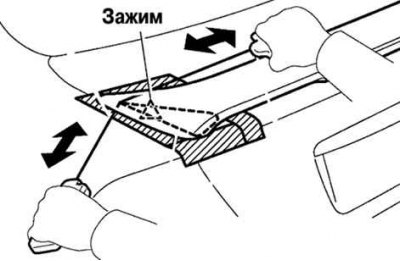
Pic. 8.40. Removing the adhesive base of the rear spoiler
Run a thin, strong thread under the contact surface of the spoiler. Passing the thread in all directions, as shown in Figure 8.40, try to make sure that the heated adhesive base connecting the spoiler to the body completely moves away from the surface of the body.
Attention! During the operation, try not to damage the surface of the body and the spoiler.
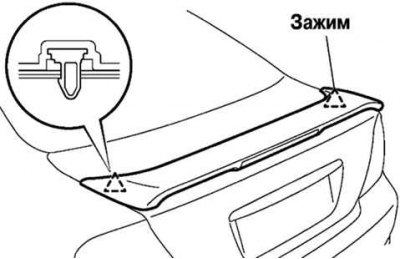
Pic. 8.41. Clips of fastening of a back spoiler
Remove the thread, disconnect the two mounting clips and remove the spoiler (pic. 8.41).
Removal of a lantern of an additional signal of braking
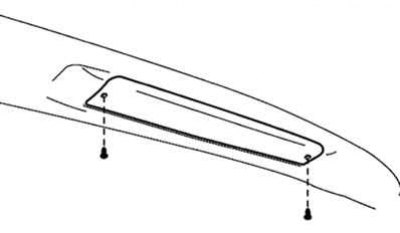
Pic. 8.42. Removal of a lantern of an additional signal of braking
Unscrew the two screws that secure the auxiliary brake light and remove the light housing (pic. 8.42).
Spoiler installation
Use an electric lamp to heat the spoiler to a temperature of 40-60°C.
Clean any adhesive residue from the contact surface of the spoiler.
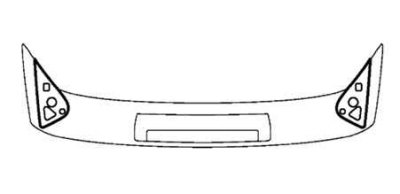
Pic. 8.43. Scheme of applying glue to the contact surface of the spoiler
Apply adhesive to the contact surface of the spoiler as shown in Figure 8.43.
Heat the spoiler to 20-30°C and the body surface to 40-60°C.
Install the spoiler in place, press and tighten the two fastening nuts.