
Removing
Note. Install in the reverse order of removal. If some of the installation steps have distinctive features, they are mentioned in the appropriate section with a common title «Installation».
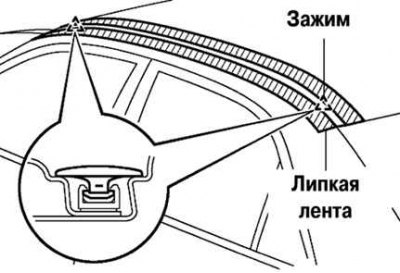
Pic. 8.44. Removing the top molding
Glue the contact surface of the body near the molding with protective tape. Carefully, using a special trim remover, release the upper molding clips from both ends and remove the molding (pic. 8.44).
Note. Do not remove clips. If the clamp has been damaged, replace it with a new original one.
Installation
Use white spirit to remove the remaining adhesive from the recess on the surface of the roof of the car and remove the tape.
Use an electric lamp to heat up the mounting points of the clamps to a temperature of 40-60°C.
Heat the molding to a temperature of 20-30°C.
Install the missing clips by hand, apply new adhesive to the molding, and install the molding.
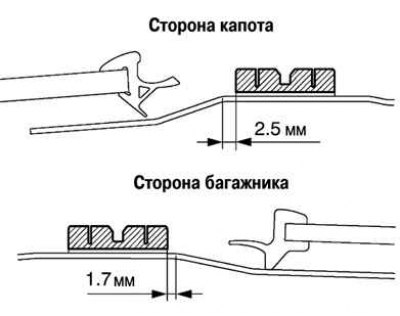
Pic. 8.45. Top molding installation diagram
Press the molding to the roof, put a press on top and do not remove it for 24 hours.
Note. The minimum time for keeping the molding under pressure is 30 minutes.