
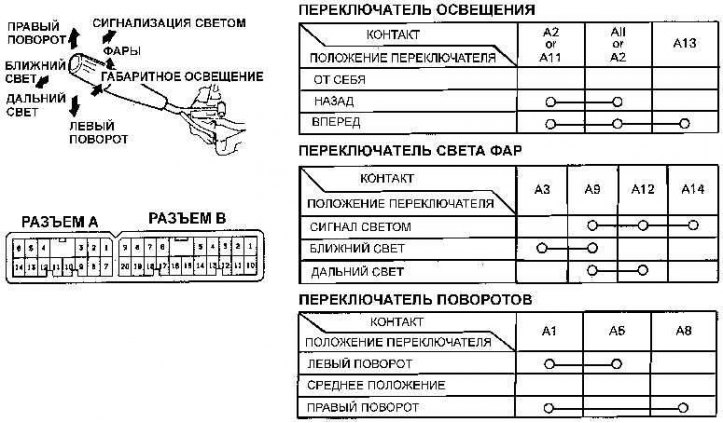
Switch for lighting and contact status on the connector at various switch positions
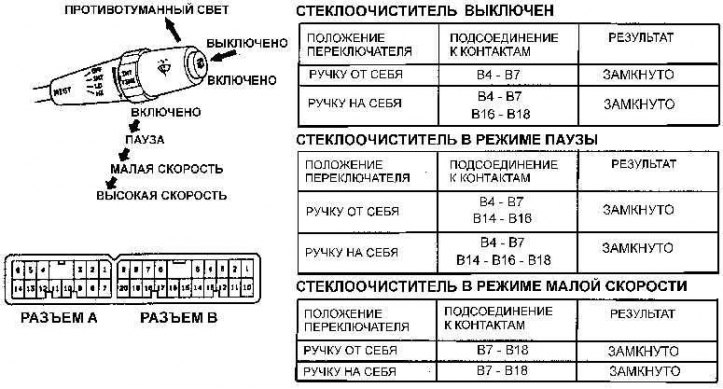
Wiper switch and connector contact status at various switch positions
Examination
1. Remove the ground wire from the battery.
2. Remove the upper and lower steering column cover.
3. Disconnect the large electrical connector located on the wiring harness at the bottom of the steering column.
4. Using an ohmmeter, check the resistance between the pins of the connector, depending on the position of the switches (see fig. Lighting switch and contact status on the connector at various switch positions and fig. Wiper switch and connector contact status at various switch positions).
Replacement
Multifunction steering column switches
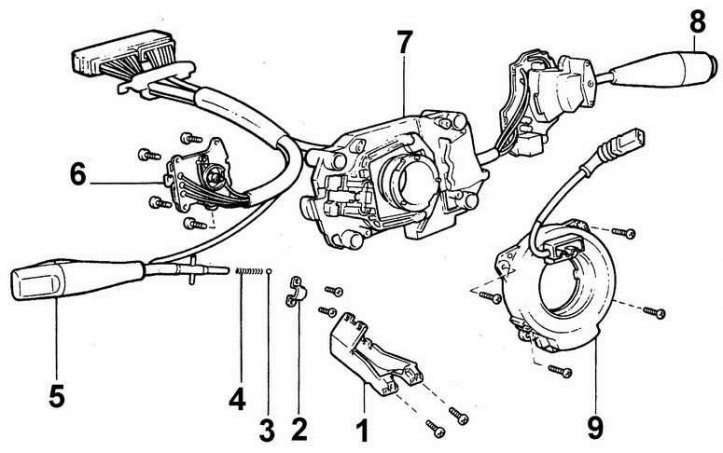
1 – a casing of a plait of wires; 2 - fastening bracket; 3 - ball; 4 - spring; 5 - switch handle; 6 - lighting switch; 7 – base of switches; 8 - wiper switch; 9 - spiral drive unit
1. Remove the steering wheel.
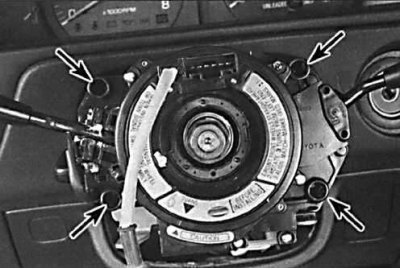
2. Remove the screws securing the multifunction switch.
3. Release the clips and remove the switch along with the wiring harness from the steering column.
4. Unscrew the mounting screws and remove the required switch from the switch base (see fig. Multifunction steering column switches).
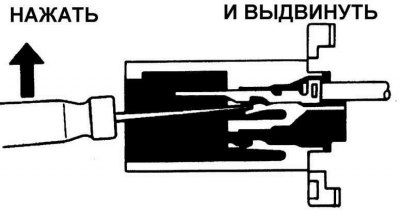
5. Remove the wire contacts of the switch being replaced and the connector. Insert a thin narrow screwdriver from the front of the connector and press the fixing tab on the contact and remove the contact from the connector by the wire.
6. From the back of the connector, insert the contacts of the new switch into the connector and push them in until they lock into place.
7. Further installation is carried out in the reverse order of removal.