
Removing
Remove the right lower engine cover.
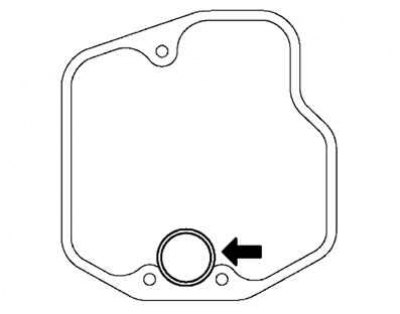
Remove the drain plug with gasket and drain the transmission fluid. Install a new gasket and drain plug.
Tightening torque: 49 Nm.
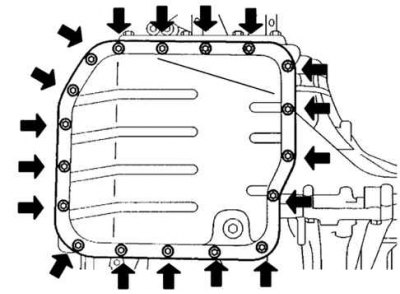
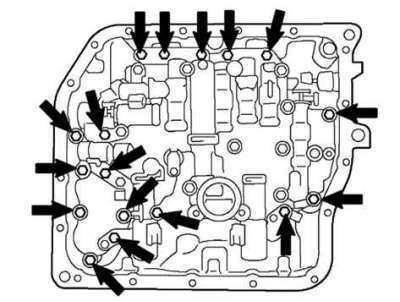
Pic. 3.99. Bolts of fastening of the oil pallet of an automatic transmission
Remove 18 bolts and carefully remove the oil pan (pic. 3.99).
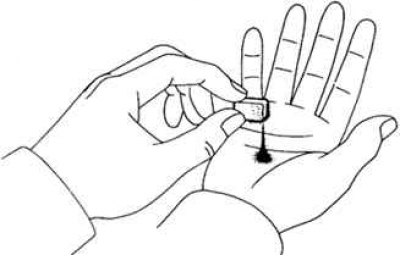
Pic. 3.100. Checking wear particles in the sump
Examine the wear particles in the sump. Remove 2 magnets and use them to collect steel chips. Carefully inspect the chips and particles in the sump and on the magnet to assess gear wear. If the suspension is dominated by steel chips and particles that react to the magnet, the bearings, gears and plates are worn out. If the suspension is dominated by brass shavings and particles that do not react to the magnet, the bearings are worn (pic. 3.100).
Disconnect the 5 shift solenoid valve connectors.
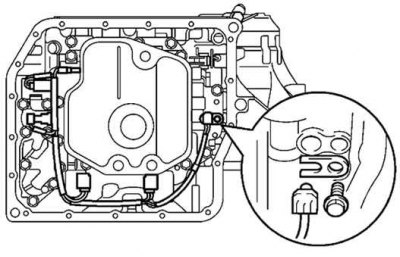
Pic. 3.101. Disconnecting the transmission fluid temperature sensor
Remove the bolt and retainer plate and disconnect the transmission fluid temperature sensor (pic. 3.101).
Pic. 3.102. Oil filter mounting bolts
Remove the 3 mounting bolts and remove the oil filter (pic. 3.102).
Attention! When removing the oil filter, be prepared for some fluid to leak out of it.
Pic. 3.103. Oil filter sealing ring
Remove the oil filter seal (pic. 3.103).
Pic. 3.104. Bolts of fastening of the valve block of an automatic transmission
Supporting the valve block, unscrew the 17 mounting bolts and remove the valve block (pic. 3.104).
Attention! Make sure that the check valve body, spring and accumulator piston do not fall out.
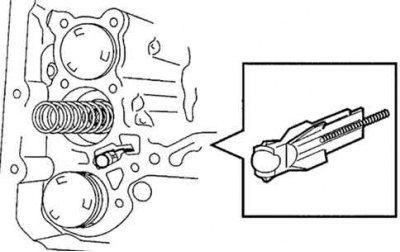
Pic. 3.105. Removing the Check Valve Body and Spring
Remove check valve body and spring (pic. 3.105).
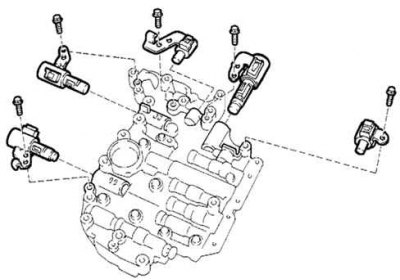
Pic. 3.106. Removing the shift solenoid valves
Remove 5 mounting bolts and remove 5 shift solenoid valves (pic. 3.106).
Installation
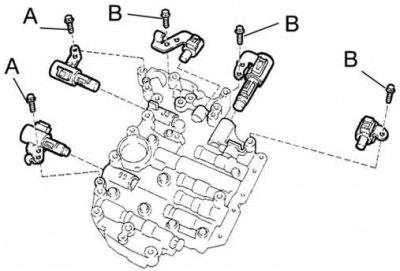
Pic. 3.107. Installing shift solenoid valves
Install 5 shift solenoid valves and secure with 5 bolts (pic. 3.107).
Torque:
- bolt A: 6.6 Nm;
- bolt B: 10.8 Nm.
Bolt length:
- bolt A: 12 mm;
- bolt B: 45 mm.
Install the spring and check valve body.

Pic. 3.105. Removing the Check Valve Body and Spring
Align the groove of the manual valve with the pin on the lever (see fig. 3.105).
Install 17 mounting bolts.
Tightening torque: 10.8 Nm.
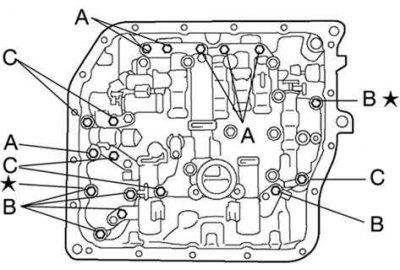
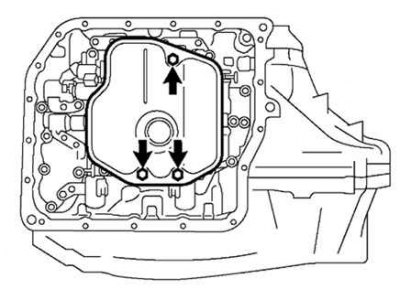
Pic. 3.108. The order of tightening the bolts of the valve block
Attention! To install the valve, sink the valve block, overcoming the action of the accumulator piston spring and the check valve body. First, temporarily tighten the bolts marked with an asterisk in Figure 3.108, as they are installation bolts.
Bolt length:
- bolt A: 25 mm;
- bolt B: 41 mm;
- bolt C: 45 mm.
Lubricate the new oil filter O-ring with automatic transmission fluid.
Install the oil filter seal.
Install the oil filter and secure it with 3 bolts.
Tightening torque: 10.8 Nm.
Lubricate the new transmission fluid temperature sensor O-ring with automatic transmission fluid.
Install the sensor, bolt and lock plate.
Tightening torque: 6.6 Nm.
Connect the 5 shift solenoid valve connectors.
Install 2 magnets in the oil pan.
Lubricate the pan mounting bolts with sealant.
Sealant: THREE BOND 2430 or equivalent.
Install the oil pan, gasket and tighten the 18 bolts.
Tightening torque: 7.8 Nm.
Attention! Since the bolts must be tight, apply sealant to them and tighten 15 minutes after applying the sealant.
Fill and check automatic transmission fluid.