



a) Align the pulley and shaft profiles and install the pulley.
b) Tighten the oil pump pulley mounting nut
- Tightening torque - 28 Nm
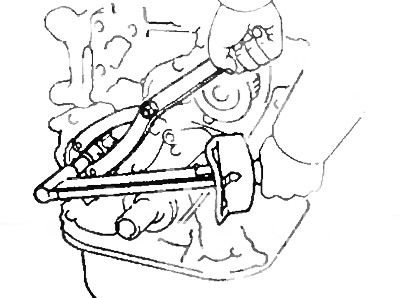
2. Install the crankshaft timing pulley. (If it was filmed).
a) Install the key into the keyway.
b) Install the crankshaft timing pulley with the belt guide facing inward.
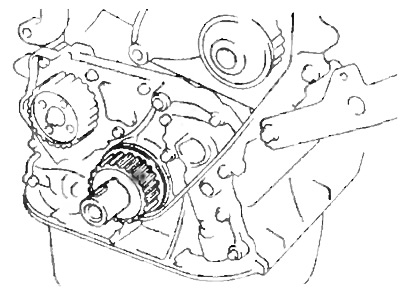
3. Install the intermediate pulley (if it was filmed).
a) Install the pulley and tighten the bolt.
- Tightening torque - 42 Nm
Note: Use 35mm long bolt.
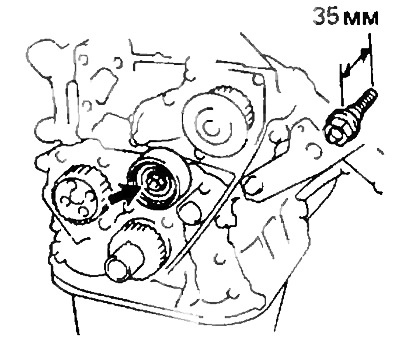
b) Check that the pulley rotates freely.
4. Temporarily install the tension roller and its spring.
a) Align the hole with the guide pin.
b) Install the tension roller and bolt. Do not tighten the bolt.
Note: Use 42mm long bolt.
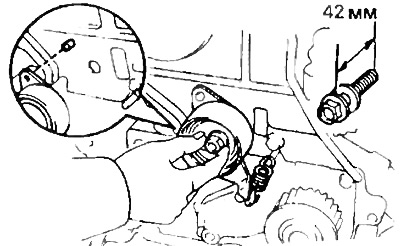
c) Install the tension roller spring.
d) Press the roller to the left as far as possible and tighten the bolt.
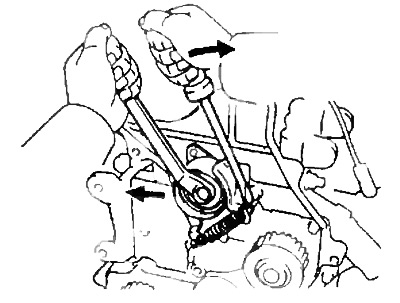
d) Check that the tension roller rotates freely.
5. Temporarily install the timing belt.
a) Turn the crankshaft by the pulley bolt.
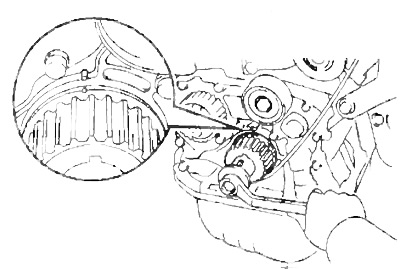
b) Align the timing marks on the crankshaft toothed pulley with the marks on the oil pump housing.
c) Remove any oil or water from the crankshaft pulley, oil pump pulley, coolant pump pulley, tensioner pulley and idler pulley, if any.
d) Install the timing belt onto the crankshaft toothed pulley, oil pump pulley, tensioner pulley, coolant pump pulley and idler pulley.
Note: When reusing the timing belt, align the marks made during removal and install the belt with the arrow pointing in the direction of rotation of the engine crankshaft.
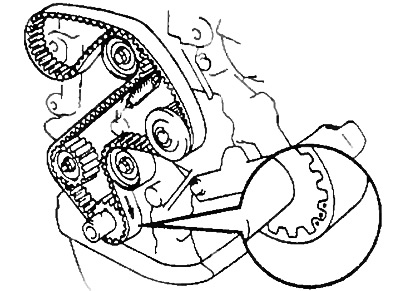
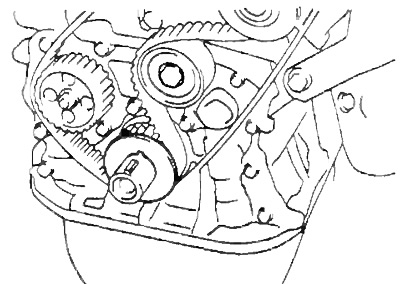
6. Install the timing belt guide
[The information was taken from a web portal ToyotaMAN]
7. Install the lower timing belt cover.
a) Install or glue the gasket onto the timing belt cover.
Note: If the gasket has swollen or changed size due to oil leakage, cut off the excess.
b) Install the timing belt cover and tighten the four bolts.
8. Install the crankshaft pulley.
a) Align the pulley key with the groove on the pulley and install the pulley.
b) Tighten the pulley bolt.
- Tightening torque - 108 Nm
9. Install the camshaft timing pulley.
a) Align the camshaft dowel pin with the dowel hole and install the camshaft timing pulley.
b) Tighten the pulley bolt.
- Tightening torque - 54 Nm
10. Set the piston of cylinder No.1 to TDC of the compression stroke.
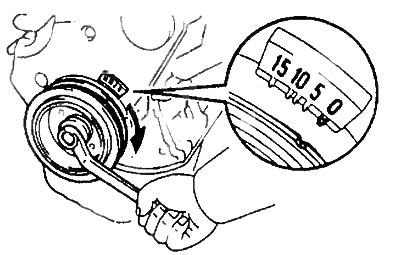
a) Turn the crankshaft pulley and align its mark with the "0" timing mark on the lower timing belt cover.
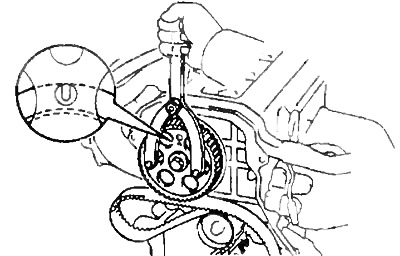
b) Using the special tool, turn the camshaft and align the hole of the camshaft toothed pulley with the timing mark of the bearing cap.
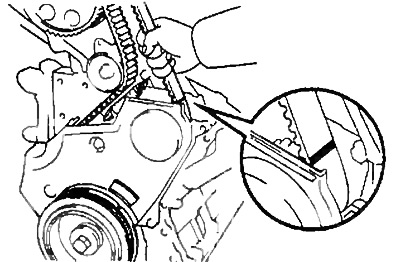
11. Install the timing belt onto the camshaft sprocket.
Note: When reusing the timing belt, make sure the marks on the timing belt and cover are aligned.
Check the alignment of the timing belt marks and the camshaft toothed pulley.
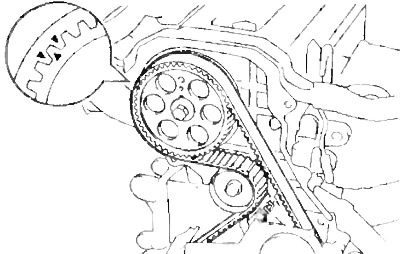
If necessary, reinstall the timing belt until they are aligned.
a) Remove any oil or water from the camshaft sprocket, if any.
b) Install the timing belt on the toothed pulley of the camshaft, checking the tension of the working branch between the toothed pulley of the crankshaft and the toothed pulley of the camshaft.
12. Check the valve timing, a) Loosen the tension roller by turning the bolt 1/2 turn.
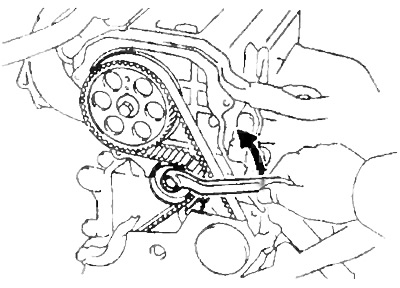
b) Slowly turn the crankshaft pulley two revolutions from TDC to TDC.
Note: Always turn the crankshaft pulley clockwise, otherwise the roller will "play back", the belt will become slack and will skip a tooth.
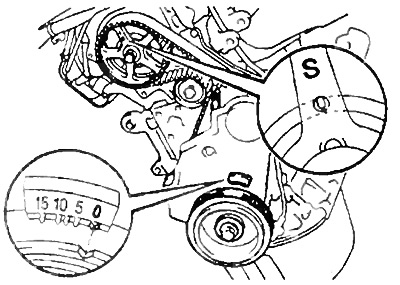
c) Check that each pulley is aligned with the timing marks as shown in the figure.
If the timing marks are not aligned, remove the timing belt and reinstall it.
d) Tension the timing belt. Slowly turning the crankshaft pulley 1 and 7/8 turns, align its line with the 45° BTDC mark (for cylinder #1) on the lower timing belt cover.
Note: Always turn the crankshaft pulley clockwise.
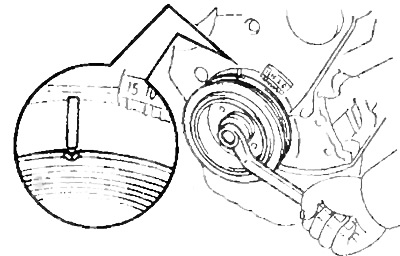
d) Tighten the tension roller mounting bolt.
- Tightening torque - 42 Nm
13. Install the upper timing belt cover.
a) Install the gasket on the lower timing belt cover.
Note: It is better to glue the gasket so that it does not slip inside.
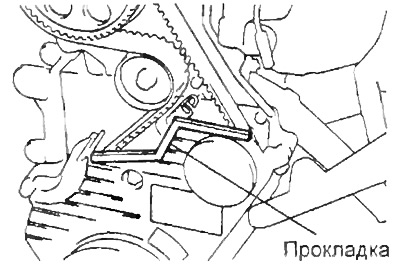
b) Disconnect the wiring harness protector from the cylinder head and the rear timing belt cover.
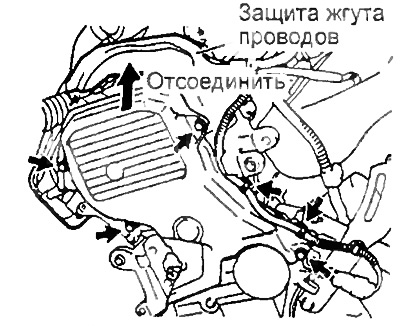
c) Install the timing belt cover by tightening the four bolts.
d) Install the two wire harness clamps.
d) Install the engine wiring harness protection clamps to the two timing belt upper cover mounting bolts in the sequence shown in the figure.
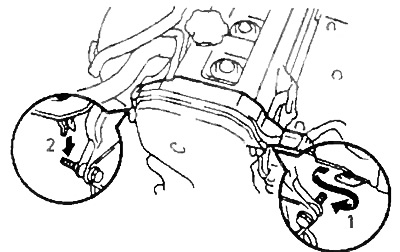
14. Install the spark plugs and connect the high-voltage wires to the spark plugs.
- Tightening torque - 18 Nm
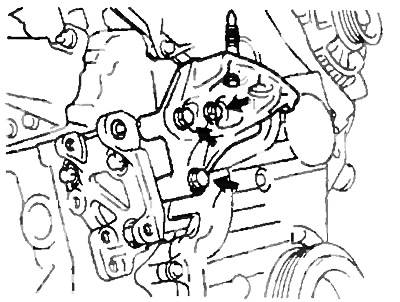
15. Install the right engine mount support by tightening the three bolts.
- Tightening torque - 52 Nm
16. Install the generator.
a) Install the generator on the hinge, locking bolts (models with air conditioning) or on the adjusting bolt (models without air conditioning). Do not tighten the bolts.
b) Install the generator drive belt and adjust its tension.
c) Tighten all bolts
Tightening torque:
- hinge bolt - 54 Nm
- locking and adjusting bolt - 19 Nm
d) Connect the generator connector.
e) Connect the generator wire by tightening the wire fastening nut and install the rubber cap.
c) Connect the wire harness clamp to the clamp on the generator.