
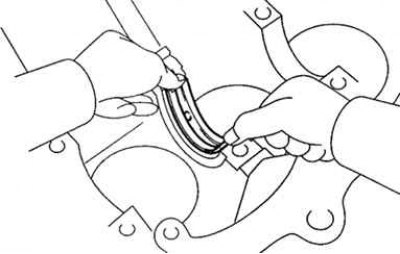
Pic. 2.128. Installing the main bearing shells
To install the main bearing shells, align the tabs on the upper bearing shells with the grooves (grooves) bed block and insert liners (pic. 2.128).
Note. Top halves of earbuds (installed in the cylinder block) have oil grooves and holes, and the lower (mounted in main bearing caps) - Dont Have. Clean the back surface of the bearing shell and the surface of the cylinder block in contact with the shell. Keep oil and dirt away from these surfaces. Clean the back of the bearing shell and the surface of the bearing cap that contacts the shell. Keep oil and dirt away from these surfaces.
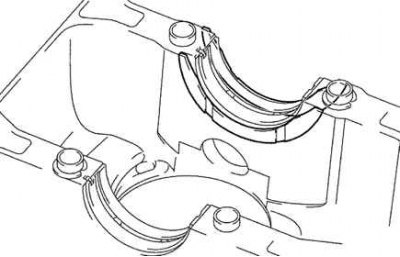
Pic. 2.129. Alignment of the protrusions of the bearing shells with the grooves in the main bearing caps
Align the tabs on the lower bearing shells with the grooves in the main bearing caps and install them (pic. 2.129).
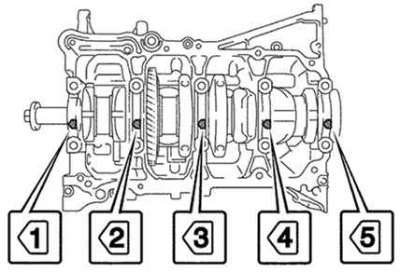
Pic. 2.121. Numbering of main bearing caps
Place the crankshaft into the cylinder block. Install the main bearing caps according to the markings indicated on their housing (see fig. 2.121). Apply a light coat of engine oil to the threads and under the heads of the main bearing cap bolts. Install and evenly tighten the bolts of the main bearing caps in several passes in the sequence shown in Figure 2.122 with a tightening torque of 20 Nm. After that, re-tighten the main bearing cap bolts in the same sequence to 40 Nm.
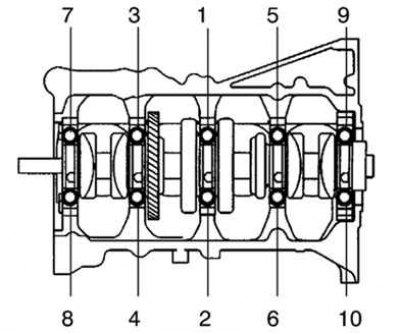
Pic. 2.122. The order of tightening the bolts of the main bearing caps
Note. If the bolt does not tighten to the specified torque, replace it.
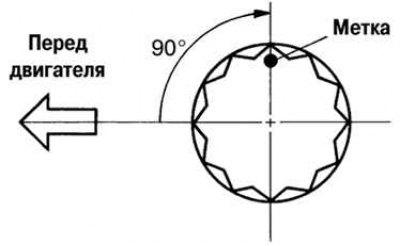
Pic. 2.130. Mark applied to the face of a bolt
Mark the side of the bolt facing the front of the engine with a mark (pic. 2.130).
Turn the bolts 90°in the order shown above. Make sure all marks are rotated 90°from their original position. Make sure the crankshaft rotates freely. Check crankshaft end play. Install the piston and connecting rod assembly.

Pic. 2.131. Correct installation of the piston and connecting rod assembly
Using a ring compressor, install the piston kits into the cylinders according to their numbers, orienting the marks «before» on the pistons towards the front of the engine, as shown in Figure 2.131.
Install the connecting rod caps, checking that the numbering of the connecting rod bearing caps and connecting rod caps match. Install the connecting rod caps so that the marks «before» were facing the front of the engine. Apply a coat of engine oil to the threads and under the bolt heads. Evenly, in several passes, tighten the mounting bolts. Tighten the bolts by 90°. Make sure the marks on the bolts are now at 90°from their original position. Make sure the crankshaft turns smoothly.
Measure the end play of the connecting rods.
Install the crankshaft rear oil seal.