
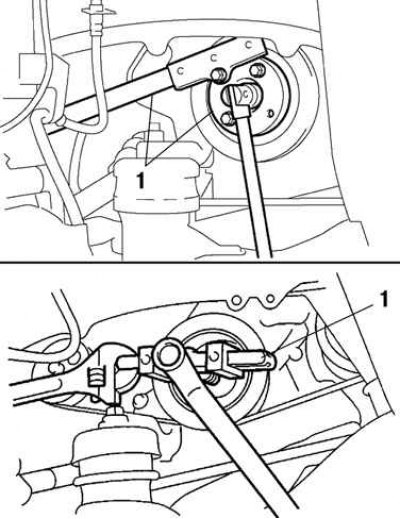
Pic. 2.233. Removing the timing pulley: 1 - special tools
Holding the crankshaft pulley with special tools 09213-54015 and 09950-50013, unscrew the pulley mounting bolt and remove the pulley (pic. 2.233).
Remove the four bolts and remove the #1 timing belt cover.
Remove the timing belt guide.
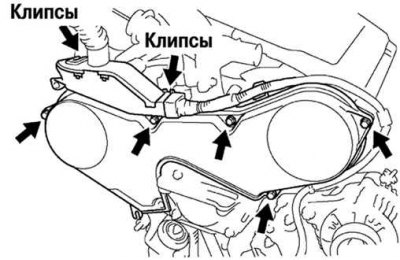
Pic. 2.234. Removing cover No. 2 timing belt
Remove the #2 timing belt cover. Loosen the bolt and remove the wiring protection from the cover No. 3 of the timing belt. Remove the wiring protection clip from the #3 timing belt cover. Remove the 5 bolts, release the two fastening clips and remove the timing belt cover No. 2 (pic. 2.234).
Remove the two bolts and nut and remove the right engine mount.
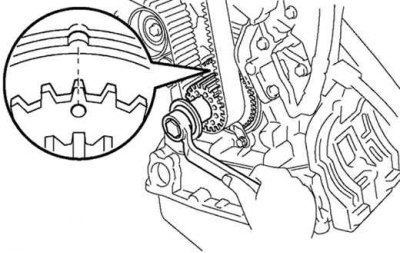
Pic. 2.235. Alignment of the alignment marks on the crankshaft sprocket and the oil pump housing
Set the piston of the 1st cylinder to the TDC of the compression stroke. Temporarily install the crankshaft pulley bolt onto the crankshaft. Rotate the crankshaft by aligning the alignment marks on the crankshaft sprocket and the oil pump housing (pic. 2.235).
Attention! Always turn the crankshaft clockwise.
Attention! Check if the marks on the camshaft pulleys match the marks on the #3 timing belt cover. Otherwise turn the crankshaft one turn (360°).
Attention! Loosen the crankshaft pulley bolt.
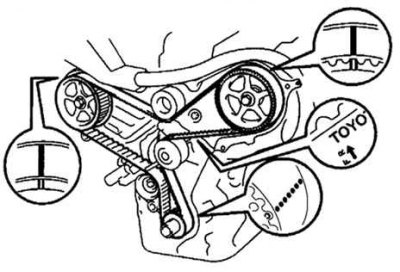
Pic. 2.237. Timing belt marking
If the timing belt is to be reused, check that there are three alignment marks and a mark indicating the direction of rotation on the outside of the belt. If there are no marks, apply three alignment marks opposite the marks on the toothed pulleys of the camshafts and crankshafts and a mark for the direction of rotation (pic. 2.237).
Alternately loosening, unscrew the two bolts, remove the timing belt tensioner and boot. Remove the timing belt.