
Removing
To remove the clutch release master cylinder, remove the parts shown in the assembly drawing.
Disassembly
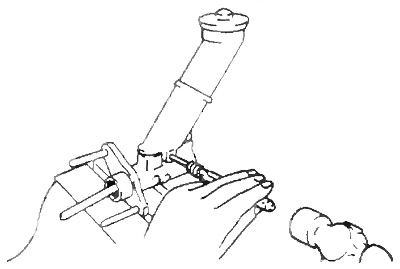
1. Remove the tank.
A) Using a punch and hammer, knock out the split pin.
b) Remove the tank and sealing sleeve.
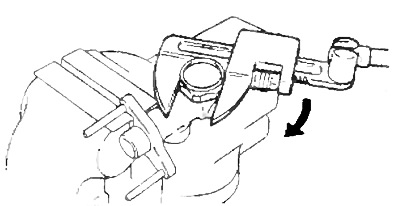
2. Remove anther and, using the special tool, remove a lock ring. Remove the stock.
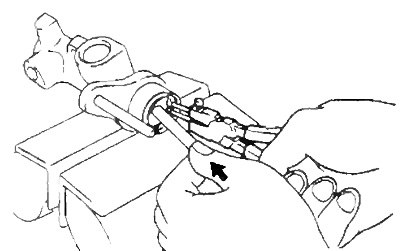
3. Remove the piston.
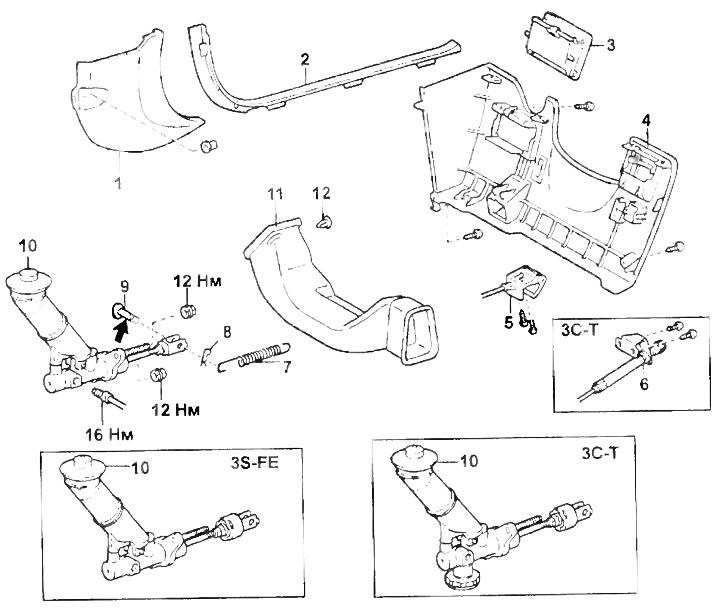
Removing the clutch release master cylinder
1 - side trim,
2 - side trim of the front door,
3 - additional glove box,
4 - lower trim panel on the driver's side,
5 - hood lock handle,
6 - idle speed control knob during warm-up,
7 - return spring,
8 - cotter pin,
9 - fork axle,
10 - clutch release master cylinder assembly,
11 - air duct,
12 - latch.
4. (ZS-T) Remove damper and o-ring.
Assembly
1. Apply grease to the locations indicated by the arrows in the assembly drawing.
2. (ZS-T) Install damper and new o-ring.
- Tightening torque - 45 Nm
3. Insert the piston into the cylinder.
4. Install stem, washer and circlip.
5. Install the reservoir and sealing sleeve. Using a punch and hammer, carefully drive in the split pin as shown.
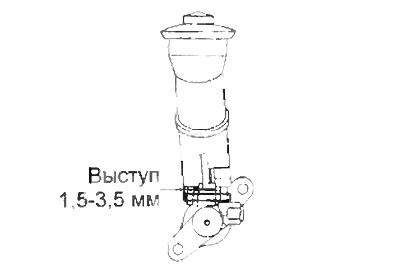

Clutch master cylinder
1 - cover,
2 - float,
3 - tank,
4 - split pin,
5 - sealing sleeve,
6 - main cylinder body,
7 - piston with spring assembly,
8 - stock,
9 - washer,
10 - retaining ring,
11 - anther,
12 - fork,
13 - sealing ring,
14 - damper.
Installation
Install in the reverse order of removal.
Note: After installation, bleed the clutch hydraulics and adjust the clutch pedal travel.