
Removing
1. Raise the front of the car and place on stands. Remove the front wheels.
2. Remove the wing protection panel, which is attached with three bolts.
3. Disconnect the tie rods from the left and right steering knuckles (see subsection 9.2.3.).
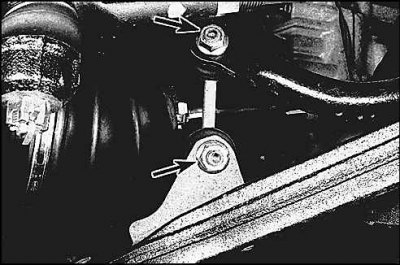
4. Disconnect the stabilizer links from the rod by unscrewing the nuts (arrows). When turning the stud, secure it with a hex wrench. When removing the lever, unscrew the bottom nut.
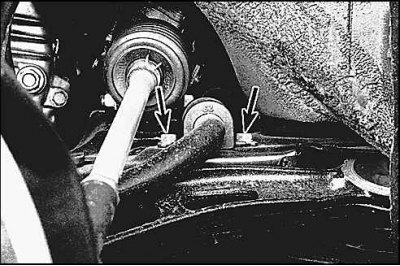
5. Loosen the bolts securing the clamps of the stabilizer bushings to the engine frame.
6. Remove the front section of the exhaust pipe.
7. Loosen the steering gear bolts (see subsection 9.2.5.).
8. Remove the steering gear and remove the stabilizer bar from the left wheel side.
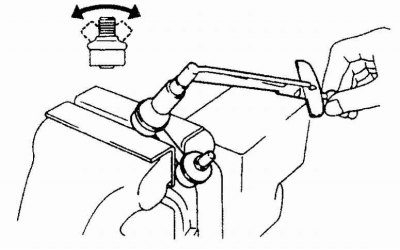
9. Remove the rubber bushings and check their condition. If bushings show damage, replace bushings. Check the condition of the stabilizer link joints by rocking the ball joint 5–6 times from side to side. Then screw on the nut and turn it with a torque wrench (with a scale of several Nm) 1 revolution, making a revolution in 2-4 seconds. When making the 5th turn, take the key dynamometer reading, which should be in the range from 0.04 to 0.87 Nm. Otherwise, replace the stabilizer link.
10. Clean the place where the bushings fit on the rod from dirt and rust.
Installation
1. Lubricate the new bushings with cooking vegetable oil.
Attention! Do not lubricate bushings with mineral oil, petroleum based oil, or brake fluid during assembly to prevent premature bushing failure.
2. The stabilizer is installed in the reverse order.