



Contents: Removal ↓ Installation ↓
Starter terminals
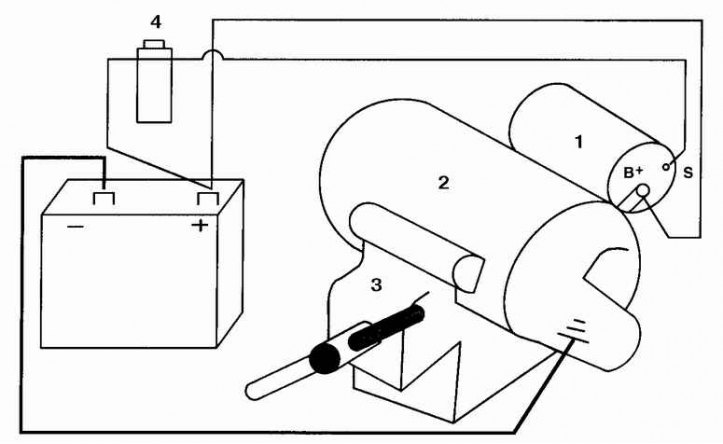
1. Traction relay; 2. Starter; 3. Vice; 4. Switch
If you suspect a faulty starter circuit, make sure the battery is charged, check the wiring for cleanliness and tightness, and check the Park/Neutral switch or clutch for proper operation (for cars with manual transmission). Also check the serviceability of the starter relay (is located in the relay mounting block in the engine compartment).
If the starter motor does not rotate at all when the key is turned, check the voltage at the traction relay. If there is voltage, remove the starter and check.
When the starter rotates slowly, check the voltage and current at start-up, which at a not very low temperature, no more than 10 seconds after the starter is turned on, should be no lower than 8.0 V and 250–400 A, respectively. If the starting current does not correspond to the specified limit, replace the starter, having first checked the serviceability of the wires, connections, and battery.
If there is voltage on the starter, but the starter does not rotate, then remove the starter for testing. To test the starter, assemble the circuit by connecting the specified terminals with wires (see fig. Starter terminals). If the overrunning clutch extends but the starter does not rotate, the starter is faulty. If clicks are heard but the clutch does not extend, either the relay or the starter is faulty.
Removal
Starter mounting details (4-cylinder engine)
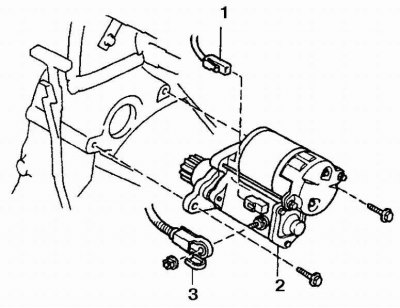
1. Connector; 2. Starter; 3. Power cable
Starter mounting details (6-cylinder engine)
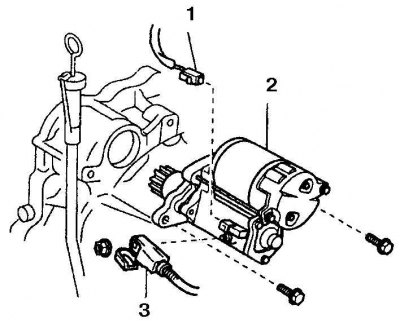
1. Connector; 2. Starter; 3. Power cable
1. Remove the battery.
2. Remove the cruise control actuator.
3. Disconnect the wires from the starter.
4. Remove the starter bolts.
5. Remove the bracket from the top of the starter. To do this, loosen 1-2 bracket bolts, lower the starter, and unscrew the remaining bolts.
Installation
Installation is carried out in reverse order.