
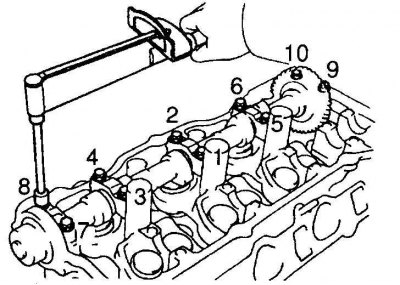
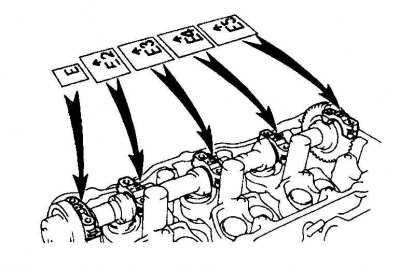
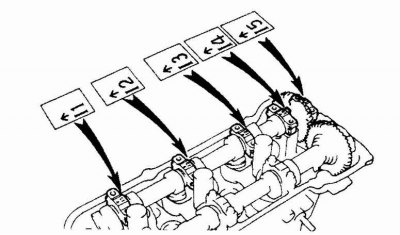
The sequence of tightening the bolts of the bearing caps of the intake valve shaft (right head)
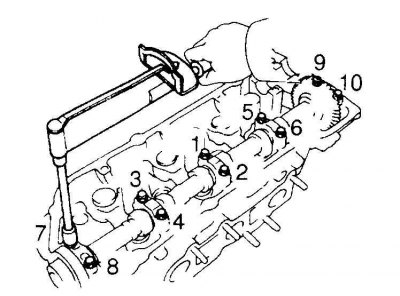
The sequence of tightening the bolts of the bearing caps of the intake valve shaft (left head)
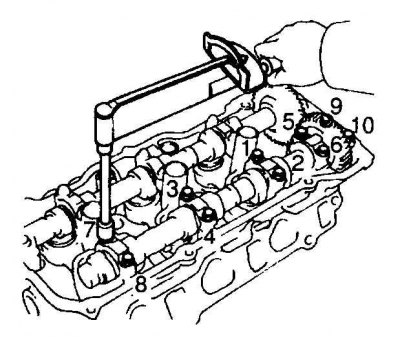
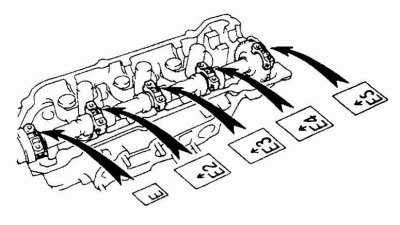
The sequence of tightening the bolts of the bearing caps of the exhaust valve shaft (right head)
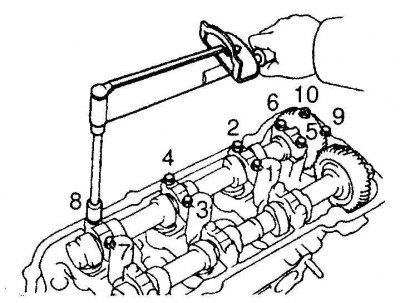
The sequence of tightening the bolts of the bearing caps of the exhaust valve shaft (left head)
Removing
1. Set the first piston to TDC. Remove the head covers, timing belt and camshaft sprocket.
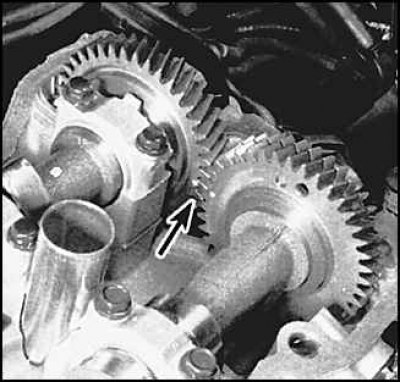
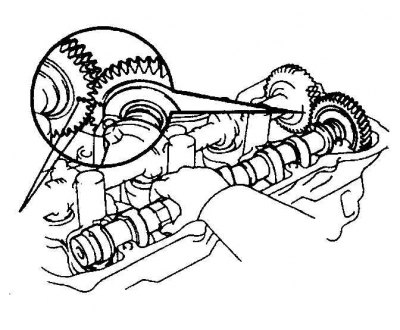
2. Check that the timing marks on the shaft gears are aligned.
3. Lock the exhaust valve shaft auxiliary gear by screwing the bolt into the holes of the auxiliary and main gears.
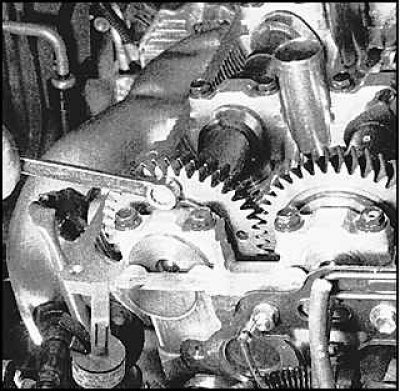
4. Loosen the intake valve shaft bearing cap bolts in the reverse order of tightening them (see fig. The sequence of tightening the bolts of the bearing caps of the intake valve shaft (right head), pic. The sequence of tightening the bolts of the bearing caps of the intake valve shaft (left head). Remove the bearing caps and remove the shaft.
5. Loosen the exhaust valve shaft bearing cap bolts in the reverse order of tightening them (see fig. The sequence of tightening the bolts of the bearing caps of the exhaust valve shaft (right head), pic. The sequence of tightening the bolts of the bearing caps of the exhaust valve shaft (left head)). Remove the covers and take out the shaft.
6. Remove the shafts of the other head in the same way.
7. Fold the bearing caps in the correct sequence.
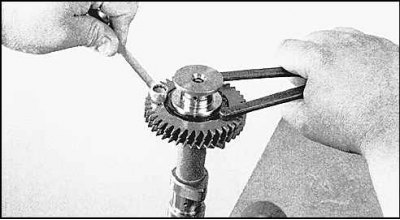
8. To disassemble the exhaust valve shaft gear, secure the shaft in a vise. Using a special wrench, relieve pressure on the bot screwed into the gears and unscrew it.
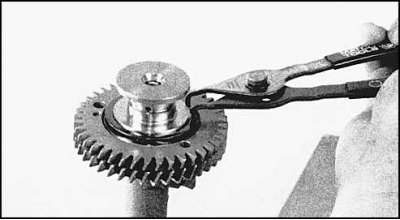
9. Remove the sub gear circlip.

10. Remove auxiliary gear (3), spring (2) and washers (1).
Examination
See subsection 3.1.10.
Installation
1. Install the auxiliary gear and its elements.
2. Secure the shaft in a vise and screw the bolt back into the shaft gear holes. Lubricate the valve lifters with multipurpose grease (if you filmed them) and install them in their respective slots.
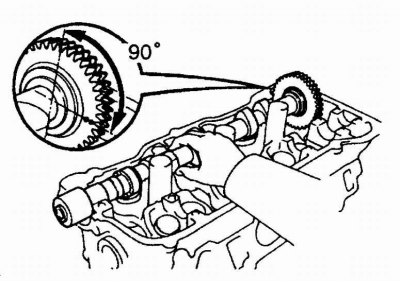 |  |
3. Lubricate the cams and bearing journals of the exhaust valve shaft with special grease, and install the shaft into the head. The marks on the gear must point towards the exhaust valve shaft (in the figure on the right - the right head, on the left - the left).
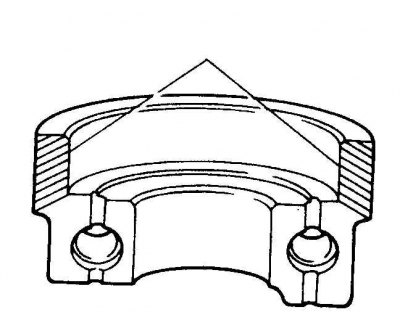
4. Apply sealant to the outside of the mating surface of the first bearing cap (marked with hatching).
 |  |
5. Install bearing caps in numerical order. The arrows on the covers must point towards the timing belt (in the figure on the right - the right head, on the left - the left).
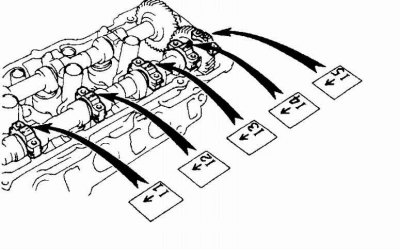
6. Tighten the cover bolts to the required tightening torque. Tighten the bolts in the sequence shown one fourth of a turn at a time (see fig. The sequence of tightening the bolts of the bearing caps of the exhaust valve shaft (right head), pic. The sequence of tightening the bolts of the bearing caps of the exhaust valve shaft (left head)).
7. Install a new shaft seal.
8. Lubricate the cams and bearing journals of the intake valve shaft with special grease.
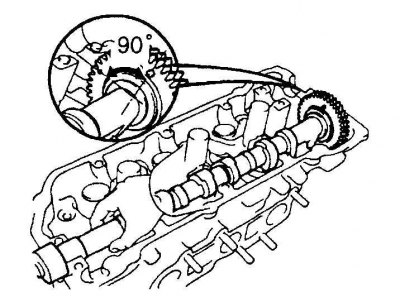
9. Install the shaft into the head, aligning the marks on the gears of the shafts.
 |  |
10. Install bearing caps in numerical order. The arrows on the covers must point towards the timing belt (in the figure on the right - the right head, on the left - the left).
11. Tighten the cover bolts to the required tightening torque. Tighten the bolts in the sequence shown one fourth of a turn at a time (see fig. The sequence of tightening the bolts of the bearing caps of the intake valve shaft (right head), pic. The sequence of tightening the bolts of the bearing caps of the intake valve shaft (left head)).
12. Remove the retaining bolt from the intake valve shaft gears.
13. Install the shaft sprockets and timing belt.
14. Install the remaining parts.