
Timing belt

1. Gasket; 2. Gas distribution belt; 3. Belt guide disc; 4. Bracket; 5. Gasket; 6. Protective casing of wires; 7. Intermediate pulley N1; 8. Case; 9. Plate; 10. Belt tensioner; 11. Crankshaft sprocket; 12. Washer; 13. Intermediate pulley N2; 14. Left camshaft sprocket; 15. Right camshaft sprocket; 16. Crankshaft pulley; 17. Lower belt cover; 18. Right engine mounting bracket; 19. Upper belt cover
Removing
1. Disconnect the negative battery cable.
2. Remove the expansion tank of the cooling system and the windshield washer reservoir.
3. Remove the alternator and power steering pump drive belts.
4. Loosen the right front wheel bolts. Raise and secure the front of the vehicle. Remove the wheel. Remove the wheel arch insulation.
5. Set the first piston cylinder to top dead center.
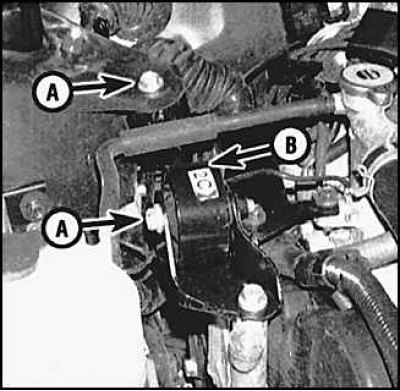
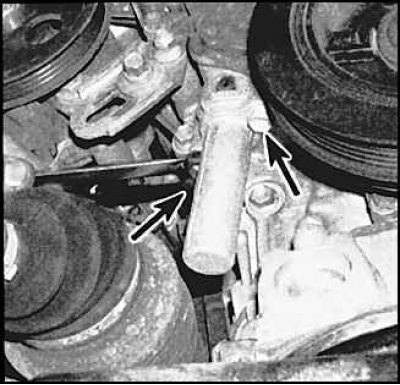
6. Unscrew the two through bolts (A) and remove the thrust that regulates the displacement of the engine (IN) and traction bracket.
7. Remove the spark plugs.
8. Remove the upper timing belt cover and gasket.
9. If you are going to reuse the timing belt, make alignment marks on it.
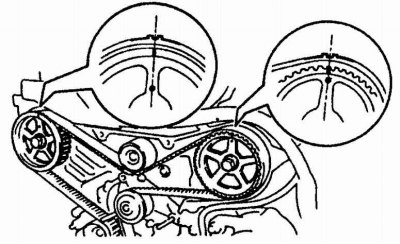
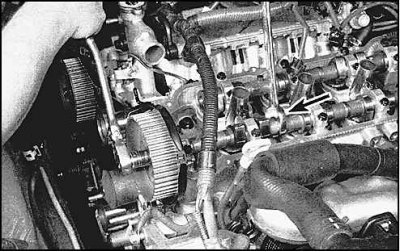
10. Check the timing marks of the camshaft sprockets. The marks on the sprockets of the shafts must be aligned with the marks on the back cover of the belt.
11. Remove two screws (arrows) and remove the belt tensioner.
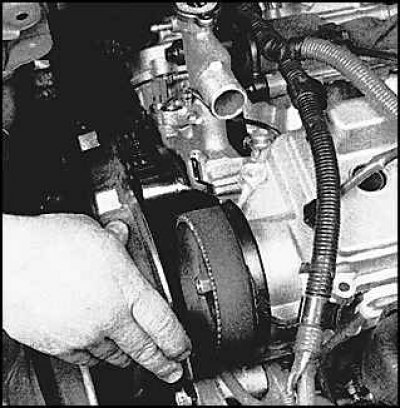
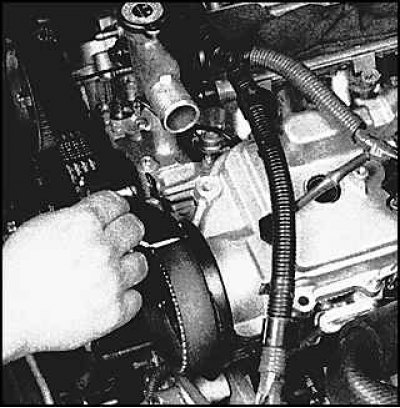
12. Loosen the belt tension and remove the belt.
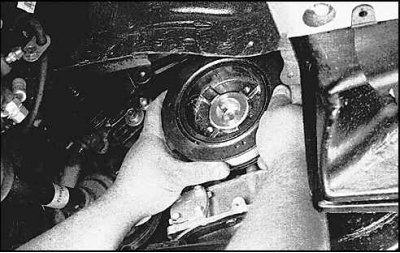
13. To remove the camshaft sprocket, remove the head cover and lock the shaft with a wrench (arrow). Twist the sprocket bolt and remove the sprocket.
14. Remove the upper intermediate pulley.
15. Unscrew the crankshaft pulley bolt, after locking the flywheel.
16. Check the timing marks and remove the pulley.
17. Remove the lower belt cover and gasket.
18. Remove the belt guide disc.
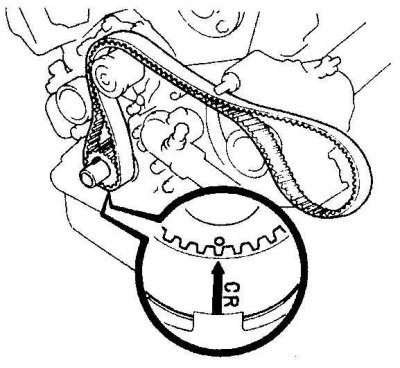
19. If you are going to reuse the belt, make a timing mark on the belt against the hole in the crankshaft sprocket. Remove the belt.
Examination
1. Check the belt (see subsection 3.1.7.).
2. Check if the belt tensioner is leaking, replace the tensioner if necessary.
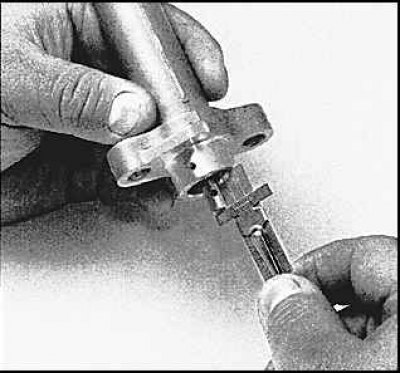
3. Measure the protruding part of the tensioner rod. If the value obtained is out of specification, replace the tensioner.
Installation
1. Thoroughly clean the front of the engine.
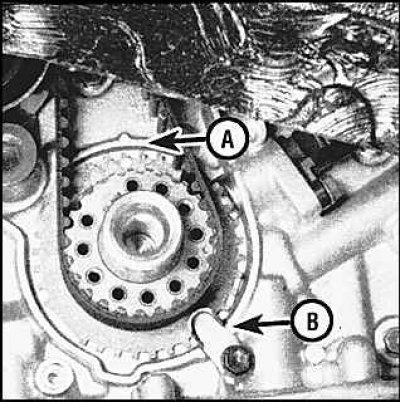
2. Install the crankshaft sprocket (if you filmed it) and align the timing sprocket mark with the mark on the cylinder block (A) and install the sprocket lock (IN).
3. Lubricate the lower intermediate rod with sealant, install the pulley and tighten the bolt to the required torque.
4. Put on the belt using the alignment marks.
5. Install the belt guide disc and lower belt cover.
6. Install the crankshaft pulley and tighten the pulley bolt.
7. Install the upper intermediate pulley and tighten the mounting bolt.
8. Install the camshaft sprockets. The front sprocket flange should point outward and the rear sprocket flange inward. Check that the timing marks on the sprockets and on the back cover of the belt are aligned. Tighten the sprocket bolts to the correct torque.
9. Put the belt on the camshaft sprockets using the alignment marks.
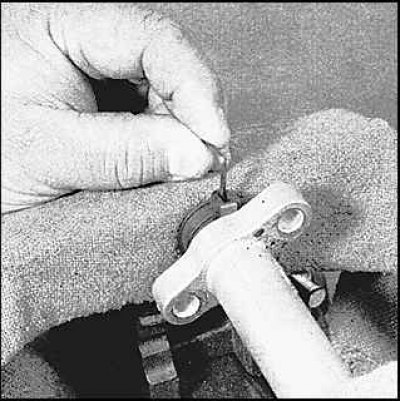
10. Using a vise, press in the tensioner rod. Insert a 1.27 mm diameter lock pin into the holes in the casing and tensioner rod.
11. Install the tensioner and tighten its bolts. Remove the stem lock pin.
12. Turn the crankshaft clockwise two full turns. Check the timing marks.
13. Install the remaining parts.