Removing nozzles
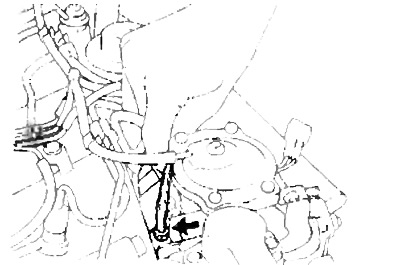
1. Turn away nuts and remove a clip of fuel pipes of a high pressure.
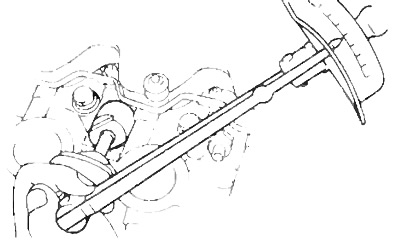
2. Remove the high pressure fuel pipes.
A) Remove the high pressure fuel line holders.
b) Loosen the union nuts of the high-pressure fuel pipes on the injectors and injection pump.
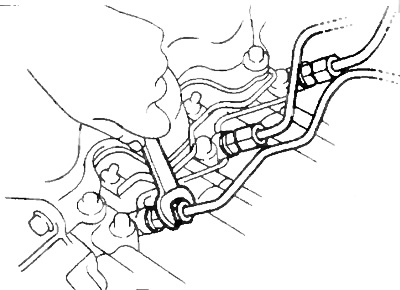
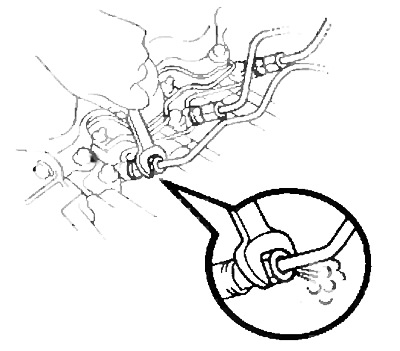
3. Remove the fuel return pipe.
A) Disconnect the fuel return hose from the fuel return pipe union.
b) Loosen the nuts securing the fuel return pipe and remove it together with the gaskets.
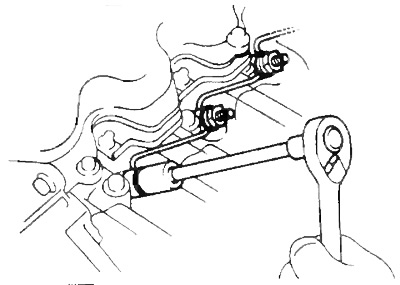
4. Remove nozzles.
A) Remove the injectors using the special tool.
b) Arrange them in order of removal.
V) Remove the nozzle seats and gaskets.
Checking the injectors
1. Check injection pressure.
A) Install the nozzle on the stand for testing.
b) Move the fuel injection lever rapidly several times to build up pressure to clear the nozzle opening.
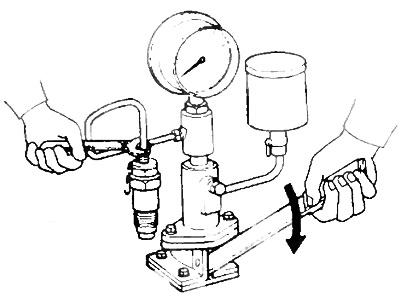
V) Slowly swing the lever and read the pressure on the pressure gauge to start lifting the needle.
Needle lift start pressure:
- used nozzle - 135-155 bar
- new nozzle 145-155 bar
Note: When the injector is operating correctly, a distinctive crisp cut-off sound should be heard.
If the pressure to start lifting the needle does not correspond to the specified values, adjust it by selecting an adjusting washer of the required thickness.
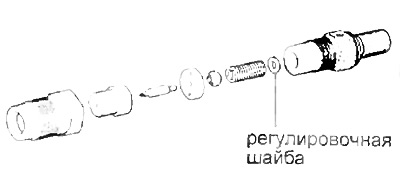
Note:
- Adjusting washers have 43 sizes (thickness values) from 0.900 mm to 1.950 mm in 0.025 mm increments.
- A change in the thickness of the shim by 0.025 mm results in a change in injection pressure of approximately 3.5.
- Only one shim needs to be used.
When adjusting the injection pressure, use the data for new injectors.
d) After the end of the injection, no fuel leakage should be observed.
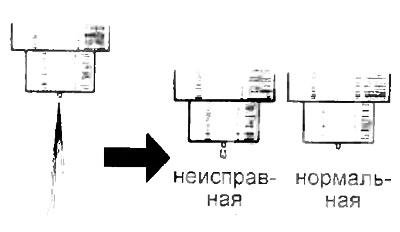
2. Check the nozzle needle for leaks. Create a pressure of 10-20 bar on the injector test stand until the injector needle opens. In this case, there should be no leakage of fuel from the nozzle opening or around the nozzle coupling nut for 10 seconds.
If fuel leakage is observed, replace or repair the injector.
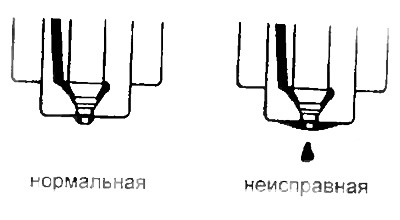
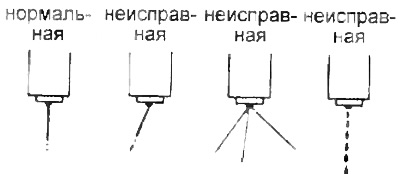
3. Checking the spray pattern.
A) Set the speed of the injection pump drive shaft (at the fuel stand) 15-60 rpm (nozzles used) and 30-60 rpm (new nozzles).
b) Check the correct spray pattern.
Installation of nozzles
1. Check injection pressure and fuel spray pattern.
2. Install nozzles.
A) Install A new gaskets and injector seats in the cylinder head seat.
b) Install the injectors and tighten them with the special tool.
- Tightening torque - 64 Nm
Warning: re-tightening of the injector body is not allowed.
3. Installing the fuel return pipe.
A) Install 4 new gaskets, fuel return pipe and tighten 4 tie nuts.
- Tightening torque - 29 Nm
b) Connect the fuel return pipe to the fuel return hose.
4. Connect the high pressure fuel lines.
A) Install the high pressure fuel line union nuts on the injector and injection pump fittings.
b) Install the high pressure fuel line fittings.
- Tightening torque - 29 Nm
5. Install the high pressure fuel line clamp and tighten the nuts.
6. Remove air from nozzles.
A) Loosen the union nuts of the high pressure fuel lines on the injector side.
b) Turn the engine over with the starter and after bleeding the fuel pipes, tighten the nuts to the torque indicated above.
7. Start the engine and check for fuel leaks.
8. Check idle speed and maximum engine speed.
Removal and installation of the fuel cut-off valve
Note: install the parts in the reverse order of removal.
1. Remove the retarder damper.
- Tightening torque - 11.5 Nm
Note: Never turn the damper adjusting screw.
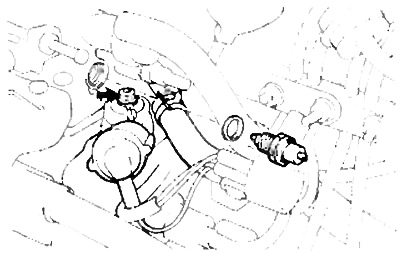
2. Remove the protective cover and disconnect the valve connector.
3. Disconnect the fuel hose.
4. Turn away an adjusting bolt.
5. Turn away the electromagnetic valve of a cut-off of giving of fuel.