



Contents: Checking on the engine ↓ Checking the fuel pump ↓ Removal and installation the fuel…↓ Removal and installation the fuel…↓
Checking on the engine
1. Check the operation of the fuel pump.
a) Turn on the ignition.
Note: Do not start the engine.
b) Short-circuit the "+B" and "FP" terminals of the diagnostic connector with a jumper
c) Check for fuel pressure in the hose coming from the fuel filter.
Note: At this point, the noise of fuel flowing from the fuel pressure regulator into the return line can be heard.
d) Remove the jumper from the diagnostic connector.
d) Turn off the ignition.
If there is no fuel pressure, check the following items:
- fusible links,
- fuses,
- main injection system relay,
- fuel pump,
- start inhibit switch.
- wire connections
- electronic control unit.
2. Check the fuel pressure.
a) Make sure that the battery voltage is at least 11-12 V.
b) Disconnect the (-) cable from the battery.
c) Loosen the bypass bolt, remove the two gaskets and disconnect the fuel inlet hose from the fuel filter.
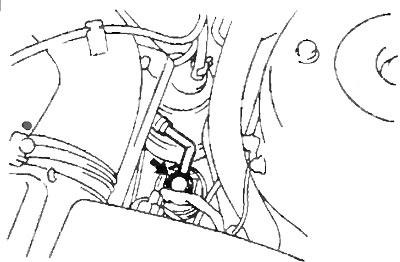
Note:
- Place a suitable container under the fuel filter;
- Slowly loosen the bypass bolt.
d) Drain the fuel.
d) Using three new gaskets and an adapter fitting, connect the pressure gauge to the fuel supply line or to the fuel filter.
Tightening torque - 29 Nm
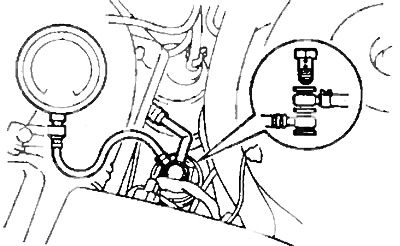
c) Wipe up any spilled fuel.
i) Connect the (-) cable to the battery.
k) Short-circuit the "FP" and "+B" terminals of the diagnostic connector with a jumper.
l) Disconnect the vacuum hose from the fuel pressure regulator and plug it.
m) Measure the fuel pressure at idle.
Nominal fuel pressure - 2.7-3.1 bar
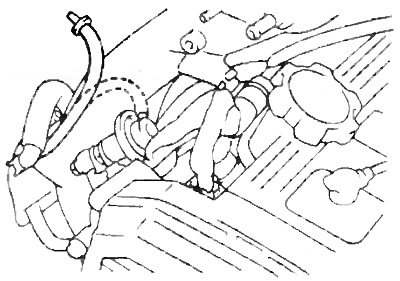
n) Connect a vacuum hose to the fuel pressure regulator and measure the fuel pressure at idle.
Nominal fuel pressure is about 2.35 bar
If the fuel pressure differs significantly from the specified value, check the vacuum hose and fuel pressure regulator.
o) Stop the engine and check that the fuel pressure remains at least 1.5 bar for 5 minutes after stopping the engine. If not, check the fuel pump, fuel pressure regulator and/or injectors.
p) After checking the fuel pressure, disconnect the (-) cable from the battery again. Carefully remove the pressure gauge, being careful not to splash fuel.
p) Using two new gaskets, reconnect the fuel inlet hose by tightening the bypass bolt.
Tightening torque - 29 Nm
Note: When installing the bypass bolt, hold the fuel feed line or fuel filter in place with a wrench.
c) Connect the (-) cable to the battery.
t) Start the engine and check for fuel leaks at the connections.
Checking the fuel pump
1. Disconnect the cable from the negative (-) battery terminal.
2. Remove the rear seat cushion.
3. Disconnect the fuel pump and fuel level sensor connectors.
4. Check the fuel pump.
a) Check the electrical resistance of the fuel pump anchor by connecting an ohmmeter to terminals "4" and "5" of the fuel pump connector.
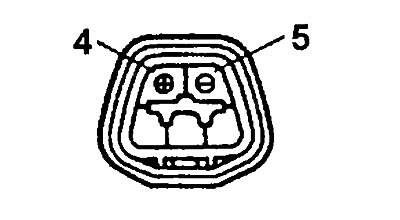
Resistance at 20°C - 0.2-3.0 Ohm
If the resistance is not within the specified range, replace the fuel pump.
b) Check the pump's functionality by connecting the (+) and (-) wires of the battery to terminals "4" and "5" of the pump connector, respectively. Make sure that the fuel pump is working. Otherwise, replace the pump.
Note.
- To avoid burnout of the fuel pump winding, it is necessary to check it quickly (within 10 seconds);
- Keep the fuel pump as far away from the battery as possible;
- Always turn on the pump only by connecting the wires to the battery terminals. Connect the fuel pump and fuel level sensor connectors;
- On the fuel pump body, the terminals are marked accordingly and Using the color of the wires, check the polarity of the battery connection.
c) Check the fuel pump operating pressure by lowering the pump (with filter on) into a bucket and pour in about two liters of gasoline. Connect a pressure gauge to the pump outlet pipe and connect the pump to the battery.
Observe the pressure gauge readings for 2 seconds, then turn off the pump.
- If the pump pressure is less than 3 bar, it is faulty and must be replaced.
- If the pressure is 3-4 bar, the pump is working properly, but will not last long.
- If the pressure is 4-5.5 bar or higher, then the pump is working properly.
6. Install the rear seat cushion.
7. Connect the cable to the negative (-) terminal of the battery.
Removal and installation the fuel filter
1. Remove the air filter cover with air duct (see below "Removal the throttle body").
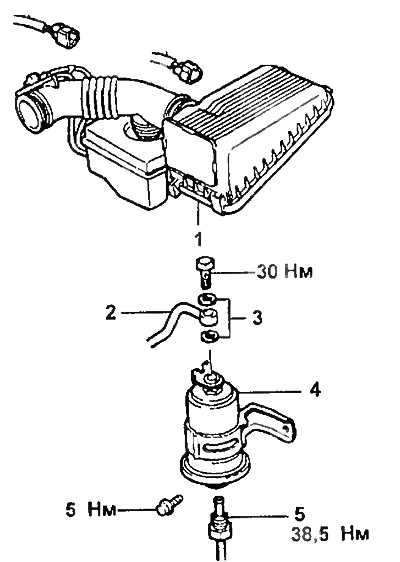
Parts removed when removing the fuel filter.
1 - air filter cover,
2 - fuel hose,
3 - gaskets,
4 - fuel filter,
5 - fuel supply pipe.
1. Remove the air filter cover with air duct (see below "Removal the throttle body").
2. Disconnect the fuel outlet hose by unscrewing the bypass bolt.
- Tightening torque - 30 Nm
3. Unscrew the fuel supply pipe.
- Tightening torque - 39 Nm
4. Remove the fuel filter by unscrewing the 2 mounting screws.
- Tightening torque - 5 Nm
The fuel filter is installed in the reverse order of its removal.
Removal and installation the fuel pump
1. Disconnect the cable from the negative (-) battery terminal.
2. Remove the rear seat cushion.
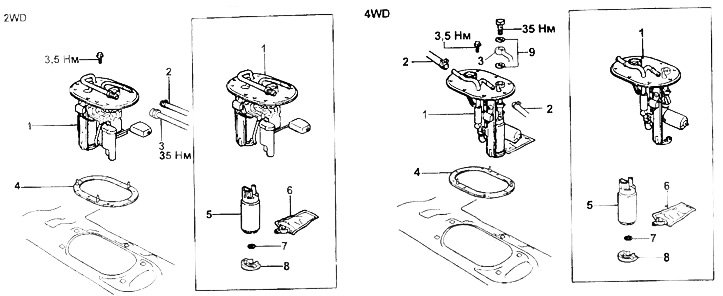
Parts removed when dismantling the fuel pump.
1 - pump bracket,
2 - fuel return pipe,
3 - fuel outlet pipe,
4 - gasket,
5 - fuel pump,
6 - pump filter,
7 - clamp,
8 - rubber shock absorber,
9 - gasket.
3. Remove the service hatch cover.
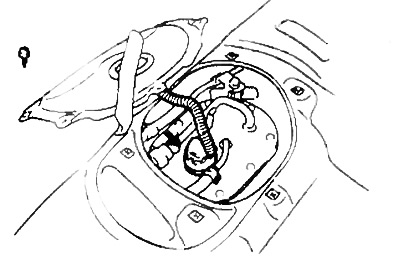
4. Remove the fuel pump and fuel level gauge sensor assembly.
a) Disconnect the fuel pump and fuel level indicator sensor connector.
b) Disconnect the fuel outlet and return pipes.
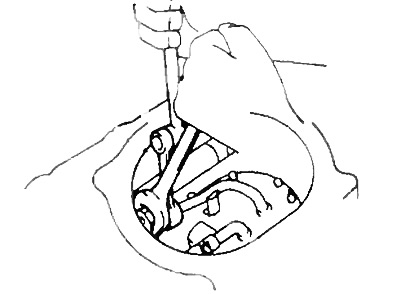
2WD models
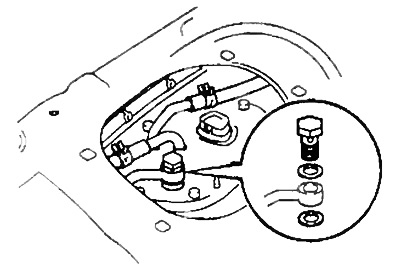
4WD models
5. Disconnect the fuel pump mounting bracket from the fuel tank by unscrewing 8 bolts
- Tightening torque - 3.5 Nm
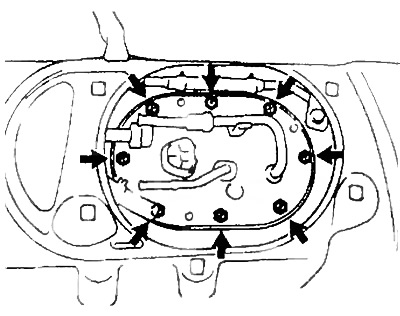
2WD models
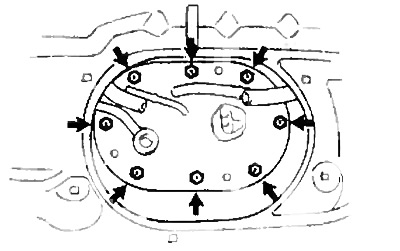
4WD models
6. Remove the pump from the bracket.
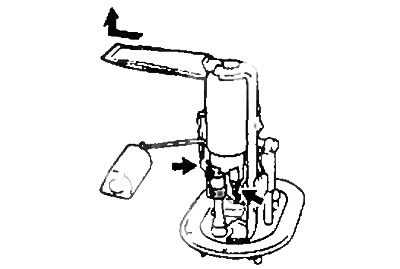
2WD models
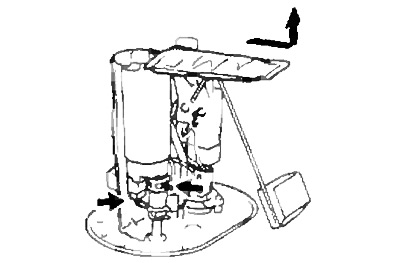
4WD models
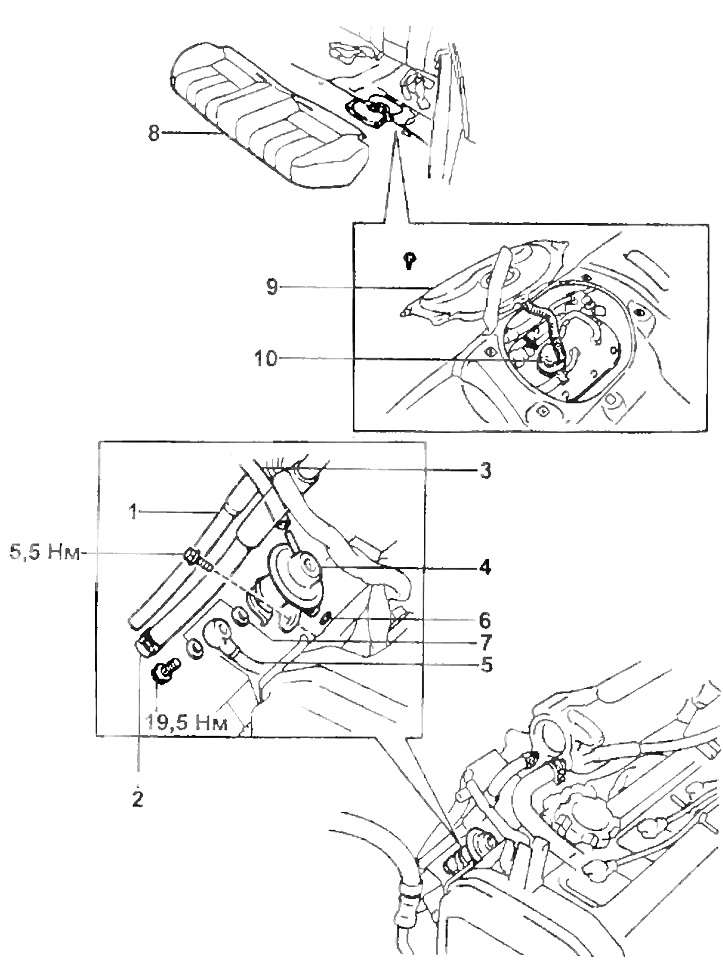
Parts to be removed when dismantling the fuel pressure regulator.
1 - hose of the idle speed increase system when the air conditioner is turned on,
2 - power steering hose,
3 - vacuum hose,
4 - fuel pressure regulator,
5 - fuel pipe No.2,
6 - O-ring seal,
7 - gasket,
8 - rear seat cushion,
9 - service hatch cover,
10 - pump connector.
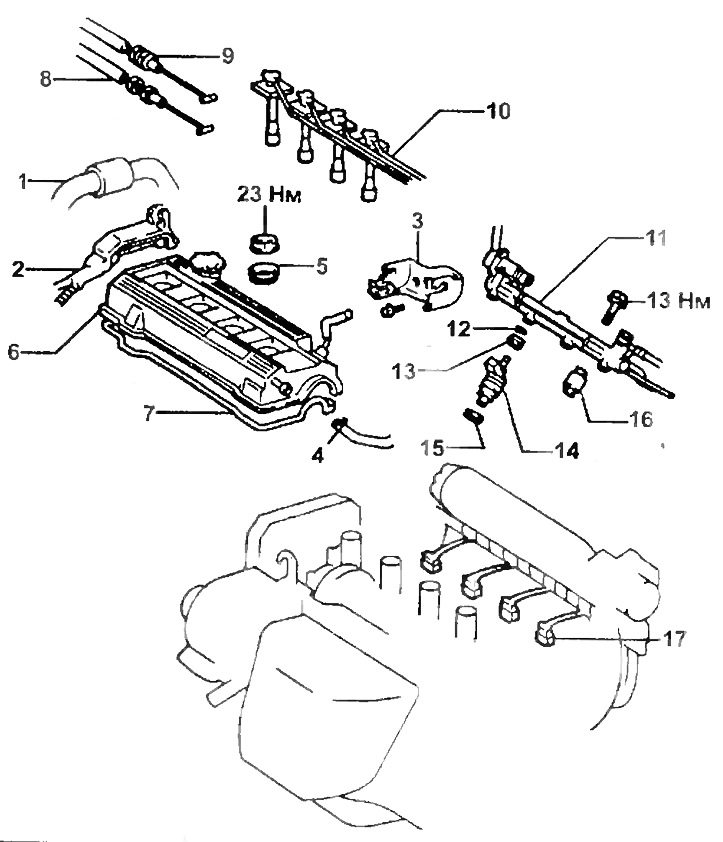
Parts removed when dismantling injectors.
1 - power steering hose
2 - wiring protection,
3 - bracket,
4 - crankcase ventilation hose,
5 - seal,
6 - cylinder head cover,
7 - gasket,
8 - accelerator cable,
9 - throttle actuator cable (from automatic transmission),
10 - high-voltage wires,
11 - fuel manifold,
12 - O-ring seal,
13 - fuel manifold mounting bolt,
14 - injectors,
15 - safety sleeve,
16 - spacer,
17 - injector connectors.
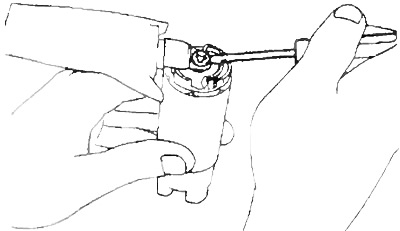
6. Using a small screwdriver, remove the clamp and then pull out the filter.
Note: The fuel pump is installed in the reverse order of its removal.