
Vehicle check
1. Check the throttle body.
A) Check the smoothness of the damper actuator.
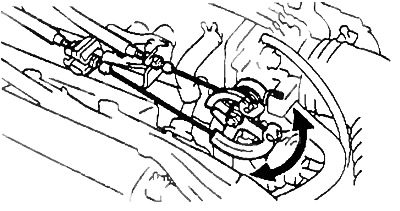
Cars with automatic transmission
Removing the throttle body
1. Drain the engine coolant.
2. Disconnect the accelerator cable.
3. Disconnect the throttle cable from the automatic transmission.
4. Remove the air filter cover and air duct.
A) Disconnect the intake air temperature sensor connector.
b) Disconnect the solenoid valve connector.
V) (With TRC) Disconnect the hoses of the forced crankcase ventilation system and the idle speed increase system.
G) Remove the air filter cover and air duct.
5. Disconnect the throttle position sensor connector
6. (With TRC) Disconnect the auxiliary throttle position sensor connector.
7. (With TRC) Disconnect the secondary throttle servo connector.
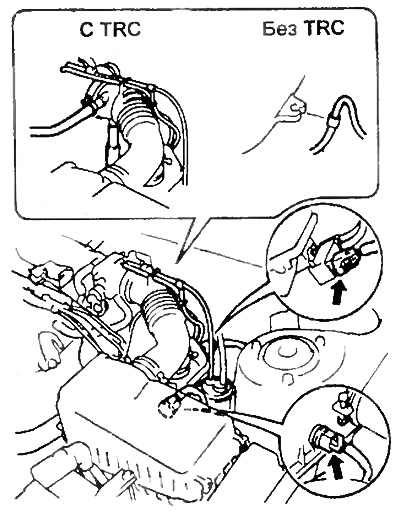
8. (With TRC) Remove the mount by unscrewing 2 bolts.
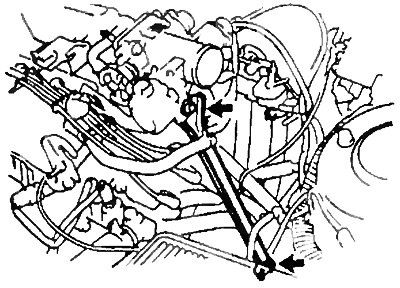
9 Remove the idle speed control valve.
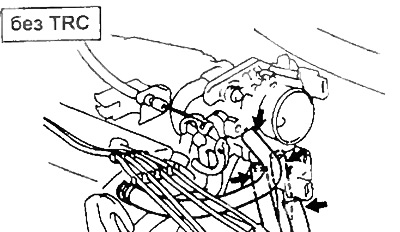
10. (Without TRC) Disconnect the air hose.
11. (Without TRC) Disconnect the exhaust gas recirculation hose.
12. Disconnect the coolant bypass hoses.
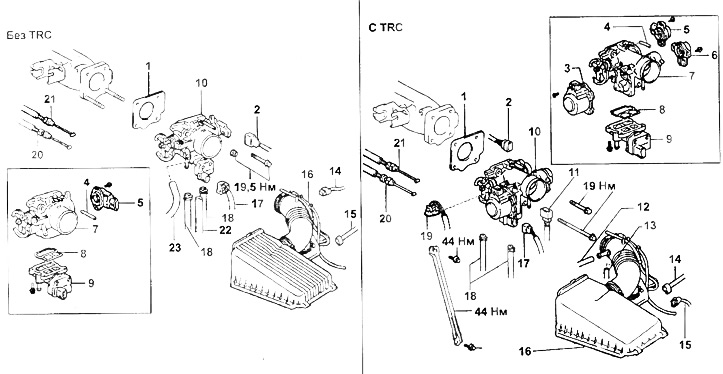
Parts for removal and installation.
1 - throttle body gasket,
2 - throttle position sensor connector,
3 - additional throttle servo (TRC system),
4 - vacuum hose,
5 - throttle position sensor,
6 - additional throttle position sensor,
7 - throttle body,
8 - gasket for the idle speed control valve,
9 - idle speed control valve,
10 - throttle body assembly,
11 - auxiliary throttle position sensor connector,
12 - hose of the forced crankcase ventilation system,
13 - hose system for increasing the idle speed,
14 - electropneumatic valve connector,
15 - intake air temperature sensor connector,
16 - the upper part of the air filter assembly with the air duct,
17 - connector for the idle speed control valve,
18 - coolant bypass hose,
19 - auxiliary throttle servo connector,
20 - throttle cable,
21 - throttle valve control cable,
22 - air hose,
23 - hose of the exhaust gas recirculation system.
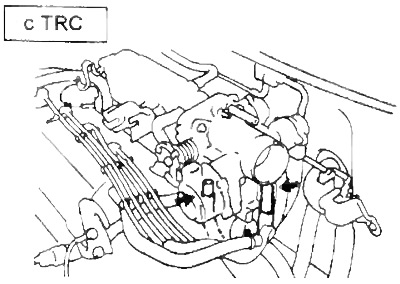
13. Remove the throttle body assembly by unscrewing 4 bolts (with TRC) or 2 bolts and 2 nuts (without TRC).
- Tightening torque - 20 Nm
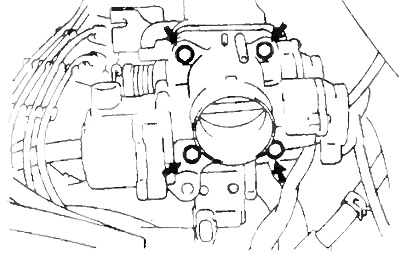
C TRC
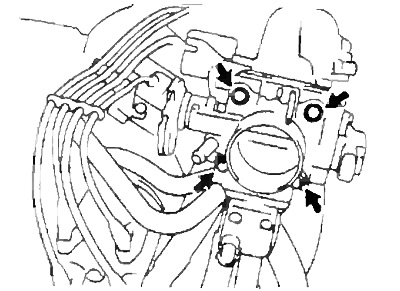
Without TRC
Throttle Body Disassembly
1. Remove the idle speed control valve by unscrewing the 4 mounting screws.
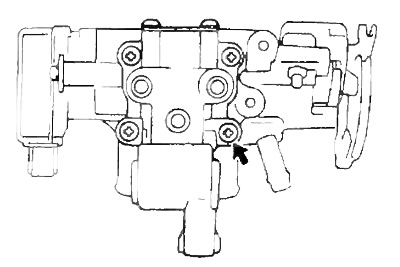
4S-FE and 3S-FE without TRC
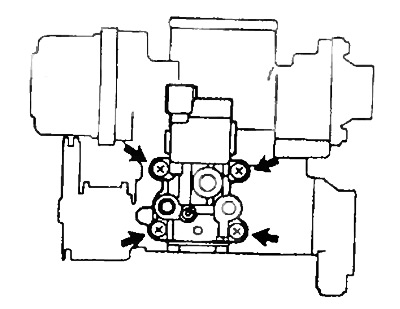
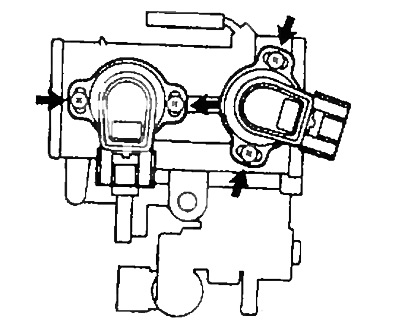
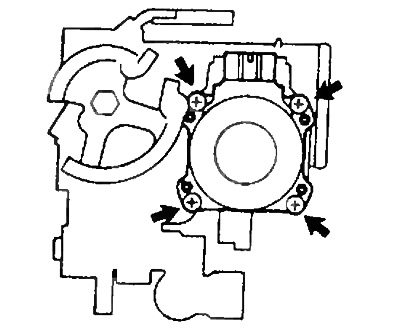
3S-FE with TRC
2. (4S-FE, 3S-FE without TRC) Remove the throttle position sensor.
a) (4S-FE) Lock the throttle valve when it is opened 45°.
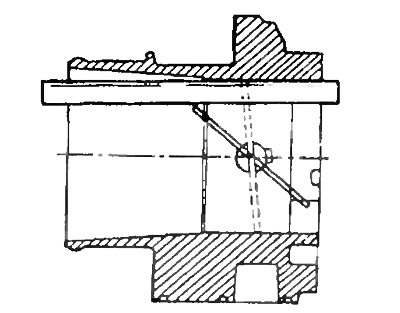
b) Loosen the 2 mounting screws and remove the sensor.
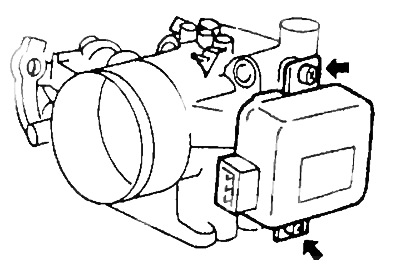
4S-FE
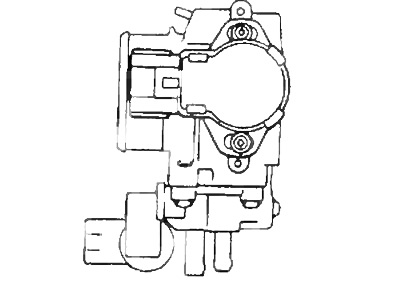
3S-FE without TRC
3. (3S-FE with TRC) Remove the primary and secondary throttle position sensors by removing two mounting screws each.
5. (3S-FE with TRC) Remove the secondary throttle servo by removing the 4 mounting screws.
Throttle Body Check
1. Clean dirty throttle body parts using a soft brush and carburetor cleaner. Using compressed air, blow out all channels and openings.
Note: Do not clean the throttle position sensor to avoid damaging it.
2. Hang the throttle.
Check that there is no play between the throttle stop adjusting screw and the throttle lever when the throttle is fully closed.
3. Installation and adjustment of the throttle position sensor.
4S-FE engine
A) Install the throttle position sensor, aligning the throttle shaft and sensor hole.
Do not allow the sensor to rotate about the axis during installation and do not remove the sensor housing.
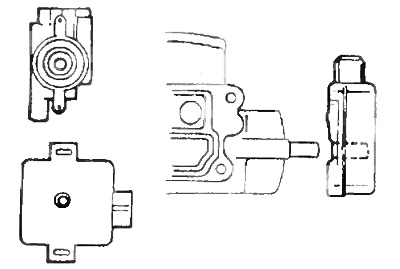
b) Insert a 0.40 mm thick feeler gauge between the throttle stop adjusting screw and lever. Check for continuity between terminals "IDL" And "E2".
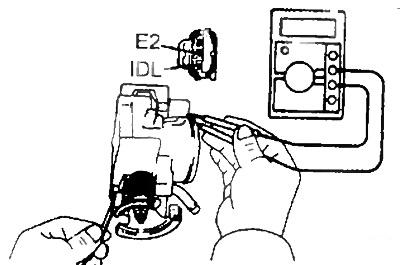
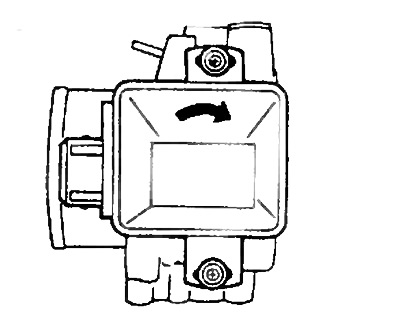
V) If necessary, adjust the throttle position sensor. Loosen the two screws securing the sensor housing, and then, slowly turning the sensor housing clockwise, find its position when the ohmmeter changes its readings. Fix the sensor housing in this position with two screws.
3S-FE engine without TRC
A) Make sure the throttle is fully closed.
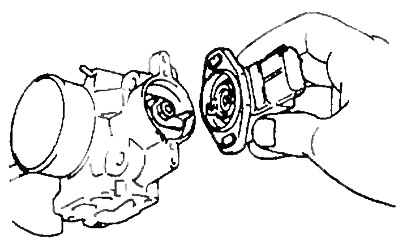
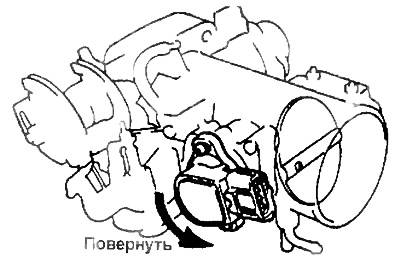
b) Install the sensor in its original position, rotate it 60-120°counterclockwise and insert it into the throttle body.
V) Rotate the sensor clockwise and temporarily secure it.
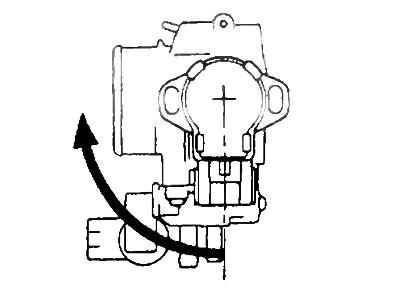
G) Adjust the sensor if necessary:
(1) Insert a 0.40 mm thick feeler gauge between the throttle stop adjusting screw and lever. Check for continuity between terminals "IDL" And "E2".
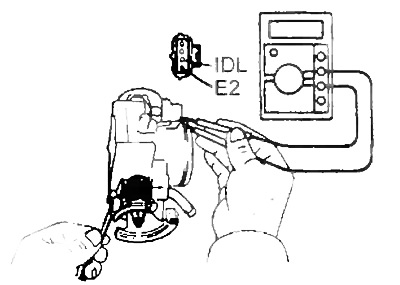
(2) Loosen the two screws securing the sensor housing, and then, slowly turning the sensor housing clockwise, find its position until the circuit breaks. Fix the sensor housing in this position with two screws.
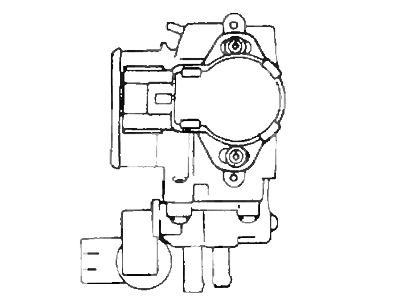
d) Check the throttle position sensor and readjust if necessary.
3S-FE engine with TRC
Secondary Throttle Position Sensor
A) Set the secondary throttle to the fully closed position.
b) Install the secondary throttle position sensor to its original position, rotate it 120°counterclockwise (to the position shown by the dotted line) and insert into the throttle body.
V) Turn the secondary throttle position sensor clockwise and set to the position shown in the figure.
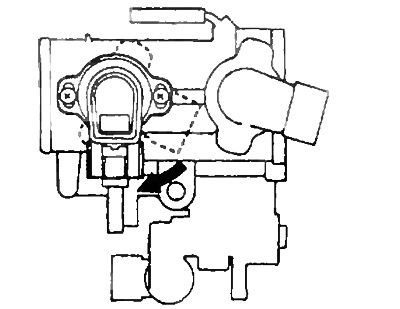
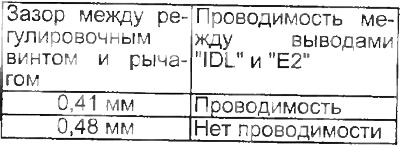
G) Insert a feeler gauge between the throttle stop adjusting screw and the gear sector. Check for continuity between terminals "IDL" And "E2".
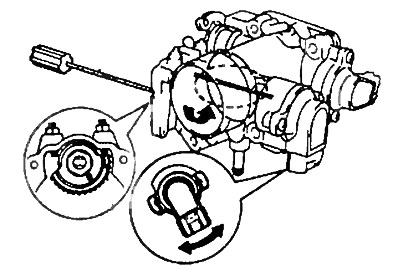
Main Throttle
A) Set the main throttle to the fully closed position.
b) Install the main throttle position sensor to its original position, rotate it 60-120°counterclockwise (to the position shown by the dotted line) and insert into the throttle body.
V) Turn the main throttle position sensor clockwise and set to the position shown in the figure. Temporarily tighten the fixing screws.
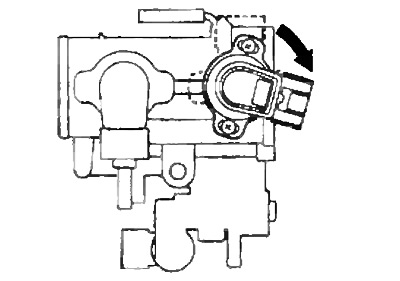
G) Insert a 0.40 mm thick feeler gauge between the throttle stop adjusting screw and lever. Check for continuity between terminals "IDL" And "E2".
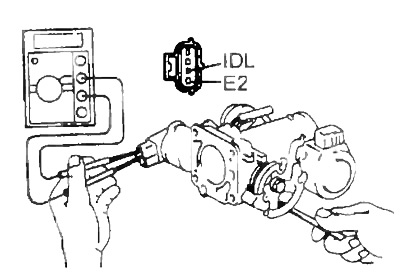
d) Slowly turn the sensor clockwise until the circuit breaks. Tighten the sensor fixing screws.
e) Check the sensor and readjust if necessary.
3. Checking the throttle position sensor.
4S-FE engine
A) Insert a 0.70 or 0.90 mm thick feeler gauge between the throttle stop adjusting screw and lever.
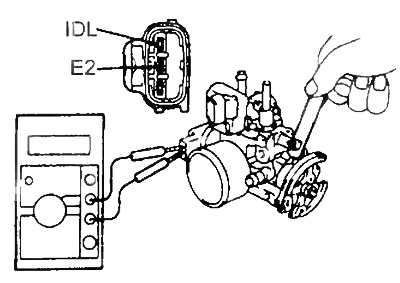
b) Using an ohmmeter, measure the resistance between the terminals "IDL" And "E2" sensor connector at various throttle positions.
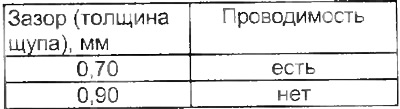
V) Make a corner template as shown in the picture.
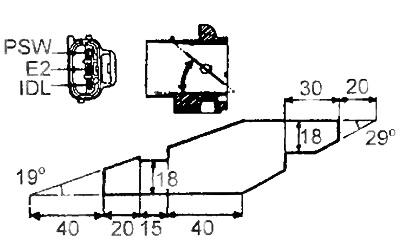
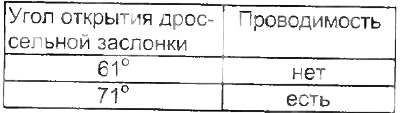
G) Set the full throttle angle from vertical according to the specifications below.
Full throttle opening angle is 61°or 71°.
Note: The full throttle angle value includes the reference angle corresponding to the fully closed throttle position.
d) Using an ohmmeter, check the continuity between the terminals "PSW" And "E2" throttle position sensor connector at different throttle plate positions.
3S-FE engine
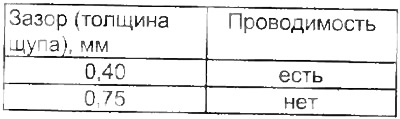
A) Insert a 0.40 or 0.75 mm thick feeler gauge between the throttle stop adjusting screw and lever.
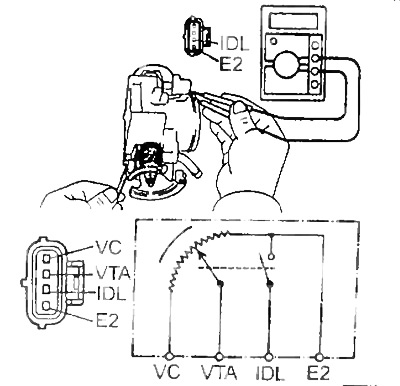
b) Using an ohmmeter, measure the resistance between the terminals "IDL" And "E2" sensor connector at various throttle positions.
V) Measure resistance between leads "VTA" And "E2".
- Rated resistance - 2.5-5.9 kOhm
G) Measure resistance between leads "VTA" And "E2" at different throttle positions.
- Throttle fully closed - 0.2-5.7 kOhm
- Throttle fully open - 2.0-10.2 kOhm
4. Adjust the secondary throttle position sensor if necessary.
A) Loosen the two sensor set screws.
b) Set the secondary throttle to the fully closed position.
V) Insert a 0.45 mm thick feeler gauge between the throttle adjusting screw and the gear sector.
V) Connect an ohmmeter to the leads "IDL" And "E2" sensor.
G) Gradually turn the sensor clockwise until the ohmmeter changes its reading, and fix it with two screws in this position.
d) Check continuity between terminals "IDL" And "E2".
6. Install the secondary throttle actuator with 4 screws.
Throttle body installation
The throttle body is installed in the reverse order of its removal.