
Checking the fluid level in the power steering
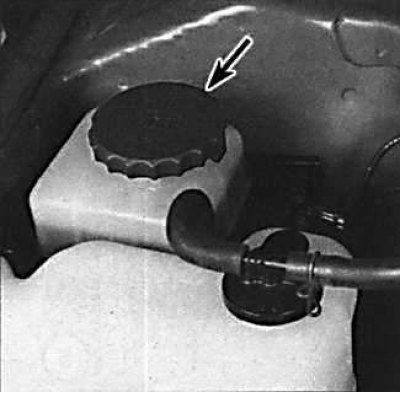
Power steering fluid reservoir location
Fluid level in the power steering reservoir on a cold and hot engine
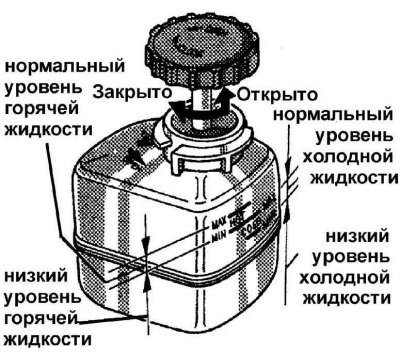
When checking the level, the wheels must be in the straight-ahead position.
The power steering fluid reservoir is made of transparent material and the fluid level can be checked visually.
If frequent topping up is required, check the tightness of the power steering system.
Constantly pay attention to the color of the coolant. If the color of the coolant has changed to brown or rust, drain the coolant and flush the cooling system.
Checking the oil level in an automatic transmission
Attention! Never allow the oil level to be above the upper mark.
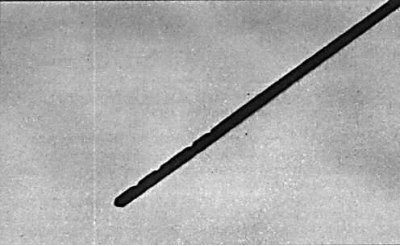
Dipstick for measuring the oil level in an automatic transmission
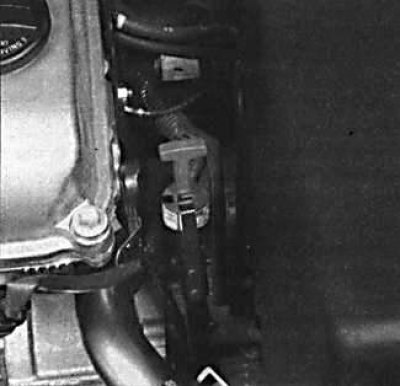
The location of the dipstick for measuring the oil level in an automatic transmission
If the gearbox is cold, the oil level should be between the two lower marks, and if the gearbox is hot, between the two upper marks.
The oil level in an automatic transmission is an important operating indicator. Both low and high oil levels are not allowed.
1. Drive the car for a short time to bring the transmission up to normal temperature.
2. Park the vehicle on a level, level surface. With the engine idling, the hand and foot brakes applied, move the selector lever through all positions and return to its original position (Park). In this position of the selector and the engine idling, remove the dipstick to measure the oil level and, simultaneously with the level mark, evaluate the condition of the oil.
3. Wipe the dipstick and reinstall it.
4. Remove the dipstick again and check the oil level. If the gearbox is cold, the oil level should be between the two lower marks on the dipstick. With the transmission warmed up to normal operating temperature, the oil level should be between the top two marks on the dipstick.
5. If the oil level is low, add it through the dipstick hole. The distance between the marks corresponds to approximately 1 liter of oil. Add oil in small amounts. If the color of the oil is black or brown, the oil should be changed. If you are in doubt about the quality of the oil, compare a sample of fresh oil with the oil in the gearbox.
Changing the oil and oil filter
Attention! If metal chips are present in used engine oil, this usually indicates wear on the crankshaft main or connecting rod bearings.
Tools needed to change oil and oil filter
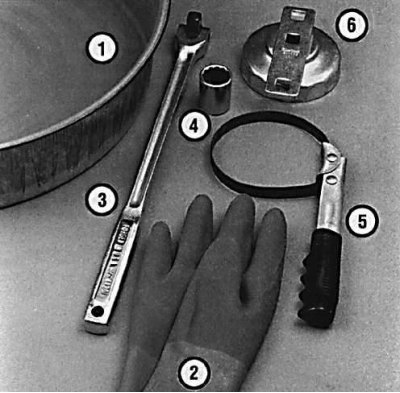
1 - a flat wide container for draining oil; 2 - rubber gloves to prevent hot oil from getting on your hands; 3 - extended key handle; 4 - key for unscrewing the oil drain plug; 5 - a special key for unscrewing the oil filter; 6 - a special key for unscrewing the oil filter, mounted on the back of the filter
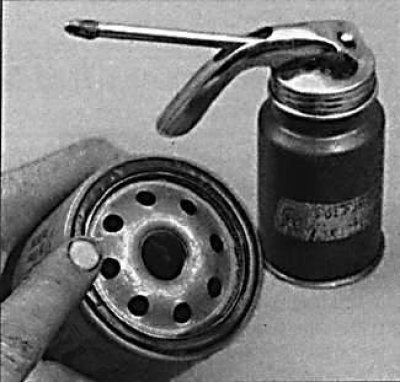
Lubricating the O-ring of the new oil filter with engine oil
Periodic oil and filter changes are the most important preventive maintenance procedures. As engine oil ages, it becomes thin and contaminated, leading to premature engine wear.
Before starting this operation, gather together all the necessary tools and materials. The engine needs to be warm to allow the oil to drain better along with the bulk of the contaminants.
1. Raise the front of the car and secure it on stands.
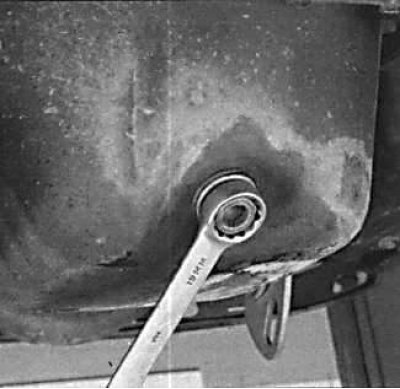
2. Unscrew the drain plug about half a turn. Place an oil drain container under the drain plug and unscrew the plug completely. If necessary, press down on the plug when unscrewing to prevent the oil from leaking prematurely. 3. When the oil is completely drained, wipe everything around the drain hole with a rag and screw the oil drain plug securely.
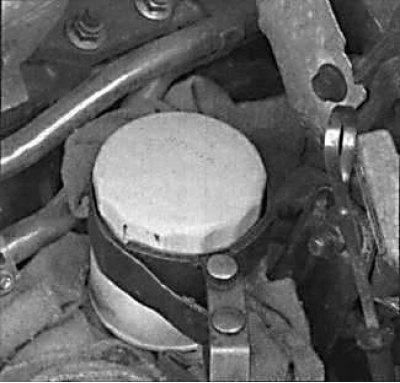
4. Place a container for drained oil under the oil filter and, using the special tool, loosen the filter, then unscrew it by hand.
5. Wipe off all traces of oil and dirt around the filter attachment. Check if the rubber seal is left on the cylinder block. If it remains, then remove it.
6. Screw in the oil filter by hand until the rubber gasket touches the engine, then screw in the filter by hand 3/4 of a turn.
7. Park the vehicle on a level, level surface.
8. Pour fresh engine oil through the oil filler neck.
9. Close the oil filler cap, start the engine and let it run for a few minutes. Check it for oil leaks around the filter and drain plug on the oil pan. Be aware that the oil pressure warning light may stay on for several seconds as oil must fill all channels and oil reservoirs in the engine.
10. Stop the engine and wait a few minutes for the oil to drain into the sump. Check the oil level and top up if necessary.