
Checking the brake system
Inspect the brakes at the recommended intervals and each time the wheels are removed.
Symptoms that indicate potential brake problems: Vehicle pulls to the side when braking, noise when braking, increased brake pedal travel, pedal force pulsation, brake fluid leakage, especially along the side of the tire.
1. Raise the appropriate part of the car and fix it on stands. Remove the wheel.
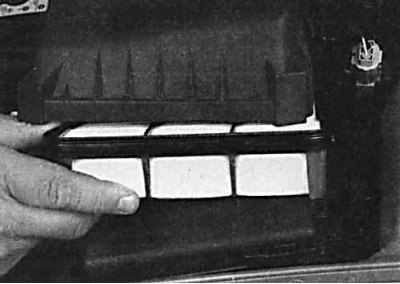
Air filter replacement
The air filter is located inside the casing on the left side of the engine compartment.
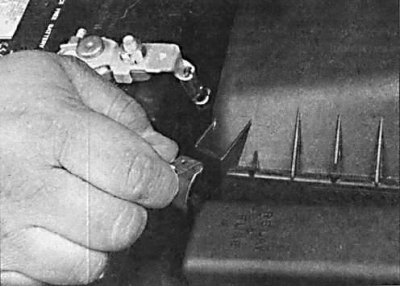 |  |
1. To remove the air filter, release the four brackets holding the two halves of the air filter housing together.
2. Remove the air filter cover and remove the filter element.
3. Install a new filter element and follow all the steps in reverse order with respect to removal.
Fuel system check
If you smell fuel while driving or parked, inspect the fuel system immediately.
1. Inspect the filler neck, supply and return pipes, make sure that the connections are securely tightened.
2. Inspect the filler neck mount. Sometimes the clamps of the rubber hoses from the neck to the fuel tank loosen.
Checking the oil level in the final drive
Plug location and checking the final drive oil level with a manual transmission
The final drive is lubricated separately from the automatic transmission.
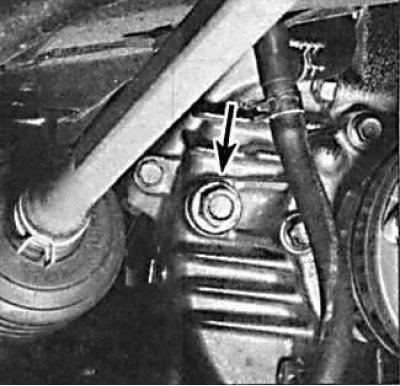
1. Unscrew the oil filler plug in the final drive.
2. The oil level should reach the lower edge of the oil level plug hole. If necessary, add oil with a syringe until oil starts to flow out. Install the plug and tighten it to the required torque.
Suspension and steering check
The car is on the ground
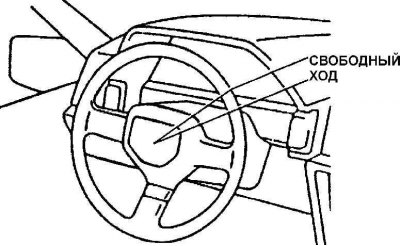
Steering wheel free play is the angle that the steering wheel must be turned before the vehicle's front wheels begin to turn.
1. Set the front wheels to drive straight ahead. Check steering wheel free play. If the free play exceeds the allowable limits, the wheel bearings, steering shaft pivots, ball joints and steering gear may be worn out.
2. Excessive rolls of the car, increased vibration of the body on rough roads, swaying when cornering indicates damage to the steering and suspension.
3. To control the shock absorbers, rock the car by pressing on each of the four corners of the car. If the body does not return to its original position in one or two strokes, the shock absorber must be replaced.
4. Check the position of the body relative to the ground. If there is a roll to the side or forward or backward, most likely the springs have sagged or the suspension parts have worn out.
On a lifted car
1. Inspect the condition of the steering shaft hinges, the presence of leaks from the steering mechanism, the integrity of the protective covers and seals.
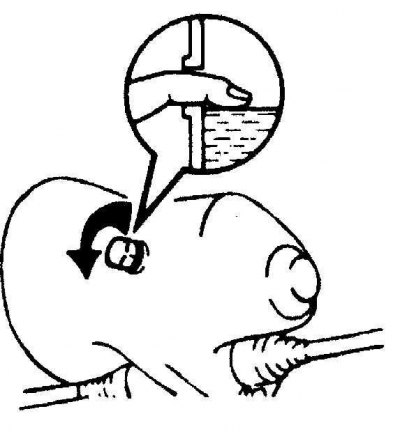
2. Check the wheel play by taking the wheel with your hands at the 12 and 6 o'clock position and try to shake it in a vertical plane. A very small play is acceptable, but if the play is large enough, then further verification is necessary to establish the source. Continue pumping the wheel while the assistant applies the foot brake. If the play is eliminated or significantly reduced, it is likely that the hub bearings are damaged. If the play is still significant with the brake applied, then there is wear in the joints and suspension mounts.
3. Now take the wheel at the 9 and 3 o'clock position and try to shake it in a horizontal plane. The presence of play in the horizontal plane can be caused by wear in the hub bearings or tie rod ball joints. If the inner or outer ball joint is worn, play will be evident.
4. Using a large screwdriver as a lever, check for wear in the suspension mount bushings between the suspension elements and the application point.
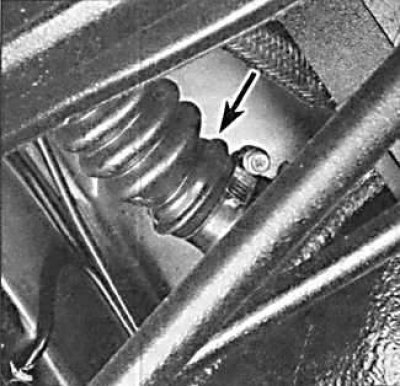
Checking the protective cover of the drive shaft
1. Raise and carefully secure the vehicle on stands.
2. Turn the steering wheel to the right or left as far as it will go and turn the front wheel.
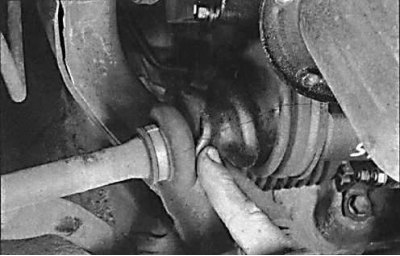
3. Inspect the CV joint rubber boots by squeezing them to open the folds.
4. Check the protective boots for cracks, which can lead to grease leakage, as well as water and dirt ingress. Also check the condition of the fasteners.
5. Inspect the covers of the internal constant-velocity joints and casings on the other side. If any damage is found, the cover must be replaced immediately.
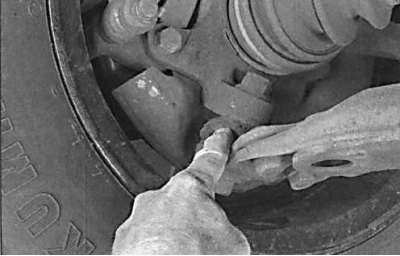
6. At the same time, check the general condition of the CV joints by holding the shaft while trying to turn the wheel.
7. Try again while holding the inner joint and turning the shaft. Any noticeable play indicates wear on the CV joint, wear in the shaft slots, or a loose shaft lock nut.