



Contents: Replacing brake pads ↓ Removal the caliper ↓ Disassembling the caliper ↓ Checking and repairing front brakes ↓ Assembling the caliper ↓ Installing the caliper ↓
Replacing brake pads
1. Remove the front wheel and temporarily secure the brake disc with wheel nuts.
2. Check the thickness of the brake pad linings through the inspection hole in the caliper.
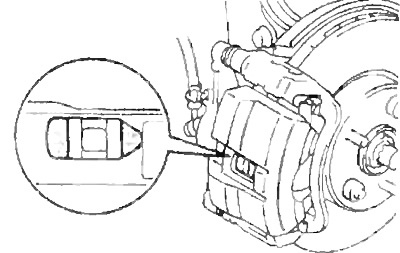
- Minimum thickness - 1.0 mm
Replace the pads if necessary.
3. While holding the guide pins, unscrew the bolts and remove the caliper.
Note: Do not disconnect the brake hose from the caliper. Secure the caliper to the stand with wire, do not leave it hanging by the brake hose.
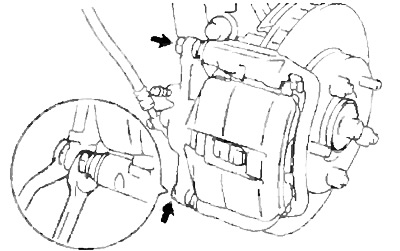
4. Remove the parts shown in the figure.
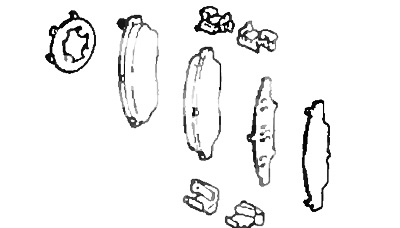
5. Check the thickness and runout of the disc (see below).
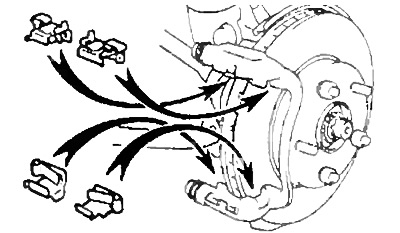
6. Install the four retaining plate inserts.
7. Install new pads.
Note: If it is necessary to replace at least one brake pad, replace all of them to ensure uniform braking. When replacing the pads, the anti-squeak pads are also changed.
a) Apply special disc brake grease to both sides of the inner anti-squeal lining.
b) Install anti-squeak pads on each pad as shown in the figure.
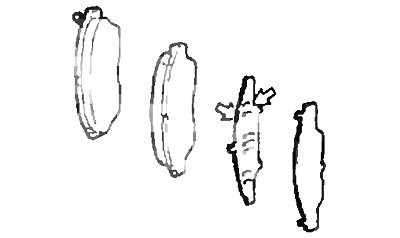
c) Install the brake pads.
Caution: Do not allow oil or grease to come into contact with the working surfaces of the pads and disc.
8. Install the caliper.
a) Remove a small amount of brake fluid from the reservoir.
b) Push the piston into the cylinder using the hammer handle.
Note: If the piston does not move well, loosen the bleed screw and push the piston in if there is a small leak of brake fluid.
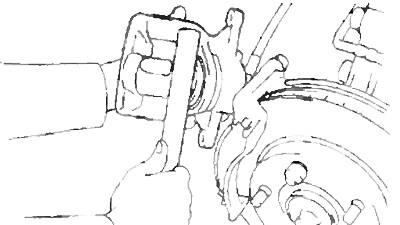
c) Install the caliper.
d) While holding the guide pins, tighten the bolts.
- Tightening torque - 35 Nm
9. Install the front wheel.
- Tightening torque - 105 Nm
10. Check the brake fluid level in the reservoir and top up if necessary.
Removal the caliper
1. Disconnect the brake hose.
a) Loosen the union bolt, remove the two gaskets and disconnect the brake hose.
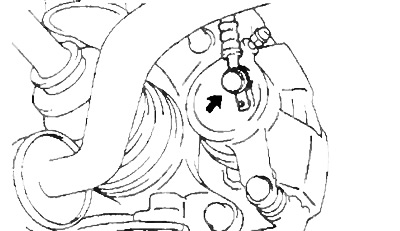
b) Using a suitable container, drain the brake fluid.
2. Remove the caliper.
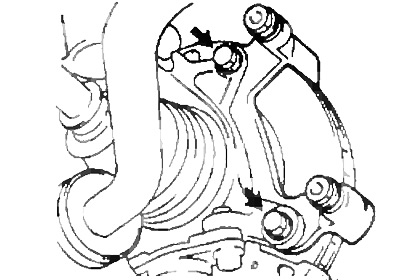
a) While holding the guide pins, loosen the mounting bolts.
b) Unscrew the mounting bolts.
c) Remove the caliper from the bracket.
3. Remove the brake pads.
4. Loosen the mounting bolts and remove the caliper bracket.
Disassembling the caliper
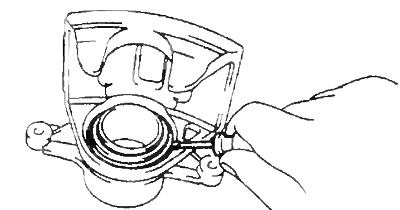
1. Using a screwdriver, remove the brake cylinder boot spring ring and boot.
2. Remove the piston.
a) Place a rag between the piston and the cylinder.
b) Using compressed air, remove the piston from the cylinder.
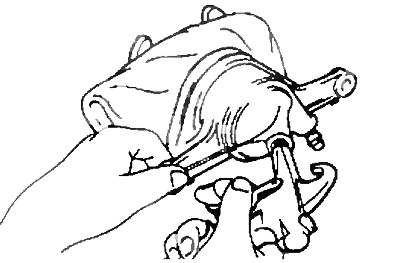
Caution: Do not place your fingers in front of the piston when using compressed air.
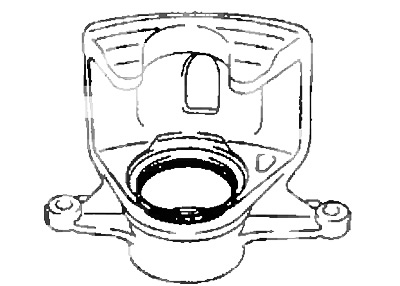
3. Using a screwdriver, remove the cuff.
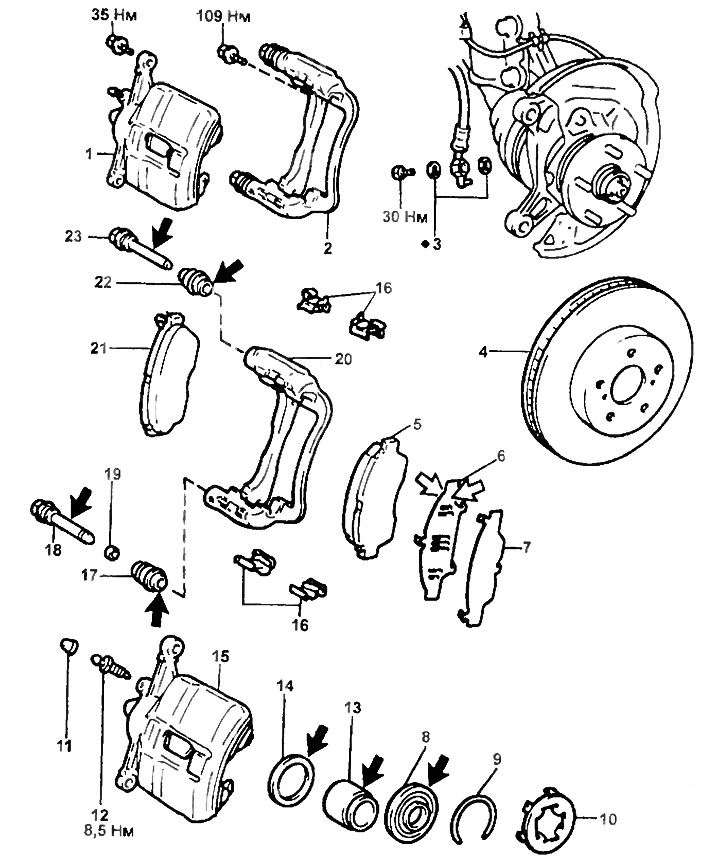
Front brakes.
1 - caliper assembly,
2 - caliper bracket,
3 - gasket,
4 - brake disc,
5 - outer brake shoe,
6 - internal anti-squeak gasket,
7 - anti-squeak gasket,
8 - case,
9 - spring ring,
10 - anti-squeak gasket,
11 - cap,
12 - bleed nipple,
13 - piston,
14 - cuff,
15 - support,
16 - retaining plate insert,
17, 22 - dust cover,
18, 23 - guide pin,
19 - bushing,
20 - caliper bracket,
21 - inner brake shoe.
4. Remove the guide pins and dust covers.
a) Remove the two guide pins.
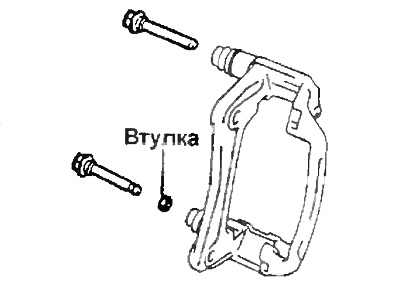
b) Using a screwdriver and hammer, remove the dust covers.
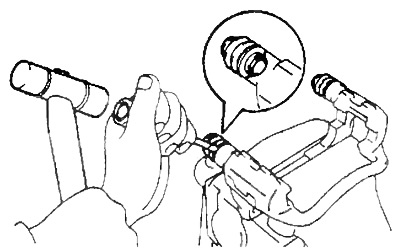
Checking and repairing front brakes
1. Measure the thickness of the brake shoe linings.
- Nominal thickness - 12.0 mm
- Minimum thickness - 1.0 mm
Replace the pads if the lining thickness is less than the minimum or if the linings are worn unevenly.
2. Measure the runout of the brake disc at a distance of 10 mm from the outer edge. The maximum permissible runout is 0.05 mm
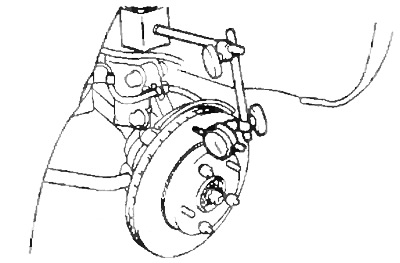
If the brake disc runout is greater than or equal to the maximum value, check the bearing axial clearance and hub runout.
3. Using a caliper, measure the thickness of the brake disc.
- Nominal thickness - 25 mm
- Minimum thickness - 23 mm
Replace the disc if the disc thickness is less than the minimum allowable.
4. Adjust the disc runout if necessary.
a) Loosen the wheel nuts and remove the disc.
b) Reinstall the disc by rotating it ⅕ of a turn from the original position on the hub, measure the disc runout in all installation options. Select the minimum value obtained. Compare it with the maximum permissible.
c) If the obtained value is less, then install the disk in this position.
d) If the obtained value is greater, replace the disk and repeat steps "b" and "c").
Assembling the caliper
1. Lubricate the surfaces indicated by arrows in the assembly drawing.
2. Install the dust covers and guide pins.
a) Using a suitable drift and hammer, install two new dust covers.
b) Make sure the dust boots fit snugly into the caliper bracket grooves.
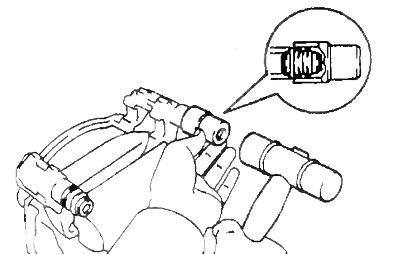
c) Insert two guide pins into the caliper bracket.
Note: When assembling, please note that the bushing is installed together with the lower guide pin.
d) Install the caliper bracket and tighten the mounting bolts.
- Tightening torque - 109 Nm
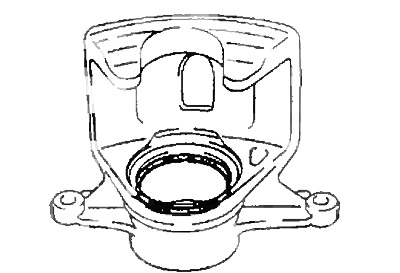
3. Install the cuff.
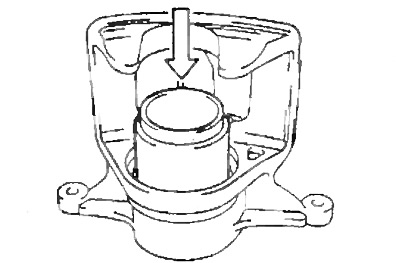
3. Install the piston into the cylinder.
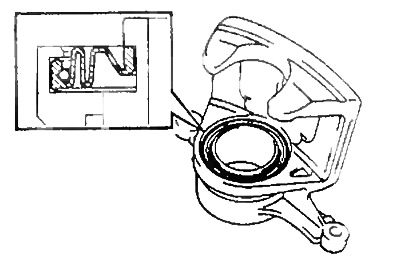
4. Install the boot and cylinder boot spring ring.
Installing the caliper
1. Install the brake pads.
2. Install the caliper.
a) Install the caliper onto the bracket.
b) While holding the guide pins, tighten the two mounting bolts
- Tightening torque - 35 Nm
3. Connect the brake hose.
Install the brake hose with two new gaskets.
- Tightening torque - 30 Nm
4. Fill the reservoir with brake fluid and bleed the brake system.
5. Check for leaks.
6. Install the front wheel.
- Tightening torque - 105 Nm
7. Check the tension of the front brake cable.