
Removing
1. Disconnect the brake fluid low sensor connector.
2. Pump out a syringe a brake liquid from a tank.
Caution: Do not allow brake fluid to come into contact with painted surfaces. If brake fluid comes into contact with a painted surface, wash it off immediately.
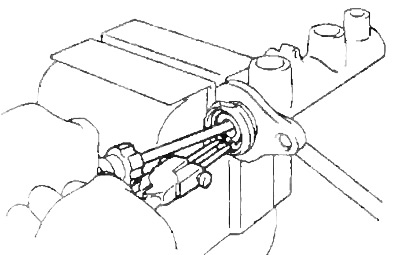
3. Using the special tool, disconnect the brake pipes from the master brake cylinder.
4. Turn away nuts, remove an arm, the main brake cylinder and a lining.
 |  |
Disassembly
1. Remove the tank.
A) Loosen the screw and remove the tank.
b) Remove the cap and remove the strainer from the tank.
2. Remove the rubber bushings.
3. (Without ABS)
Place the cylinder in a vise, use a screwdriver to push the pistons through the entire stroke and unscrew the locking bolt with gasket.
Note: before use, wrap the screwdriver with electrical tape.
4. Remove the pistons.
A) Press the piston with a screwdriver and use the special tool to remove the circlip.
b) Remove piston No. 1 with a spring, pulling it strictly along the axis without distortions.
Attention: if the piston is removed at an angle, the cylinder bore may be damaged.
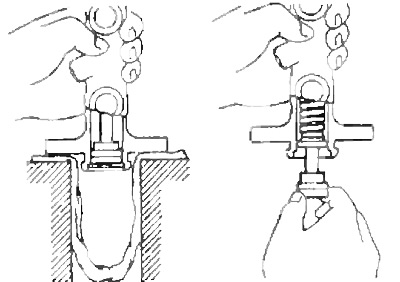
V) Lay a rag on two wooden blocks as shown in the picture and lightly strike the cylinder flange against the blocks until the number 2 piston comes out.
Note: make sure that the distance from the cloth to the top of the bars is at least 100mm.
Examination
Note: Blow out the disassembled parts of the brake cylinder with compressed air.
1. Check the cylinder bore for rust and nicks.
2. Check the cylinder for wear and damage. If necessary, replace the cylinder.
Assembly
1. Lubricate the surfaces indicated by the arrows in the assembly drawings.
2. Install pistons.
Caution: Be careful not to damage the cuffs.
A) Install the pistons strictly along the axis without distortions.
Attention: if the piston is installed at an angle, then the cylinder mirror can be damaged.
b) Press down on the piston with a screwdriver and install the circlip.
Note: before use, wrap the screwdriver with electrical tape.
3. (Without ABS)
Using a screwdriver, push the pistons all the way and install the stop bolt with a new gasket. Tighten the bolt.
- Tightening torque - 10 Nm
4. Install two rubber bushings
5. Install the tank.
A) Install the strainer and cover.
b) Install the tank and secure it with a screw.
- Tightening torque - 1.7 Nm

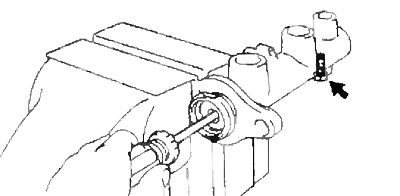
Removing the brake master cylinder.
1 - master brake cylinder,
2 - connector,
3 - gasket,
4 - tee (without ABS),
5 - tube No. 3,
6 - tube number 2 (without ABS),
7 - tube number 4 (without ABS),
8 - tube No. 1 (without ABS),
9 - bracket (4S-FE, 3S-FE),
10 - tube number 2 (with ABS).
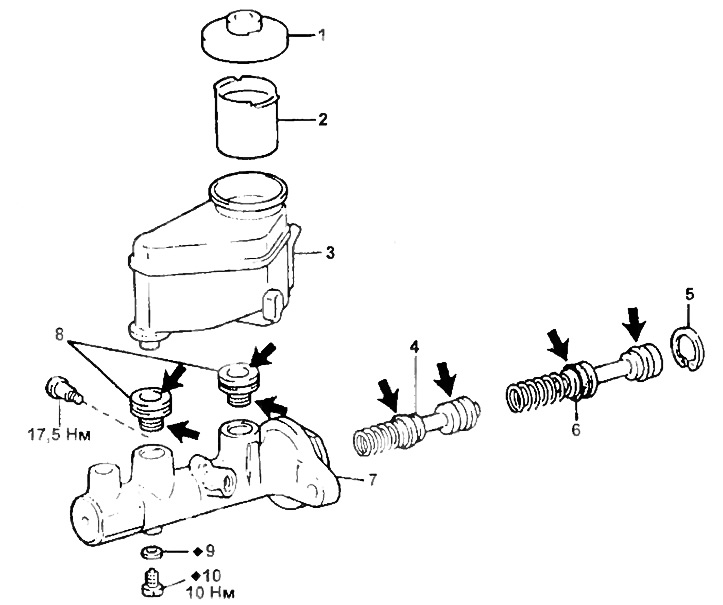
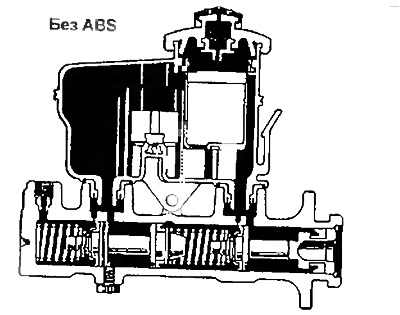
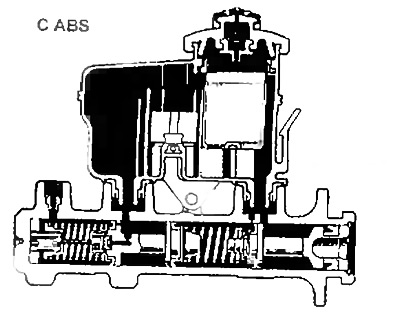
Master brake cylinder.
1 - cover,
2 - mesh filter,
3 - tank,
4 - piston No. 2 and spring,
5 - retaining ring,
6 - piston No. 1 and spring,
7 - cylinder body,
8 - rubber bushing,
9 - locking bolt (without ABS),
10 - gasket (without ABS).
Installation
1. Adjust the length of the vacuum booster rod before installing the master brake cylinder on it (see section "Vacuum brake booster").
2. Install a new gasket, brake master cylinder and bracket, tighten the fastening nuts
- Tightening torque - 13 Nm
3 Using the special tool, connect the tubes to the brake master cylinder. Tighten the fitting.
- Tightening torque - 15 Nm
4. Connect a socket of the sensor of low level of a brake liquid.
5. Fill the reservoir with brake fluid and bleed the brake system.
6. Check for leaks.
7. Check and adjust the brake pedal.