



Timing belt
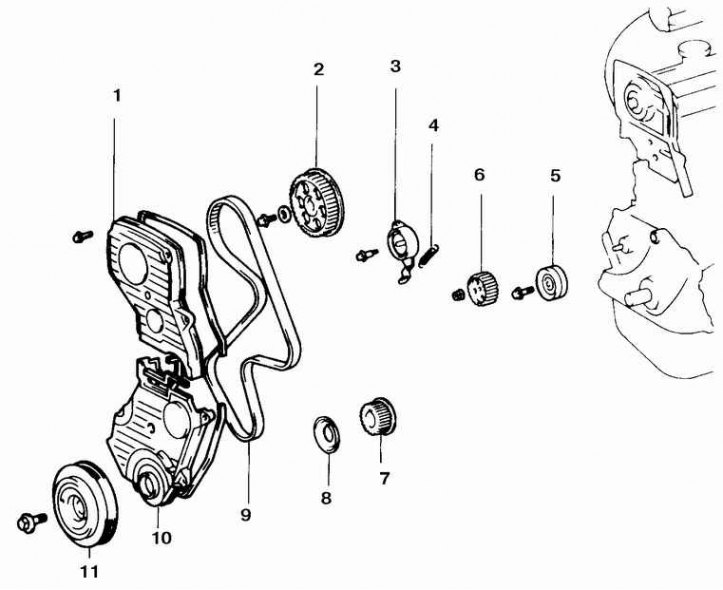
1. Upper timing belt cover; 2. Camshaft sprocket; 3. Upper intermediate pulley; 4. Spring; 5. Upper intermediate pulley; 6. Oil pump sprocket; 7. Crankshaft sprocket; 8. Timing belt guide; 9. Timing belt; 10. Lower timing belt cover; 11. Crankshaft pulley
Removal
1. Disconnect the negative battery cable.
2. Block the rear wheels and set the car to the handbrake.
3. Raise and support the front of the vehicle.
4. Remove the right front wheel and wheel arch liner.
5. Remove the engine cooling system expansion tank.
6. Remove the spark plugs and drive belts.
7. Remove the generator and its bracket.
8. Install a support under the engine, remove the right engine support and the engine offset control rod.
9. Remove the timing belt top cover screws and disconnect the wires from it. Remove the top cover and gaskets.
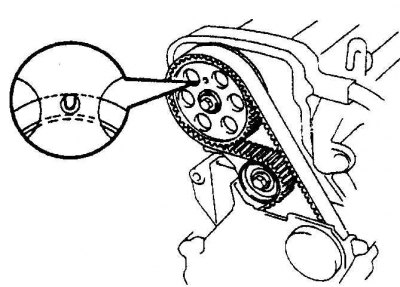
10. Set piston N1 to top dead center. Check that the small hole in the camshaft sprocket is aligned with the timing mark on the first bearing cap of the shaft.
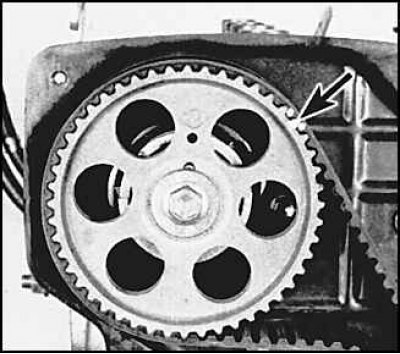
11. If you are going to reuse the timing belt, make timing marks (arrows) on it and on the sprockets. Mark the direction of rotation of the belt.
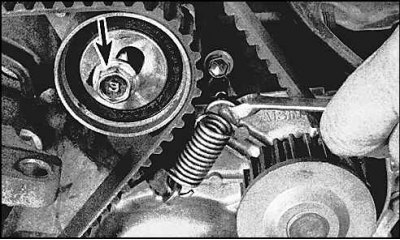
12. Loosen the upper idler pulley bolt (arrow) and remove the spring. Remove the belt from the camshaft sprocket. It is not necessary to remove the belt from the crankshaft sprocket if you are replacing the camshaft seal or removing the cylinder head.
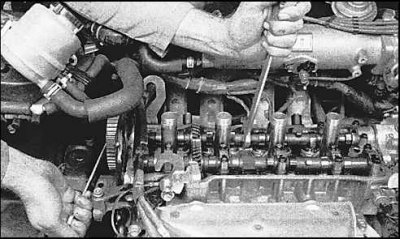
13. If the camshaft sprocket is worn or damaged, remove the cylinder head cover, lock the intake camshaft with a wrench, and remove the sprocket bolt. Remove the sprocket.
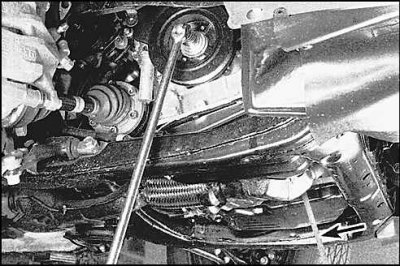
14. Remove the flywheel inspection hole cover and lock the flywheel or drive plate with a large screwdriver. Loosen the crankshaft pulley bolt.
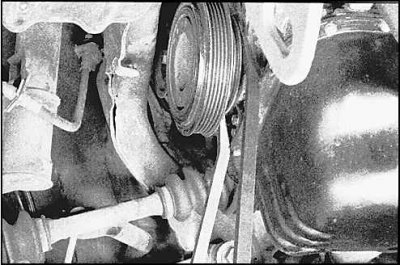
15. Unscrew the bolt and remove the pulley.
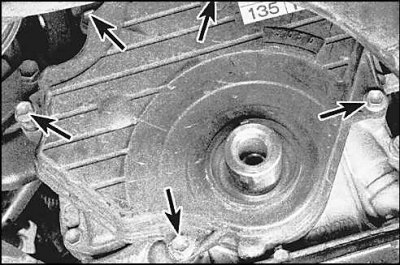
16. Remove the bolts (arrows) and the lower timing belt cover and gaskets. Remove the belt guide from the crankshaft sprocket.
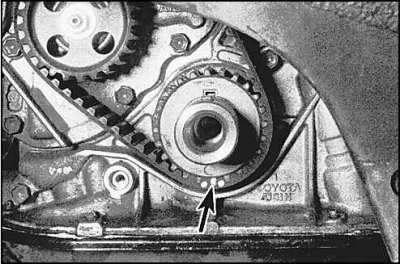
17. If you are going to reuse the timing belt, make alignment marks (arrow) on it and on the sprocket.
18. Remove the timing belt. If the crankshaft sprocket is damaged or worn, or you need to replace the front crankshaft oil seal.
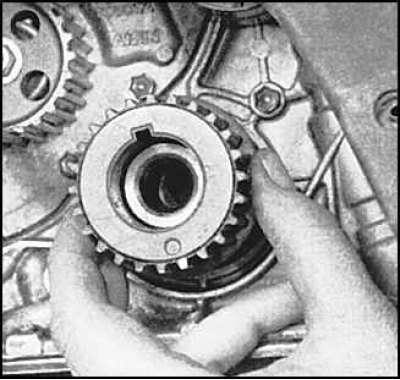
19. Remove the sprocket. It should come off freely.
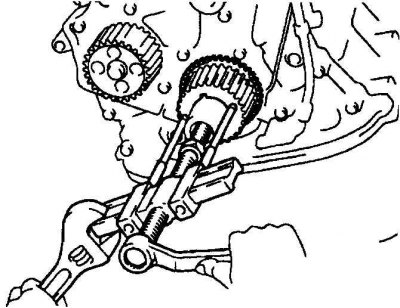
20. If the sprocket is stuck, remove it using a special tool.
Examination
Damage to the timing belt
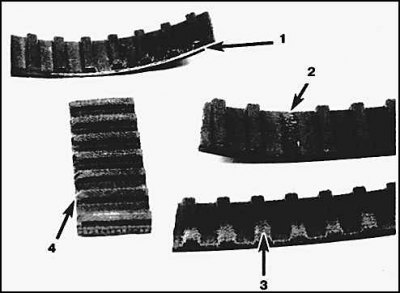
1. Stratification; 2. Lack of teeth; 3. Surface wear; 4. Rounding the side part
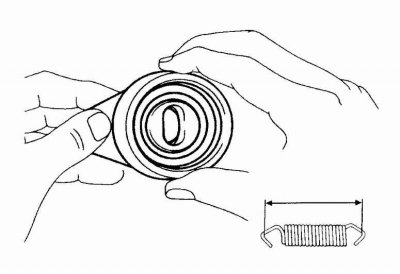
1. Remove the idler pulleys and inspect their bearings for wear and damage. Inspect the spring to ensure its length meets specifications.
2. If the timing belt has broken, it may be because it was too tight or dirty.
3. If the belt teeth are cracked or missing in some places, you need to check whether the camshafts or the water and oil pumps are sticking.
4. If the belt surface is badly worn or cracked, check the idler pulley surfaces for scratches or burrs.
5. If the belt is worn or damaged on one side only, check the belt guide disc and the correct installation of the sprockets.
6. If necessary, replace the belt, having first eliminated all faults.
Installation
1. Clean the front of the engine thoroughly.
2. Install the idler pulleys and spring.
3. Check if the timing marks on the crankshaft and camshaft are aligned.
4. Place the belt on the crankshaft sprocket, oil and water pump sprockets and idler pulleys. If you are putting on an old belt, align the marks made on the belt and sprockets during removal.
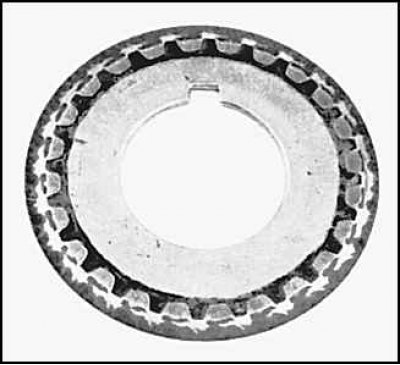
5. Install the belt guide onto the crankshaft (the figure shows the belt guide disc).
6. Install the lower belt cover and crankshaft pulley.
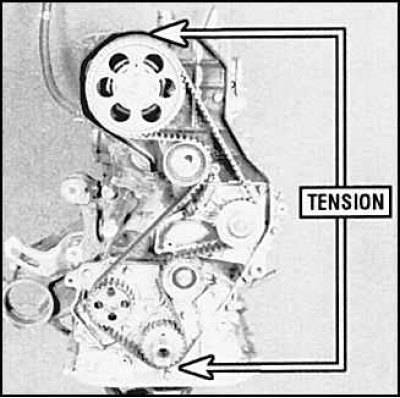
7. Place the belt on the camshaft sprocket. Tighten the front part of the belt.
8. Loosen the upper idler pulley bolt by half a turn, slowly turn the crankshaft clockwise by 1 and 7/8 turns so that the mark on the crankshaft pulley is offset by 45° relative to the mark intended for setting the first piston at top dead center and located on the lower belt cover. Tighten the idler pulley bolt.
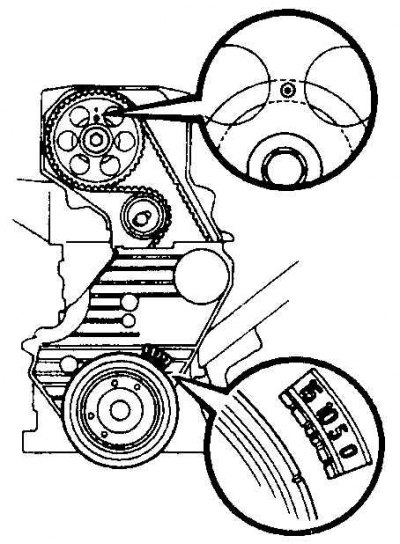
9. Turn the crankshaft two more revolutions and check whether the timing marks are aligned.
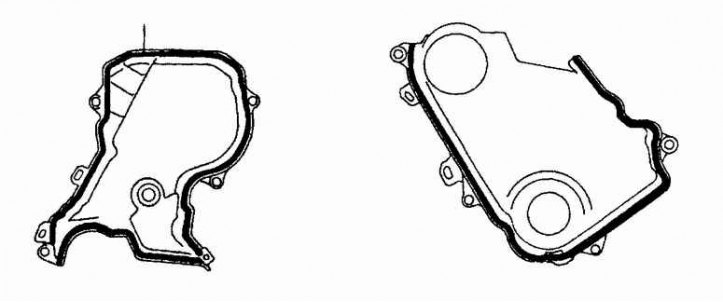
10. Install new sealant gaskets onto the timing belt covers.