
Switch test (4-cylinder models)
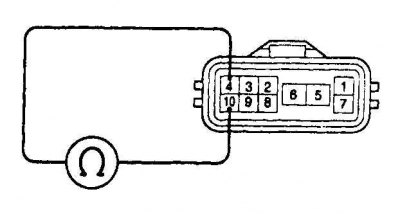
Gear lever position | Contact numbers, the circuit between the contacts is closed | |
P | 4 – 7 | 5 – 6 |
R | 4 – 8 | – |
N | 4 – 10 | 5 – 6 |
D | 4 – 9 | – |
2 | 2 – 4 | – |
L | 2 – 3 | – |
Switch test (6-cylinder models)
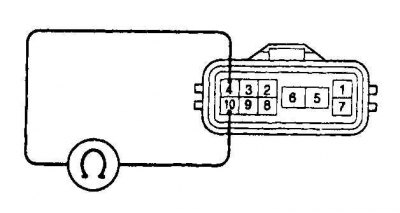
Gear lever position | Contact numbers, the circuit between the contacts is closed | |
P | 2 – 7 | 5 – 6 |
R | 2 – 8 | – |
N | 2 – 9 | 5 – 6 |
D | 2 – 10 | – |
2 | 2 – 3 | – |
L | 2 – 4 | – |
Switch adjustment (4-cylinder models)
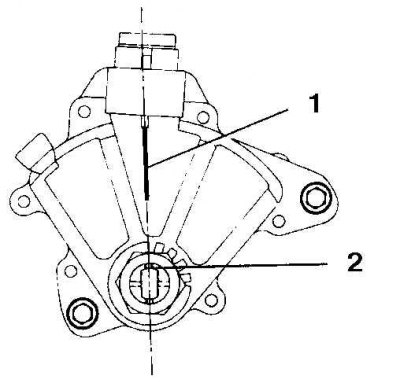
1. Setting line
2. Slit
Switch adjustment (6-cylinder models)
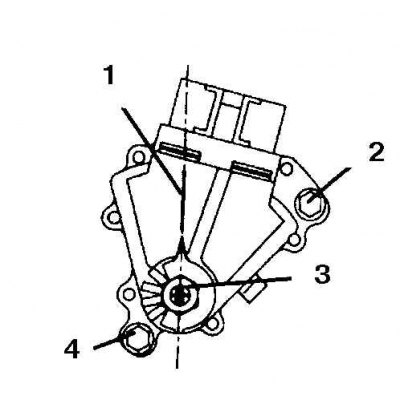
1. Installation line; 2. Bolt; 3. Slit; 4. Bolt
Examination
1. Raise and secure the front of the vehicle.
2. Disconnect the wire from the switch.
3. Check with an ohmmeter how the switch works in all positions (see fig. Check of the switch of 4-cylinder models and fig. Checking the switch of 6-cylinder models).
4. Replace switch if necessary.
Replacement
1. Raise and secure the front of the vehicle.
2. Disconnect the wire from the switch.
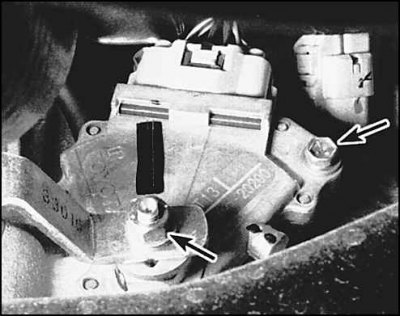
3. Loosen the shift lever nut on the gearbox (left arrow), remove the lever and remove the switch bolts.
4. Remove the switch.
5. Installation is carried out in the reverse order of removal.
Adjustment
Loosen the bolts of the switch and rotate it to align the slot and the alignment line (see fig. Adjustment of the switch of 4-cylinder models and fig. Switch adjustment 6-cylinder models). Tighten the switch bolts.