
Checking the lubrication clearance of connecting rod bearings
Location of piston ring end gaps (4 cylinder engine)
1. Top compression ring; 2. Deepening (towards the front of the engine); 3. Lower oil scraper ring; 4. Lower compression ring; 5. Expansion ring; 6. Upper oil scraper ring
Location of piston ring end gaps (6 cylinder engine)
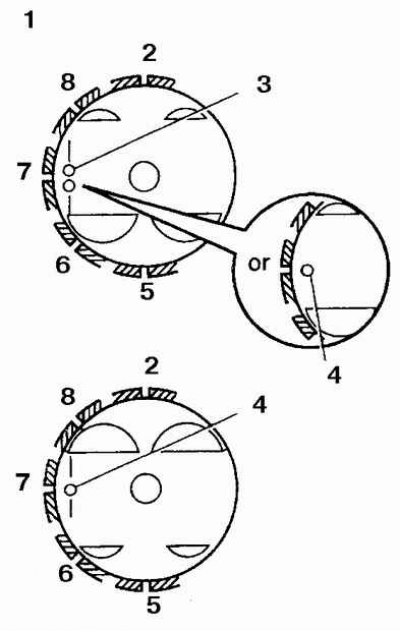
1. Piston of the right row; 2. Lower oil scraper ring; 3. Label directed towards the front of the engine; 4. Label directed towards the front of the engine; 5. Top oil scraper ring; 6. Top compression ring; 7. Expansion ring; 8. Lower compression ring
The location of the end gaps of the piston rings of the left row is identical.
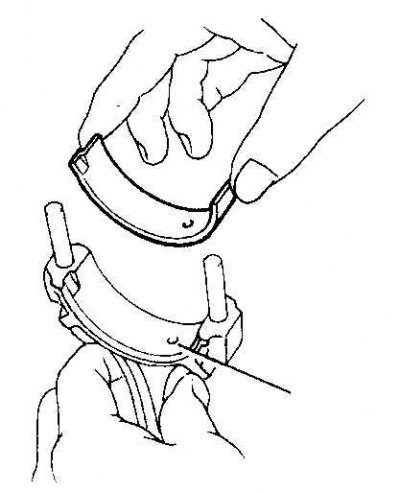
1. Clean the upper connecting rod bearing and install it on the connecting rod. The lubrication holes of the connecting rod and bushing must be aligned.
2. Clean the second bearing and install it in the connecting rod cap.
3. Position the piston ring end gaps as shown in fig. Location of piston ring end gaps (4 cylinder engine) and in fig. Location of piston ring end gaps (6 cylinder engine).
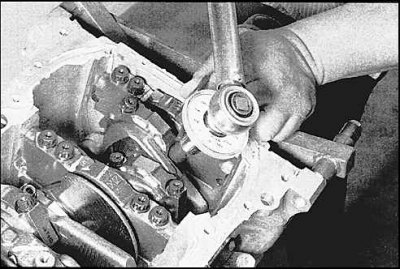
4. Lubricate the pistons and rings and compress the piston rings with a piston ring compressor.
5. Rotate the crankshaft so that the connecting rod bearing of the first cylinder is in the bottom dead center position, and lubricate the cylinder walls.
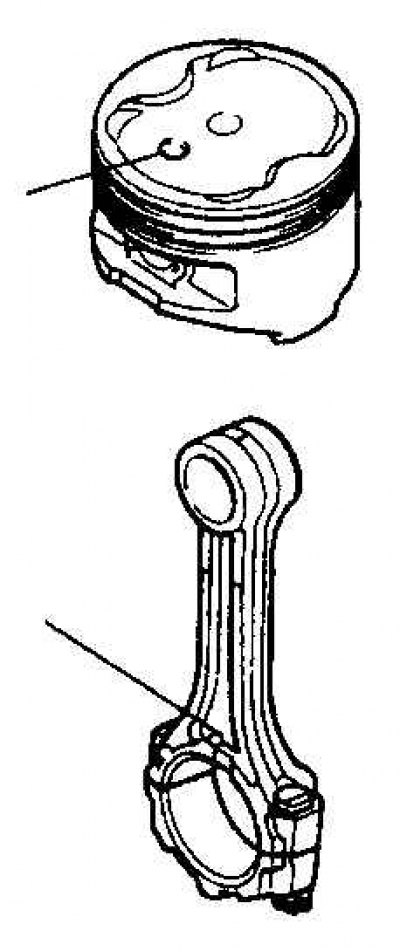
6. Check that the mark on the top of the piston is facing forward.
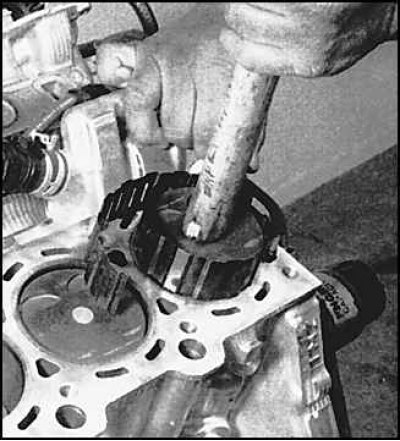
7. Press down on the piston and install it into the cylinder.
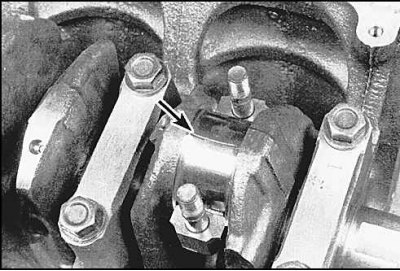
8. Lay a piece of plastic on each of the connecting rod bearings parallel to the axis of the crankshaft.
9. Install the connecting rod bearing caps (the marks on the caps must point towards the timing belt). Tighten the cap bolts according to the instructions given in the technical data (see subsection 3.3.1.1., subsection 3.3.1.2.).
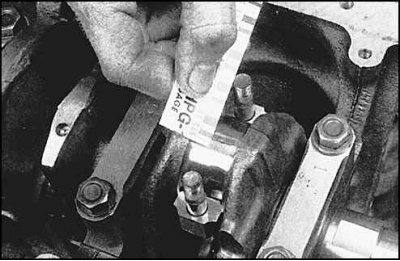
10. Compare the width of the crushed film with a special scale.
11. If the clearance is not correct, the wrong size bushings may have been installed.
Final installation of pistons and connecting rods
1. Remove all traces of plastic. Check that the surface of the bearings is absolutely clean and lubricate them with engine oil.
2. Install the connecting rod on the shaft journal, install the connecting rod cap and tighten the nuts to the correct torque. The rest of the connecting rods are installed in the same way.
3. After installing all the connecting rods, rotate the crankshaft several times and check for ease of movement.
4. Check the end play of the connecting rods.