
Fuel tank
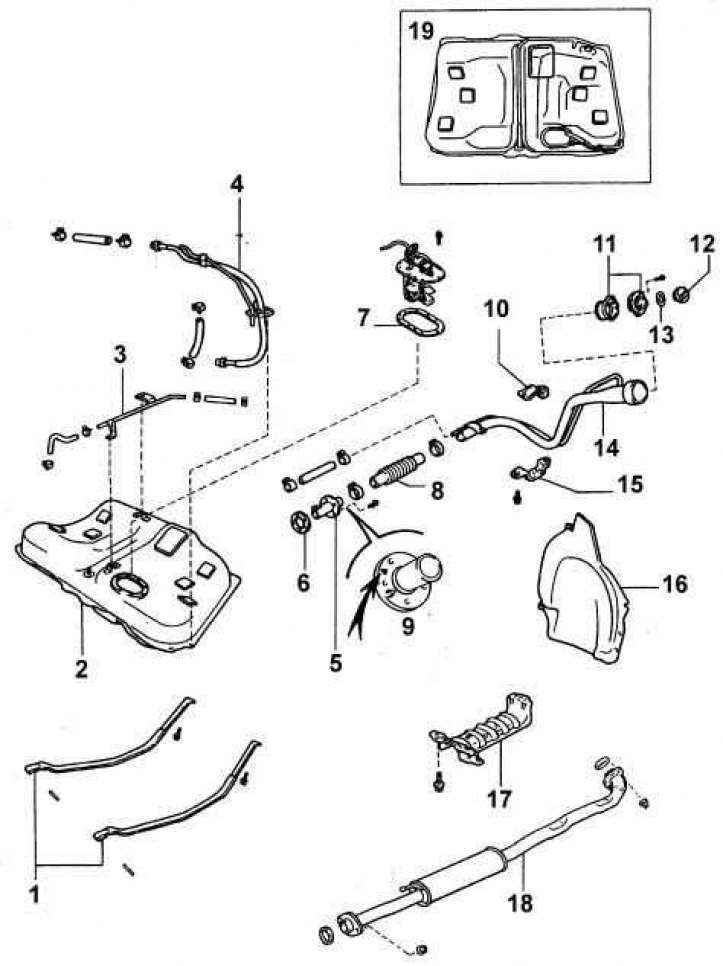
1 - fastening belt; 2 – fuel tank; 3 – a fuel tube EVAP; 4 - pressure fuel line; 5 - branch pipe; 6 - gasket; 7 - gasket; 8 - fuel hose; 9 - installation mark; 10 - bracket; 11 - fuel filler neck; 12 - cover; 13 - gasket; 14 - fuel filler pipe; 15 - bracket; 16 - protective cover; 17 - thermal protection screen; 18 – central exhaust pipe; 19 – an arrangement of linings of a fuel tank
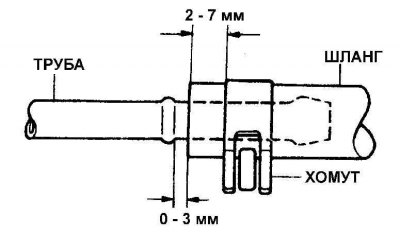
Typical fuel line to fuel hose connection
When removing the fuel tank, the level of fuel in it should be minimal.
1. Remove the fuel filler cap.
2. Remove the ground wire from the battery.
Attention! If your radio has an anti-theft code, check that you have the pairing codes before disconnecting the battery.
Attention! On models since 1993, the airbag system is disabled if the battery is disconnected for an extended period. If the airbag warning light comes on and stays on after reconnecting the battery, take it to a specialist workshop to restore the system to normal.
3. Raise the car on a lift or place it over a viewing hole.
4. Support the fuel tank with a jack by placing a plank between the jack and the fuel tank.
5. Remove the center exhaust pipe.
6. Disconnect the fuel lines from the fuel tank and plug them.
7. While supporting the fuel tank, remove the bolts securing the two fuel tank straps.
8. Slowly lower the fuel tank, disconnect the remaining pipes and electrical connector from it, and remove the fuel tank from under the vehicle.
9. Visually check the condition of the fuel tank inside and out. If there is dirt or sediment in the fuel tank, wash it with clean water or gasoline.
Attention! When working on the fuel tank, do not use open flames or tools that may generate sparks.
10. Installation is carried out in the reverse order of removal, taking into account the following points:
- when installing the fuel tank in the car, check that none of the hoses is pinched;
- check that all pipes and hoses are properly connected and securely fastened;
- Pour a small amount of fuel into the fuel tank and check the fuel system for leaks.